


Homemade Marshmallows are one of those simple kitchen projects that feel impressive while staying surprisingly easy. With a soft cloud like texture and clean sweetness, these Homemade Marshmallows are perfect for snacking, desserts, or melting into warm drinks. Making them at home gives you full control over texture, flavor, and ingredients, which means better taste and fresher results every time. This guide walks you through every detail so your Homemade Marshmallows turn out fluffy, stable, and delicious from the first batch.
Essential Tools and Preparation
Equipment You Will Need
An 8 x 8 inch baking pan lined with parchment paper is essential for shaping the marshmallows evenly. A medium saucepan is needed for heating the sweetener mixture. A stand mixer with a whisk attachment works best, though a hand mixer is also effective. Measuring cups, measuring spoons, a rubber spatula, and a sharp knife lightly moistened with water will make the process smooth.
Setting Up Your Workspace
Before starting, clear enough counter space for mixing and pouring. Having everything measured and ready prevents the mixture from cooling too quickly. Keep parchment paper slightly overhanging the pan edges to lift the marshmallows out cleanly after setting.
Ingredient Breakdown and Smart Choices
Core Ingredients Explained
You will need 2 cups water divided for blooming and cooking, 1 third cup agar agar powder as the setting agent, and 2 thirds cup allulose for gentle sweetness. Agar agar creates structure similar to classic marshmallows while staying stable during storage. For flavor, use 2 teaspoons vanilla flavor such as Simply Organic Vanilla Flavor or Watkins Clear Vanilla Flavor for a smooth finish.
Optional Coatings and Add Ins
Keto powdered sugar is excellent for dusting and preventing sticking. You may also prepare light cornstarch alternatives if desired. Keep coatings light so they do not overpower the delicate texture of Homemade Marshmallows.
Step by Step Method for Perfect Homemade Marshmallows
Blooming and Heating
Start by lining your pan with parchment paper and setting it aside. In a small bowl, add one cup of water and sprinkle the agar agar powder evenly over the surface. Allow it to sit for about 10 minutes until it absorbs liquid and becomes thick. This step ensures proper activation.
Cooking the Sweetener Base
In a saucepan, combine the remaining water with allulose. Heat over medium heat while stirring frequently. Once it reaches a steady boil, allow it to cook for several minutes until fully dissolved and slightly thickened. Remove from heat promptly to avoid over reduction.
Mixing and Whipping
Transfer the bloomed agar mixture into the bowl of a stand mixer. Begin mixing on low speed for about 30 seconds. Slowly pour in the hot sweetener mixture while mixing continuously. Add vanilla flavor and increase the speed to high. Beat for 10 to 12 minutes until the mixture becomes glossy, thick, and forms stiff peaks.
Setting and Cutting
Pour the marshmallow mixture into the prepared pan. Use a rubber spatula to smooth the surface evenly. Refrigerate for at least 2 hours until fully set. Once firm, lift the slab out using parchment paper. Cut into squares with a lightly wet knife. Dust lightly with keto powdered sugar before serving.
Practical Tips and Texture Tricks
Achieving the Best Structure
Consistency is key when making Homemade Marshmallows. Always bloom the agar thoroughly and whip long enough to trap air. Under whipping leads to dense results, while proper whipping creates light and springy texture.
Flavor and Sweetness Control
Allulose provides mild sweetness without overpowering. If adjusting sweetness, keep changes minimal to preserve structure. Vanilla flavor should be added gradually so it blends evenly.
Common Mistakes to Avoid
Avoid pouring the hot syrup too quickly into the mixer. Slow steady pouring prevents deflation. Also avoid skipping parchment paper, as marshmallows stick easily once set.
Helpful Notes for Reliable Results
Mixer Alternatives
A hand mixer can be used if a stand mixer is unavailable. Expect slightly longer mixing time and take breaks if needed to avoid overheating the motor.
Cutting Clean Pieces
Lightly wetting your knife between cuts prevents sticking and ensures clean edges. Avoid sawing motions and press down smoothly instead.
Coating Adjustments
Use minimal powdered sugar for dusting. Too much coating can dry the surface and alter texture. A gentle dusting is enough for handling.
Storage and Make Ahead Options
Refrigeration Guidelines
Store Homemade Marshmallows in an airtight container in the refrigerator for up to one month. Keep layers separated with parchment paper to prevent sticking.
Freezing for Long Term Storage
For longer storage, place marshmallows in a zip top freezer bag with parchment between layers. Freeze for up to six months. Thaw in the refrigerator before use to maintain texture.
Transporting Marshmallows
When transporting, keep them chilled and avoid high heat. Warm environments can soften structure even when fully set.
Creative Variations to Try
Homemade Marshmallows can be customized easily. Add cocoa powder during whipping for chocolate flavored marshmallows. Swirl in fruit puree for subtle fruity notes. For festive shapes, use silicone molds instead of a pan. You can also cut them into mini cubes for drinks or desserts.
Serving Suggestions Everyone Loves
Serve Homemade Marshmallows as a standalone treat, layered in desserts, or gently melted into warm beverages. They pair beautifully with chocolate sauces, fresh fruit, or crisp cookies. Their soft texture also makes them ideal for topping baked goods.
Conclusion
Homemade Marshmallows offer a rewarding balance of simplicity and indulgence. With just a few ingredients and careful technique, you can create a soft, fluffy treat that tastes fresher and cleaner than store bought options. This method ensures consistent texture, flexible flavor options, and reliable storage. Once you make Homemade Marshmallows at home, they quickly become a staple recipe worth repeating.
Frequently Asked Questions
Can I use a hand mixer instead of a stand mixer
Yes, a hand mixer works well but may require extra mixing time.
Why did my marshmallows turn out dense
They may need longer whipping or more thorough blooming of agar.
Can I reduce the sweetness
Slight adjustments are fine but large reductions may affect structure.
Do these melt like traditional marshmallows
They soften nicely when warmed but hold shape better than commercial versions.
How do I keep them from sticking
Use parchment paper between layers and light dusting of powdered sugar.
Homemade Marshmallows That Never Fail and Taste Better Than Store Bought
- Total Time: two hours including chilling
- Yield: square pan batch
Description
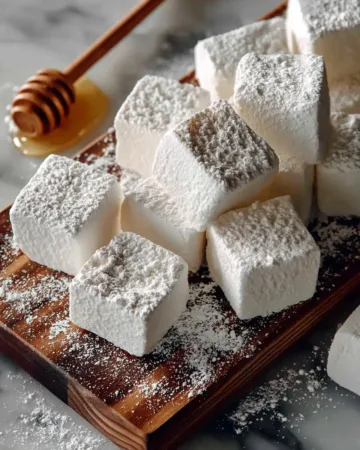
Homemade Marshmallows are soft, fluffy, and delicately sweet with a smooth vanilla aroma. This recipe creates cloud like marshmallows using simple pantry ingredients and a reliable method that delivers consistent texture every time. Making Homemade Marshmallows at home allows better control over sweetness, flavor, and freshness, making them perfect for desserts, drinks, or snacking straight from the pan.
Ingredients
Water divided for blooming and cooking
Agar agar powder for structure and stability
Allulose for gentle sweetness and smooth texture
Simply Organic Vanilla Flavor or Watkins Clear Vanilla Flavor for aroma
Keto powdered sugar for light dusting if desired
Instructions
1. Line a square baking pan with parchment paper and leave excess over the sides for easy lifting
2. Add part of the water to a bowl and sprinkle the agar agar evenly over the surface then allow it to hydrate until thick
3. Combine the remaining water and allulose in a saucepan and heat while stirring until fully dissolved and gently boiling
4. Transfer the bloomed agar mixture to a mixing bowl and begin mixing on low speed
5. Slowly pour in the hot sweetener mixture while mixing continuously to maintain volume
6. Add vanilla flavor and increase mixing speed until the mixture becomes thick glossy and holds stiff peaks
7. Spread the marshmallow mixture evenly into the prepared pan using a spatula
8. Refrigerate until fully set and firm to the touch
9. Lift from the pan cut into squares with a lightly damp knife and dust gently with keto powdered sugar
Notes
A stand mixer with a whisk attachment produces the best volume but a hand mixer also works with additional mixing time
Always hydrate the agar agar thoroughly to avoid grainy texture
Pour the hot sweetener slowly while mixing to prevent deflating the mixture
Lightly wetting the knife between cuts helps create clean edges
Use minimal powdered sugar to avoid drying the surface of the marshmallows
- Prep Time: fifteen minutes
- Cook Time: ten minutes
- Category: dessert
- Method: whipping and chilling
- Cuisine: American