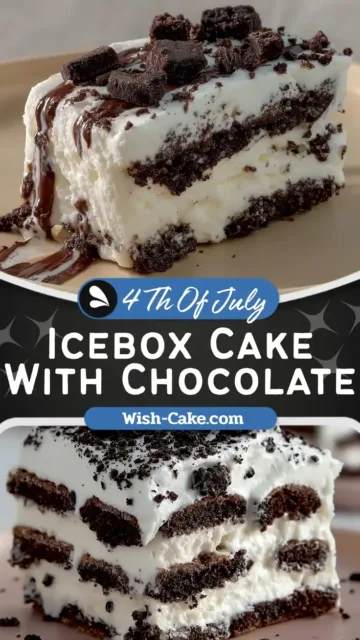


Creamy No Bake Icebox Cake With Chocolate is the ultimate chilled dessert that delivers rich flavor with minimal effort. This indulgent layered treat combines fluffy whipped cream and crisp chocolate sandwich cookies that soften into a cake-like texture after chilling. Perfect for warm days or when you want a simple yet impressive dessert, this recipe requires no oven and very little prep time. With a smooth, creamy texture and deep chocolate notes, this icebox cake is both comforting and elegant, making it a favorite for gatherings or casual sweet cravings.
Benefits
This Creamy No Bake Icebox Cake With Chocolate offers more than just delicious flavor. It is an excellent option for beginners since it requires no baking skills. The dessert is light yet satisfying, thanks to the airy whipped cream layers. For people looking for quick desserts, this recipe saves time while still delivering a bakery-style result.
From a nutritional perspective, it provides energy through carbohydrates and fats, making it suitable for active individuals who need a quick energy boost. However, those watching sugar intake may want to enjoy it in moderation due to its sweetness. The use of cream also contributes calcium, which supports bone health.
Another advantage is its flexibility. You can easily adjust sweetness levels or use lighter cream options. Since it is stored cold, it is refreshing and ideal for hot climates. The texture transformation of cookies into a soft cake layer is both unique and satisfying, making it a standout dessert option.
Ingredients List
To prepare this Creamy No Bake Icebox Cake With Chocolate, gather the following ingredients carefully measured for best results:
- 3 cups heavy whipping cream, cold
- 100 grams or 1/2 cup confectioners sugar, finely sifted
- 2 teaspoons Watkins Clear Vanilla Flavor or Simply Organic Vanilla Flavor
- 2 packs, about 740 grams total, thin chocolate sandwich cookies such as Oreo Thins
- 2 cookies reserved for topping
Equipment
- 8×4 inch loaf pan
- Plastic wrap
- Electric hand mixer or stand mixer
- Large mixing bowl
- Spatula
- Measuring cups and spoons
Step by Step
Start by preparing your loaf pan. Line it fully with plastic wrap, leaving enough overhang on all sides. This will make removing the cake easier later. Make sure the wrap is smooth to avoid wrinkles in the final shape.
Pour the cold heavy cream into a large mixing bowl. Using an electric mixer, beat the cream on medium speed for about two minutes. You will notice it thickening slightly as air is incorporated.
Add the confectioners sugar gradually while continuing to mix. This helps create a smooth and stable whipped cream. Then add the vanilla flavor and continue beating until soft to medium peaks form. The cream should hold its shape but still look smooth and not stiff.
Take one cup of this whipped cream and set it aside in the refrigerator. This portion will be used later for topping the cake.
Spread a thin layer of whipped cream at the bottom of the prepared pan. This base layer helps anchor the cookies and ensures even layering.
Place a layer of chocolate sandwich cookies over the cream. Break some cookies if needed to cover the surface evenly without large gaps. This step is important to create a uniform structure.
Add a layer of whipped cream over the cookies, spreading it gently with a spatula. Make sure the layer is even and covers all cookies.
Repeat the layering process by adding cookies followed by whipped cream. Continue this pattern until all the cream is used. Typically, you will have about four layers of cream and cookies.
Finish with a final layer of cookies on top, gently pressing them into the cream so they adhere well. Fold the plastic wrap over the top to seal the cake completely.
Place the pan in the refrigerator and let it chill for at least eight hours. This resting time allows the cookies to soften and absorb moisture from the cream, creating a cake-like texture.
When ready to serve, unwrap the plastic and invert the cake onto a serving plate. Carefully remove the wrap. Spread the reserved whipped cream over the top for a smooth finish.
Crush the remaining cookies and sprinkle them over the top as a decorative garnish. Slice the cake with a sharp knife and serve chilled for the best texture and flavor.
Storage
Proper storage is essential to maintain the texture and flavor of your Creamy No Bake Icebox Cake With Chocolate. Always keep the cake refrigerated, as it contains fresh cream that can spoil if left at room temperature.
Store the cake in an airtight container or wrap it tightly with plastic wrap to prevent it from absorbing odors from the refrigerator. It can be stored safely for up to three days while maintaining its creamy consistency.
If you plan to prepare it ahead of time, this dessert actually improves after the first 8 to 12 hours of chilling. The cookies become softer and blend perfectly with the cream layers.
Freezing is also an option. Wrap the cake securely and freeze for up to one month. When ready to enjoy, transfer it to the refrigerator and let it thaw slowly overnight. This helps retain its structure and prevents excess moisture.
Avoid leaving the cake at room temperature for long periods, especially in warm environments, as the whipped cream may lose its stability.
Variations and Substitutions
There are many ways to customize this Creamy No Bake Icebox Cake With Chocolate to suit different tastes. You can use chocolate graham crackers instead of sandwich cookies for a slightly less sweet version.
For a richer flavor, add a layer of chocolate ganache between the cookie layers. This creates a deeper chocolate profile and enhances the dessert’s indulgence.
If you prefer a lighter option, use whipped topping instead of heavy cream. This will reduce the richness while keeping the texture airy.
You can also add sliced strawberries or bananas between layers for a fruity twist. The natural sweetness of fruit pairs well with the creamy layers.
For a different flavor profile, try using mint chocolate cookies or peanut butter sandwich cookies. These variations create unique combinations while maintaining the same simple preparation method.
Tips and Tricks
Always start with cold heavy cream. This ensures it whips faster and holds its structure better. Warm cream will not achieve the desired peaks.
Do not overbeat the cream. Stop mixing once soft to medium peaks form. Overmixing can turn the cream grainy and affect the final texture.
When layering cookies, try to create even layers. This helps the cake hold its shape when sliced and improves presentation.
Allow enough chilling time. The transformation of cookies into soft layers depends on proper refrigeration. Rushing this step will result in a crunchy texture instead of a cake-like consistency.
Use a sharp knife dipped in warm water when slicing. This creates clean cuts and prevents the layers from sticking to the knife.
For extra visual appeal, pipe the reserved whipped cream on top instead of spreading it. This adds a decorative touch without extra effort.
Notes
This dessert relies on simple ingredients, so quality matters. Use fresh heavy cream and high-quality cookies for the best flavor.
The sweetness level can be adjusted by reducing or increasing the confectioners sugar slightly. Taste the whipped cream before layering to ensure it suits your preference.
The structure of the cake depends on proper layering and chilling. Take your time during assembly to avoid uneven layers.
If you notice the cake is too soft when slicing, it may need more chilling time. Returning it to the refrigerator for a few hours will help it firm up.
This recipe is highly adaptable, making it ideal for experimenting with flavors and textures while keeping the base method unchanged.
Serving Suggestions
Serve Creamy No Bake Icebox Cake With Chocolate chilled for the best experience. Pair it with fresh berries or a drizzle of chocolate syrup for added flavor. A cup of coffee or a glass of cold milk complements the creamy texture perfectly.
Conclusion
Creamy No Bake Icebox Cake With Chocolate is a simple yet impressive dessert that delivers rich flavor and smooth texture without the need for baking. With easy layering, minimal ingredients, and flexible variations, it is perfect for both beginners and experienced cooks. The combination of whipped cream and softened chocolate cookies creates a satisfying treat that feels indulgent yet effortless. Whether for gatherings or everyday enjoyment, this dessert is a reliable favorite that never disappoints.
FAQs
How long does an icebox cake need to chill
It should chill for at least 8 hours, but overnight is ideal for the best texture.
Can I use regular cookies instead of thin ones
Yes, but thin cookies soften faster and create a smoother texture.
Can I make this dessert ahead of time
Yes, it is perfect for making a day in advance and storing in the refrigerator.
Why is my whipped cream not thickening
Make sure the cream is cold and use a proper mixer at medium speed.
Can I freeze icebox cake
Yes, freeze it tightly wrapped and thaw in the refrigerator before serving.
Creamy No Bake Icebox Cake With Chocolate Delight
- Total Time: 8 hours 20 minutes
- Yield: 8 to 10 servings
- Diet: Vegetarian
Description
Creamy No Bake Icebox Cake With Chocolate is a rich and refreshing layered dessert made with whipped cream and chocolate sandwich cookies. This easy no bake recipe creates a soft, cake like texture after chilling, making it perfect for warm days or quick entertaining.
Ingredients
3 cups cold heavy whipping cream
1/2 cup or 100 grams confectioners sugar
2 teaspoons Watkins Clear Vanilla Flavor or Simply Organic Vanilla Flavor
1 1/2 packages or about 26 oz thin chocolate sandwich cookies such as Oreo Thins
2 cookies reserved for garnish
Instructions
• Line an 8×4 inch loaf pan with plastic wrap, leaving extra overhang on all sides for easy removal
• Pour the cold heavy cream into a large bowl and beat with an electric mixer on medium speed for about 2 minutes until slightly thickened
• Add the confectioners sugar and vanilla flavor, then continue beating until soft to medium peaks form
• Reserve 1 cup of the whipped cream and place it in the refrigerator for later use
• Spread a thin layer of whipped cream on the bottom of the prepared pan
• Add a layer of chocolate sandwich cookies, breaking them as needed to cover the surface evenly
• Spread a layer of whipped cream over the cookies, smoothing it evenly with a spatula
• Repeat layering cookies and cream until all cream is used, creating multiple even layers
• Finish with a final layer of cookies on top and gently press them into the cream
• Cover with plastic wrap and refrigerate for at least 8 hours or overnight for best results
• Remove the cake from the pan by lifting the plastic wrap and invert onto a serving plate
• Spread the reserved whipped cream over the top
• Crush the remaining cookies and sprinkle over the top as garnish
• Slice and serve chilled
Notes
Use cold heavy cream to ensure proper whipping and stable texture
Do not overmix the cream to avoid a grainy consistency
Allow enough chilling time so the cookies soften into a cake like texture
Adjust sweetness by slightly reducing or increasing the sugar
For clean slices, use a sharp knife dipped in warm water
Store the cake covered in the refrigerator for up to 3 days
The flavor improves after resting overnight as layers fully set
- Prep Time: 20 minutes
- Cook Time: 0 minutes
- Category: Dessert
- Method: No Bake
- Cuisine: American