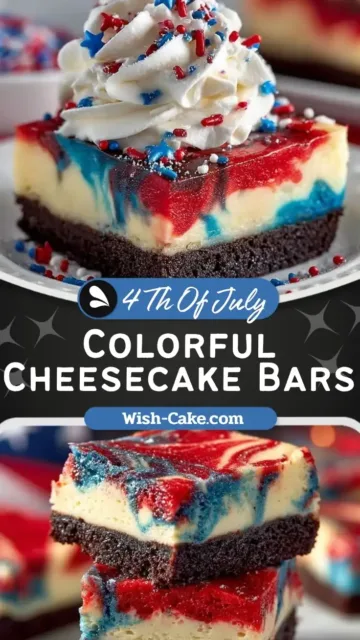


Colorful Cheesecake Bars With Red White and Blue are a vibrant, creamy dessert that combines rich cheesecake flavor with a fun swirl of colors. These cheesecake bars are perfect for gatherings, offering a smooth texture, crunchy cookie crust, and eye catching presentation. With simple ingredients and a straightforward baking process, this dessert recipe is ideal for both beginners and experienced bakers. In this guide, you will learn how to create perfect cheesecake bars, from preparing the crust to mastering the swirl technique, along with helpful baking tips, storage advice, and creative variations.
Benefits
Colorful Cheesecake Bars With Red White and Blue are not only visually appealing but also provide some enjoyable nutritional aspects when consumed in moderation. Cream cheese delivers calcium and vitamin A, which support bone health and immune function. Eggs contribute protein and essential nutrients, helping maintain muscle strength. Sour cream adds a slight tang while contributing beneficial fats that enhance flavor and texture.
These cheesecake bars are suitable for people looking for a rich dessert option for special occasions or family treats. However, due to the sugar and fat content, they may not be ideal for individuals following low calorie or low sugar diets. Using balanced portions can help you enjoy the dessert without overindulging.
Another benefit is their versatility. You can easily adapt the ingredients to suit dietary preferences or ingredient availability. The colorful presentation also makes them appealing for kids and adults alike, turning a simple dessert into a memorable experience.
Ingredients List
For the Crust
30 Oreo cookies, finely crushed
4 tablespoons unsalted butter, melted
For the Cheesecake Filling
3 packages 8 oz each Philadelphia Cream Cheese or Organic Valley Cream Cheese, softened
1 1/2 cups granulated sugar
1/4 cup Daisy Sour Cream or Organic Valley Sour Cream
2 teaspoons Simply Organic Vanilla Flavor or Watkins Clear Vanilla Flavor
1/4 cup all purpose flour
3 large eggs at room temperature
Red and blue gel food coloring
Optional Toppings
Whipped cream
Colorful sprinkles
Equipment
9×13 inch baking pan
Aluminum foil
Food processor or blender
Mixing bowls
Electric mixer
Spatula
Measuring cups and spoons
Butter knife
Wire cooling rack
Step by Step
Preparing the Cookie Crust
Start by preheating your oven to 325 degrees Fahrenheit. Line a 9×13 inch baking pan with foil, allowing some overhang for easy removal later. Place the Oreo cookies with their filling into a food processor and pulse until fine crumbs form. Transfer the crumbs to a bowl and mix with melted butter until evenly coated.
Press the mixture firmly into the bottom of the prepared pan, ensuring an even layer. Bake for 10 minutes to set the crust, then remove and allow it to cool completely. This step ensures a firm base that holds the cheesecake layers perfectly.
Creating the Cheesecake Batter
In a large mixing bowl, beat the softened cream cheese and granulated sugar until smooth and creamy. This step is essential for achieving a lump free texture. Add the sour cream, vanilla flavor, and flour, then mix again until fully combined.
Crack in the eggs one at a time, mixing gently after each addition. Avoid overmixing at this stage to prevent excess air, which can cause cracks during baking. The batter should be silky and slightly thick.
Adding Colors and Swirling
Divide the cheesecake batter evenly into three separate bowls. Leave one bowl plain, then add red gel food coloring to the second bowl and blue to the third. Mix each gently until the colors are vibrant and evenly distributed.
Spoon the three batters alternately over the cooled crust. Once layered, use a butter knife to swirl the colors by dragging it through the batter in different directions. Create a marbled effect without overmixing to keep the colors distinct and attractive.
Baking and Cooling
Place a large baking sheet filled halfway with water on the lower rack of the oven. This creates moisture that helps prevent cracks. Place the cheesecake pan on the rack above it.
Bake for 45 to 50 minutes until the center is set but slightly jiggly. Remove the pan from the oven and place it on a wire rack. Let it cool at room temperature for one hour before transferring it to the refrigerator. Chill for at least 4 to 6 hours to allow the cheesecake to fully set.
Once chilled, lift the bars out using the foil, cut into squares, and add whipped cream or sprinkles if desired.
Storage
Colorful Cheesecake Bars With Red White and Blue should be stored properly to maintain their creamy texture and fresh flavor. After cutting, place the bars in an airtight container and refrigerate them. They will stay fresh for up to 5 days when kept chilled.
If stacking the bars, place parchment paper between layers to prevent sticking. Avoid leaving the cheesecake at room temperature for extended periods, as dairy based desserts can spoil quickly.
For longer storage, you can freeze the cheesecake bars. Wrap each piece tightly in plastic wrap, then place them in a freezer safe container. They can be frozen for up to 2 months. When ready to enjoy, thaw them overnight in the refrigerator for best texture.
Variations and Substitutions
You can easily customize Colorful Cheesecake Bars With Red White and Blue to suit your taste. Swap Oreo cookies with chocolate graham crackers or vanilla wafers for a different crust flavor. For a lighter version, use reduced fat cream cheese and sour cream.
If you prefer natural coloring, use fruit based options like strawberry puree for red and blueberry puree for blue. This adds subtle flavor while maintaining the colorful look.
You can also experiment with flavors by adding lemon zest for brightness or a hint of almond flavoring for a nutty twist. Each variation creates a unique version of this classic dessert.
Tips and Tricks
To achieve the best Colorful Cheesecake Bars With Red White and Blue, always use room temperature ingredients. This ensures a smooth batter and prevents lumps. Avoid overmixing once eggs are added, as too much air can lead to cracks.
Use gel food coloring instead of liquid for more vibrant colors without thinning the batter. When swirling, keep the motion gentle to maintain distinct patterns.
Placing water in the oven helps create a moist environment, reducing the risk of cracking. Do not skip the chilling step, as it allows the cheesecake to firm up properly and enhances the flavor.
For clean cuts, use a sharp knife and wipe it clean between each slice. This keeps the edges neat and professional looking.
Notes
This dessert recipe works best when prepared a day in advance, allowing the flavors to develop fully. The cheesecake texture should be creamy yet firm enough to hold its shape when sliced.
If you notice slight cracks, do not worry, as toppings like whipped cream can easily cover them. Always measure ingredients accurately to maintain the right consistency.
The swirl design may vary each time, making every batch unique. This adds a homemade charm to the dessert that makes it even more special.
Serving Suggestions
Serve these cheesecake bars chilled with a dollop of whipped cream and a sprinkle of colorful toppings. Pair them with coffee or a light fruit drink for a balanced dessert experience.
Conclusion
Colorful Cheesecake Bars With Red White and Blue are a delightful combination of creamy texture, rich flavor, and stunning presentation. With simple steps and accessible ingredients, this dessert recipe is perfect for creating memorable treats. From the crunchy crust to the smooth swirled filling, every bite offers a satisfying experience. By following the tips, storage methods, and variations provided, you can confidently prepare cheesecake bars that look impressive and taste incredible.
FAQs
How do I prevent cracks in cheesecake bars
Avoid overmixing the batter and use a water filled pan in the oven to maintain moisture.
Can I freeze cheesecake bars
Yes, wrap them tightly and freeze for up to 2 months, then thaw in the refrigerator.
Why is my cheesecake too soft
It may need more chilling time or slightly longer baking.
Can I use different colors
Yes, you can use any gel food coloring to customize the appearance.
Do I need a water bath
A full water bath is not required, but adding water in the oven helps improve texture.
Colorful Cheesecake Bars With Red White and Blue Delight
- Total Time: 1 hour 25 minutes
- Yield: 24 bars
- Diet: Vegetarian
Description
Colorful Cheesecake Bars With Red White and Blue are rich, creamy dessert bars featuring a crunchy Oreo crust and beautifully swirled cheesecake layers. These vibrant bars are smooth, slightly tangy, and perfectly sweet, making them an eye-catching treat for any gathering.
Ingredients
30 Oreo cookies, finely crushed
4 tablespoons (1/4 cup) unsalted butter, melted
24 oz (3 packages, 8 oz each) Philadelphia Cream Cheese or Organic Valley Cream Cheese, softened
1 1/2 cups granulated sugar
1/4 cup Daisy Sour Cream or Organic Valley Sour Cream
2 teaspoons Simply Organic Vanilla Flavor or Watkins Clear Vanilla Flavor
1/4 cup all purpose flour
3 large eggs, room temperature
Red gel food coloring
Blue gel food coloring
Optional whipped cream for topping
Optional colorful sprinkles
Instructions
1. Preheat oven to 325°F and line a 9×13 inch baking pan with foil, leaving overhang for easy removal
2. Place Oreo cookies in a food processor and pulse until fine crumbs form
3. Mix cookie crumbs with melted butter until fully combined
4. Press mixture evenly into the bottom of the prepared pan and bake for 10 minutes, then let cool completely
5. Place a large baking sheet filled halfway with water on the lower oven rack
6. In a large bowl, beat cream cheese and sugar until smooth and creamy
7. Add sour cream, vanilla flavor, and flour, then mix until combined
8. Add eggs one at a time, mixing gently after each addition until just combined
9. Divide batter evenly into three bowls
10. Leave one bowl plain, color one red and one blue using gel food coloring
11. Spoon batters alternately over the crust
12. Use a butter knife to gently swirl colors to create a marbled pattern
13. Place cheesecake pan on the rack above the water pan
14. Bake for 45 to 50 minutes until center is set but slightly jiggly
15. Remove from oven and cool on a wire rack for 1 hour
16. Refrigerate for 4 to 6 hours until fully set
17. Lift out using foil, slice into bars, and serve with whipped cream and sprinkles if desired
Notes
Use room temperature ingredients for a smoother batter and better texture
Avoid overmixing after adding eggs to prevent cracks
Gel food coloring works best for vibrant colors without thinning the batter
Chill thoroughly before slicing for clean edges
Store leftovers in an airtight container in the refrigerator for up to 5 days
Freeze individual bars wrapped tightly for up to 2 months and thaw in the refrigerator before serving
- Prep Time: 30 minutes
- Cook Time: 55 minutes
- Category: Dessert
- Method: Baking
- Cuisine: American