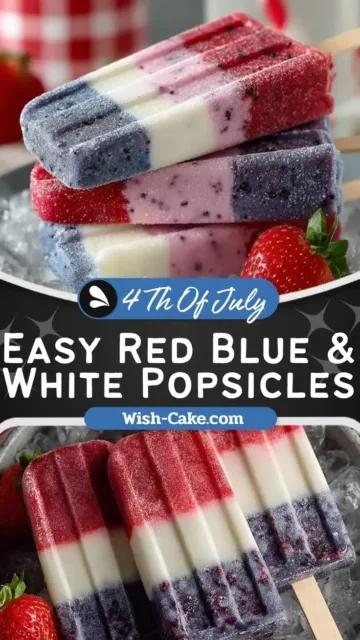


Cooling Red Blue & White Popsicles are a refreshing, colorful frozen treat that combines fruity flavors with creamy texture for a perfect homemade dessert. This recipe uses simple ingredients like strawberries, blueberries, banana, and yogurt to create vibrant layered popsicles. Ideal for warm days, these popsicles are easy to prepare and customizable. The combination of natural fruit sweetness and creamy yogurt makes them both delicious and satisfying. In this guide, you will learn how to make Cooling Red Blue & White Popsicles step by step, along with tips, storage methods, and variations to suit your taste preferences.
Benefits
Cooling Red Blue & White Popsicles are not just visually appealing but also offer several nutritional benefits. Strawberries and blueberries are rich in antioxidants and vitamin C, which support immune health and skin vitality. Bananas provide potassium and natural sugars that help maintain energy levels. Greek yogurt adds protein and calcium, supporting muscle health and bone strength.
These popsicles are a lighter dessert option compared to store bought frozen treats. They contain less processed sugar and no artificial preservatives when made at home. For active individuals or children, they offer a balanced snack that hydrates while delivering nutrients.
However, people who are sensitive to dairy may need to choose lactose free yogurt alternatives. Those watching sugar intake can reduce added sugar or use natural sweeteners. Overall, Cooling Red Blue & White Popsicles are a wholesome treat that fits many lifestyles when adjusted properly.
Ingredients List
To make these Cooling Red Blue & White Popsicles, prepare the following ingredients with precise measurements:
- 1 cup fresh strawberries, chopped, about 167 grams
- 1½ tablespoons granulated sugar, about 18 grams, divided
- ¾ cup filtered water, about 170 grams, divided
- 3 cups plain Greek yogurt such as FAGE Total Plain Greek Yogurt or Chobani Plain Greek Yogurt, about 681 grams, divided
- 1 cup fresh blueberries, about 170 grams
- 1 ripe banana, chopped into small slices
- 3 drops red food coloring, optional
- 3 drops blue food coloring, optional
These ingredients are simple and easy to find, making this recipe accessible and convenient for home preparation .
Equipment
To achieve the best results, use the following equipment:
- Popsicle mold set with sticks
- High powered blender
- Measuring cups and spoons
- Mixing bowls
- Spoon or spatula
- Kitchen scale for precise measurements, optional
Having the right tools ensures smooth blending and clean layering of the popsicles.
Step by Step
Prepare the Strawberry Layer
Start by placing chopped strawberries into a blender. Add ½ tablespoon sugar and ¼ cup water. Blend until smooth and slightly thick. Add 1 cup of Greek yogurt and blend again until fully creamy. If you prefer a brighter red shade, add a few drops of red food coloring. Transfer the mixture to a bowl and refrigerate while preparing the other layers.
Prepare the Blueberry Layer
Rinse the blueberries and place them in the blender. Add ½ tablespoon sugar and ¼ cup water. Blend until smooth. Mix in 1 cup Greek yogurt and blend until creamy. Add blue food coloring if you want a deeper color. Set aside in the refrigerator to keep the mixture fresh and chilled.
Prepare the Banana Layer
Add chopped banana to the blender with the remaining sugar and water. Blend until smooth and naturally creamy. Add the final cup of Greek yogurt and blend again. This layer creates the white portion of the popsicles and adds natural sweetness without extra coloring.
Assemble the Popsicles
Take your popsicle molds and begin layering. Start with the blueberry mixture at the bottom of each mold. Fill about one third of the mold. Insert sticks if needed and freeze for about 2 hours until firm.
Once the first layer is frozen, add the banana layer on top. Freeze again for another 2 hours. Finally, add the strawberry layer and freeze completely for at least 2 more hours or until solid.
This gradual freezing process ensures distinct layers and a visually appealing result. The total freezing time is about 6 hours, but overnight freezing works best for perfect texture.
Final Touch
Once fully frozen, remove popsicles by running the mold under warm water for a few seconds. Gently pull them out and enjoy immediately. The layers should be clearly visible with a smooth creamy texture.
Storage
Cooling Red Blue & White Popsicles can be stored in the freezer for up to one month. After removing them from the molds, place each popsicle in an airtight container or wrap individually in parchment paper. This prevents freezer burn and keeps flavors fresh.
Keep them stored at a consistent freezing temperature to maintain texture. Avoid repeated thawing and refreezing as it can cause ice crystals to form and affect the creamy consistency.
If you plan to make a large batch, label the container with the date to track freshness. For best taste and texture, consume within two to three weeks. Proper storage ensures your Cooling Red Blue & White Popsicles remain delicious and ready to enjoy anytime.
Variations and Substitutions
This recipe is flexible and allows for creative variations. You can replace strawberries with raspberries for a slightly tart flavor. Blueberries can be swapped with blackberries for a deeper color and richer taste.
For a dairy free version, substitute Greek yogurt with coconut yogurt or almond milk yogurt. This keeps the creamy texture while catering to different dietary needs.
You can also experiment with natural sweeteners like honey or maple syrup instead of granulated sugar. Adding a splash of lemon juice enhances fruit flavors and balances sweetness.
For extra texture, consider blending in small fruit chunks or layering with granola for a unique twist. These variations allow you to personalize Cooling Red Blue & White Popsicles to suit your preferences.
Tips and Tricks
To achieve smooth layers, always freeze each layer completely before adding the next. This prevents colors from mixing and keeps the popsicles visually appealing.
Use ripe fruits for maximum natural sweetness and flavor. Overripe bananas work especially well for the creamy layer. If your blender struggles, add a small amount of water gradually to help blending without thinning the mixture too much.
For easier removal, dip the molds briefly in warm water. Avoid leaving them too long, as this can melt the outer layer.
If you want a more vibrant color without food coloring, choose deeply colored fruits like dark blueberries or ripe strawberries. You can also strain the fruit puree for a smoother texture.
Keep your ingredients chilled before layering to speed up freezing time. These small tricks make a big difference in the final quality of your Cooling Red Blue & White Popsicles.
Notes
The sweetness level can be adjusted depending on your taste. If your fruits are naturally sweet, you may reduce or skip added sugar. Using flavored yogurt like vanilla can also enhance taste without extra sweeteners.
Food coloring is optional and mainly used for visual appeal. Natural fruit colors are usually sufficient for a beautiful presentation.
The texture of these popsicles is creamy rather than icy due to the yogurt content. If you prefer a more icy texture, reduce the yogurt slightly and increase fruit puree.
This recipe yields about 8 popsicles depending on mold size. You can easily double the ingredients for larger batches.
These Cooling Red Blue & White Popsicles are simple yet versatile, making them a great addition to your homemade dessert collection.
Serving Suggestions
Serve Cooling Red Blue & White Popsicles straight from the freezer for a refreshing treat. Pair them with fresh fruit slices or a light snack for a balanced dessert. They are perfect for gatherings, afternoon treats, or a cooling snack during warm weather.
Conclusion
Cooling Red Blue & White Popsicles are a simple, colorful, and nutritious frozen dessert that anyone can make at home. With fresh fruits, creamy yogurt, and easy layering techniques, this recipe delivers both flavor and visual appeal. By following the steps, tips, and variations provided, you can customize these popsicles to suit your taste. Whether you enjoy them as a snack or dessert, they offer a refreshing way to stay cool while enjoying natural ingredients.
FAQs
How long do Cooling Red Blue & White Popsicles take to freeze?
They take about 6 hours total, but overnight freezing gives the best results.
Can I make these popsicles without yogurt?
Yes, you can use fruit juice or dairy free yogurt alternatives for a different texture.
Do I need food coloring?
No, it is optional. Natural fruit colors are usually enough.
How do I prevent layers from mixing?
Freeze each layer completely before adding the next.
Can I use frozen fruit?
Yes, just thaw slightly before blending for smoother consistency.
Cooling Red Blue & White Popsicles Delight
- Total Time: 6 hours 5 minutes
- Yield: 8 popsicles
- Diet: Vegetarian
Description
Cooling Red Blue & White Popsicles are a refreshing layered frozen treat made with strawberries, blueberries, banana, and creamy Greek yogurt. These colorful popsicles are easy to prepare, naturally sweet, and perfect for a cooling dessert with a smooth texture and vibrant fruit flavors.
Ingredients
1 cup (167 g) fresh strawberries, chopped
1½ tablespoons (18 g) granulated sugar, divided
¾ cup (170 ml) water, divided
3 cups (681 g) plain Greek yogurt (FAGE Total Plain Greek Yogurt or Chobani Plain Greek Yogurt)
1 cup (170 g) fresh blueberries
1 medium ripe banana, chopped
3 drops red food coloring (optional)
3 drops blue food coloring (optional)
Instructions
• Blend strawberries with ½ tablespoon sugar and ¼ cup water until smooth, then mix with 1 cup Greek yogurt and refrigerate
• Blend blueberries with ½ tablespoon sugar and ¼ cup water until smooth, then mix with 1 cup Greek yogurt and refrigerate
• Blend banana with remaining sugar and water until creamy, then mix with remaining Greek yogurt
• Pour blueberry mixture into popsicle molds filling one third and freeze for about 2 hours
• Add banana layer on top of frozen blueberry layer and freeze again for about 2 hours
• Add strawberry layer as the final layer and freeze completely for at least 2 more hours or until solid
• Remove popsicles by running molds under warm water briefly and serve immediately
Notes
Use ripe fruits for the best natural sweetness and flavor
Vanilla flavored yogurt can be used for extra sweetness and aroma
Food coloring is optional and can be skipped for natural color
Store popsicles in an airtight container in the freezer for up to 1 month
For dairy free option, use coconut or almond milk yogurt alternatives
Avoid refreezing after thawing to maintain smooth texture
- Prep Time: 5 minutes
- Cook Time: 0 minutes
- Category: Dessert
- Method: Freezing
- Cuisine: American