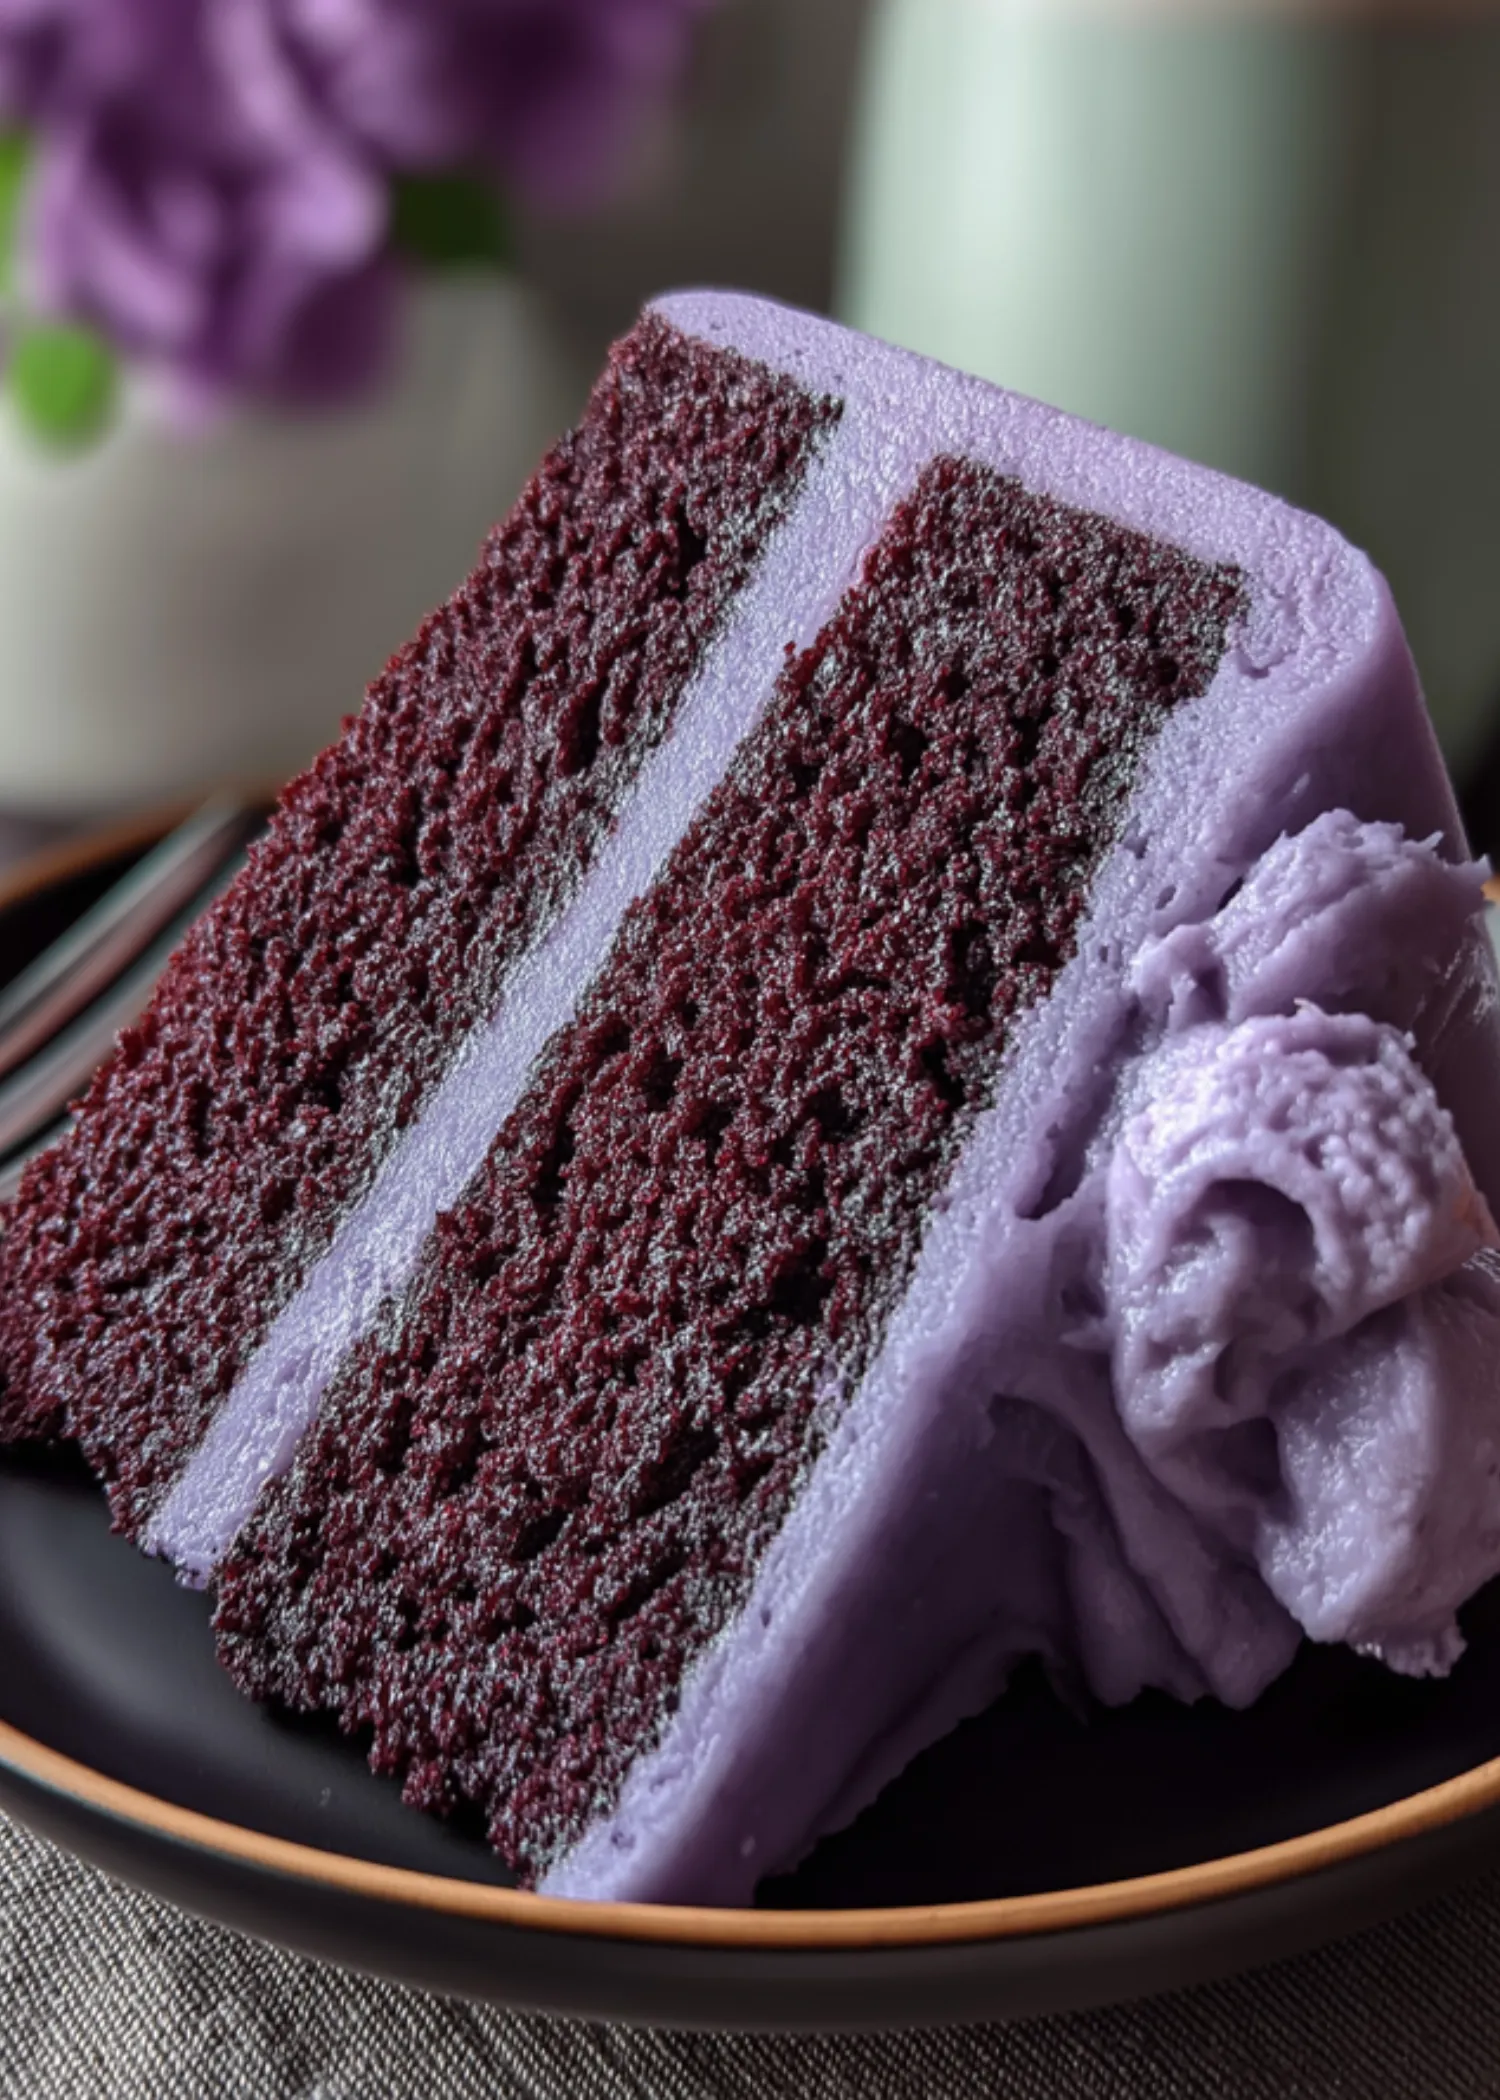
Purple cake isn’t just a treat for the taste buds, it’s a visual delight that makes any occasion feel extra special. Whether you’re baking for a birthday, a bridal shower, or just because you love beautiful desserts, this vibrant creation stands out on the table. With its moist, velvety texture and a creamy white chocolate cream cheese frosting, the purple cake is more than just a pretty face. It offers rich flavor, elegant presentation, and plenty of room for creativity.
In this article, you’ll learn everything from what gives purple cake its signature color to how you can perfect each layer at home. We’ll dive into essential ingredients, step-by-step baking instructions, flavor variations like ube cake, and even how it compares to traditional classics like Queen Elizabeth cake. If you’re curious about the world’s most expensive cake or looking to create a flawless homemade purple cake, you’re in the right place.
Contents
- 1 Understanding Purple Cake
- 2 Ingredients Breakdown for the Best Purple Cake
- 3 Purple Cake Recipe
- 4 Step-by-Step Instructions to Bake Purple Cake Layers
- 5 Mixing the Batter the Right Way
- 6 Making the White Chocolate Cream Cheese Frosting
- 7 Assembling the Final Frosting
- 8 Expert Tips for Achieving a Perfect Purple Cake
- 9 Optimizing Texture and Structure
- 10 Achieving Bakery-Quality Presentation
- 11 How to Assemble and Decorate Your Purple Cake
- 12 Decorative Techniques for a Purple-Themed Cake
- 13 Serving, Storing, and Customizing Purple Cake
- 14 How to Store and Extend Cake Freshness
- 15 Easy Customizations to Make It Your Own
- 16 Conclusion – Why Purple Cake Deserves a Spot in Your Recipe Collection
Understanding Purple Cake
– What Makes a Cake Purple?
The color purple in cakes is usually achieved in two main ways—natural ingredients or artificial coloring. Naturally, ingredients like ube (purple yam), purple sweet potatoes, and even blueberries can give cakes a beautiful, subtle purple tone. However, when you’re aiming for a more vibrant and consistent color, gel-based food coloring is your best bet. It blends smoothly into batter and resists fading during baking.
In the case of a purple cake, the base recipe is similar to that of red velvet, with cocoa powder and buttermilk lending a rich, soft crumb. The key difference lies in replacing the red food dye with purple, then brightening the shade using a small amount of white food coloring. This prevents the cocoa from darkening the mix too much and helps maintain a true purple hue.
– Natural vs Artificial Coloring Options
If you’re interested in avoiding artificial dyes, consider using purple yams (ube), which offer both vibrant color and a uniquely nutty flavor. Purple carrot powder or butterfly pea flower can also be used as natural colorants, though results may vary depending on baking conditions.
For those looking for guaranteed color precision and vibrant impact, artificial gel food coloring remains the top choice. It allows you to control depth and brightness by adjusting the quantity. When using artificial coloring in your purple cake, always choose gel over liquid to avoid altering the batter’s consistency. A little goes a long way, and combining with white food coloring keeps the final shade light and eye-catching.
Understanding these options helps you decide whether you want a naturally tinted cake with earthy undertones or a bold, bakery-style dessert that pops on the plate.
Ingredients Breakdown for the Best Purple Cake
– Key Ingredients in Purple Cake Layers
To create the perfect purple cake, your ingredient choices matter just as much as your technique. This cake starts with 2⅛ cups of all-purpose flour, which gives structure without being too dense. ¼ cup of unsweetened cocoa powder adds a mild chocolate flavor—just enough to enhance taste without overpowering the purple hue. Make sure it’s not Dutch-processed, as that type is darker and may muddy your color.
Leavening agents like 1 teaspoon each of baking powder and baking soda, along with ¼ teaspoon of salt, ensure the cake rises properly and stays tender. 8 tablespoons of unsalted butter and 1½ cups of granulated sugar are creamed together to create a light and fluffy base. Eggs bring structure and richness, while 1 teaspoon of vanilla extract deepens the flavor.
The magic happens when you mix 1 cup of buttermilk with 1 teaspoon of white vinegar and add purple gel food coloring. Buttermilk contributes to a soft, tender crumb and reacts with the baking soda and vinegar to help the cake rise. This mixture also helps maintain the cake’s tangy velvet character while allowing the color to shine through.
– White Chocolate Cream Cheese Frosting Ingredients
The frosting is what gives this cake a rich, creamy finish. Start with 8 ounces of white chocolate, which should be gently melted and cooled. Combine it with 12 ounces of cream cheese and 6 ounces of softened unsalted butter for a luscious, smooth texture. Blend in 1 teaspoon of vanilla extract for flavor depth.
Optionally, a touch of food coloring can be added here as well, whether to match the cake layers or create a lovely contrast. This frosting is easy to spread and holds up beautifully between layers and on the exterior of the cake.
Each of these ingredients plays a crucial role—not just in taste, but also in the final look and feel of your purple cake. Make sure all ingredients are at room temperature before you begin mixing. This helps ensure an even blend and avoids curdling, especially in the frosting. With the right preparation, you’ll have a purple cake that looks incredible and tastes even better.
Print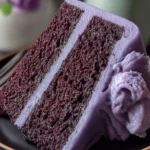
Purple Cake Recipe
- Total Time: 5 hours
- Yield: 12 servings
- Diet: Vegetarian
Description
A stunning homemade purple velvet cake with a light cocoa flavor, topped with a rich white chocolate cream cheese frosting. Perfect for birthdays, themed events, or just because you love colorful, delicious cake.
Ingredients
Cake Layers:
2⅛ cups (266 grams) all-purpose flour
¼ cup (24 grams) unsweetened cocoa powder (not Dutch processed)
1 teaspoon baking powder
1 teaspoon baking soda
¼ teaspoon salt
8 tablespoons (4 ounces) unsalted butter, softened
1½ cups (300 grams) granulated sugar
2 eggs, room temperature
1 teaspoon vanilla extract
1 cup buttermilk
1 teaspoon white vinegar
Purple food coloring (and white food coloring for brightness, if desired)
Frosting:
8 ounces (226 grams) white chocolate
12 ounces (340 grams) cream cheese, softened
6 ounces (170 grams) unsalted butter, softened
1 teaspoon vanilla extract
Purple food coloring (optional)
Instructions
1. Preheat oven to 350°F (175°C).
2. Grease and line two 9-inch round cake pans with parchment paper, grease the paper, and dust with cocoa powder.
3. Sift together the flour, cocoa, baking powder, baking soda, and salt in a medium bowl.
4. In a stand mixer, beat softened butter for 3-5 minutes until pale and fluffy.
5. Add sugar and beat for 1-2 minutes until light and fluffy.
6. Add eggs one at a time, beating for 1 minute after each addition.
7. Mix in vanilla extract.
8. In a measuring cup, combine buttermilk, white vinegar, and purple food coloring.
9. Add dry ingredients in three parts, alternating with the buttermilk mixture in two parts. Start and end with dry.
10. Mix just until combined. Do not overmix.
11. Divide batter evenly between pans. Tap pans gently on counter to remove air bubbles.
12. Bake for 25 minutes or until a toothpick comes out clean.
13. Cool cakes in pans for 10 minutes, then transfer to wire racks to cool completely.
14.
15. Make the frosting: Melt white chocolate using a double boiler. Let cool.
16. Cream butter and cream cheese together until smooth and fluffy.
17. Add vanilla and cooled chocolate, beat to combine.
18. Add food coloring if desired.
19.
20. Assemble the cake: Level layers if needed. Frost between layers and all around the cake.
21. Chill slightly to set before slicing and serving.
Notes
To achieve a bright purple color, use gel-based purple food coloring and add a drop of white coloring.
Store the cake in an airtight container in the fridge for up to 5 days.
Unfrosted cake layers can be wrapped tightly and frozen for up to 2 months.
- Prep Time: 1 hour
- Cook Time: 25 minutes
- Category: Cakes Recipes
- Method: Baking
- Cuisine: Unspecified
Step-by-Step Instructions to Bake Purple Cake Layers
Preparing Your Cake Layers with Precision
Setting Up the Baking Environment
Start by preheating your oven to 350°F, ensuring it reaches full temperature before the batter goes in. Prepare two 9-inch round cake pans by greasing them thoroughly. Line the bottoms with parchment paper, then grease the paper and dust the entire interior with unsweetened cocoa powder. This step not only prevents sticking but also enhances the cake’s chocolate flavor.
Sifting the Dry Ingredients for a Light Texture
In a medium bowl, sift together your dry ingredients to remove clumps and ensure even distribution:
- 2⅛ cups (266g) all-purpose flour
- ¼ cup (24g) unsweetened cocoa powder
- 1 teaspoon baking powder
- 1 teaspoon baking soda
- ¼ teaspoon salt
Sifting also aerates the mix, which contributes to a tender crumb.
Mixing the Batter the Right Way
Creaming the Butter, Sugar, and Eggs
In the bowl of a stand mixer or using a hand mixer, beat 8 tablespoons (4 oz) of unsalted butter on medium speed for 3–5 minutes. Scrape the sides of the bowl frequently until the butter becomes pale and fluffy.
Add 1½ cups (300g) granulated sugar and beat for another 1–2 minutes until light and airy.
Next, add 2 room temperature eggs, one at a time, beating for 1 minute after each. Scrape the bowl and add 1 teaspoon vanilla extract, then beat again to fully combine.
Creating the Buttermilk-Vinegar-Coloring Mix
Measure 1 cup of buttermilk into a large measuring cup. Add 1 teaspoon of white vinegar and your desired amount of purple gel food coloring. For a vibrant purple, use a concentrated gel and optionally blend in a bit of white coloring to brighten the hue. Mix this well so the color is fully incorporated.
Combining Wet and Dry Mixtures
Add the dry ingredients to the butter mixture in three parts, alternating with the colored buttermilk in two parts. Begin and end with the dry ingredients. Mix each addition just until incorporated. Avoid overmixing, which can lead to a tough cake. Scrape down the bowl as needed for an even blend.
Baking and Cooling Like a Pro
H3: Filling the Pans and Eliminating Air Bubbles
Divide the batter evenly between the two prepared pans. Smooth the tops using a spatula, then gently tap each pan on the countertop to release trapped air bubbles. This helps the layers bake evenly and prevents holes.
Baking Time and Cooling Process
Place both pans on the middle rack of the oven. Bake for 25 minutes, but start checking at 18 to 20 minutes. Insert a toothpick into the center of each cake. If it comes out clean or with a few moist crumbs, it’s done.
Let the purple cakes cool in the pans for 10 minutes before turning them out onto wire racks. Cool completely before frosting—this usually takes about 1 to 2 hours, depending on room temperature.
Follow these steps, and you’ll have perfectly baked purple cake layers—moist, rich, and vibrantly colored. The next step is making the frosting that brings it all together.
Making the White Chocolate Cream Cheese Frosting
Crafting a Smooth and Flavorful Frosting
Melting the White Chocolate Properly
Start by gently melting 8 ounces of white chocolate using a double boiler. Place the chocolate in a heatproof bowl over a saucepan of simmering water, making sure the bowl doesn’t touch the water. Stir continuously until smooth and melted.
Be careful not to overheat the chocolate, as white chocolate burns easily and can seize. Once melted, set it aside to cool to room temperature. This step is crucial—if added hot, the chocolate will melt the butter and ruin the frosting texture.
Creaming the Butter and Cream Cheese
In a large mixing bowl, combine 12 ounces (340g) of softened cream cheese and 6 ounces (170g) of softened unsalted butter. Beat them together on medium-high speed until the mixture becomes fluffy and smooth, usually about 2–3 minutes.
Room-temperature ingredients are key here. Cold butter or cream cheese can cause lumps and uneven mixing.
Assembling the Final Frosting
Blending in Vanilla and Chocolate
Once your white chocolate has cooled, add it to the creamed butter and cream cheese mixture along with 1 teaspoon of vanilla extract. Beat until everything is fully incorporated and smooth. The chocolate will add a mild, sweet richness without overpowering the tang of the cream cheese.
Adjusting Color for Visual Impact
This is where you can get creative. If you want your frosting to match the purple hue of the cake or provide a beautiful contrast, now’s the time to add a few drops of gel food coloring.
You can make the frosting a light lavender to keep the color palette elegant, or go bolder with a deeper purple. Just like in the purple cake batter, a small amount of white coloring can lighten the tone without affecting the flavor.
Once your frosting is ready, cover it and chill slightly if needed to thicken. This makes it easier to spread, especially if you plan to pipe decorative swirls or edges. With this frosting in hand, your purple cake will not only taste amazing—it’ll look like it came straight from a bakery display.
Expert Tips for Achieving a Perfect Purple Cake
Enhancing Color Without Compromising Flavor
Reducing Cocoa to Preserve the Purple Hue
Cocoa powder can deepen the batter’s color and shift your intended purple tone toward brown. That’s why this recipe limits cocoa to ¼ cup instead of the more typical 6 tablespoons found in traditional velvet cakes. This keeps a hint of chocolate flavor while allowing the food coloring to take center stage. Always use natural (non-Dutch processed) cocoa to avoid overly dark results.
Using White Food Coloring for Vibrancy
Adding a touch of white gel food coloring may sound unusual, but it works wonders for balancing the depth of purple. It neutralizes the darker tint from the cocoa and softens overly saturated purple, giving the purple cake a clean and elegant pastel-like finish. It’s especially helpful if your purple turns too blue or red.
Optimizing Texture and Structure
Stick to Room Temperature Ingredients
From eggs to butter to cream cheese, using ingredients at room temperature ensures a smooth batter and uniform baking. Cold ingredients can create lumps, separate the batter, or interfere with proper rising. Room temperature ingredients mix more evenly and hold more air, leading to a fluffier cake.
Don’t Overmix After Combining Wet and Dry
Once you begin alternating your dry ingredients with the buttermilk-vinegar mix, stir only until everything is just combined. Overmixing at this stage can lead to dense, chewy cake layers. Stop mixing as soon as the flour streaks disappear, and always scrape down the bowl to avoid unmixed pockets.
Achieving Bakery-Quality Presentation
Leveling the Cake Layers Before Frosting
After your purple cake layers cool, use a serrated knife to trim the domed tops for a flat surface. This makes it easier to stack them evenly and ensures a professional look. You can save those scraps for taste-testing—or crumble them for decorative topping.
Chilling the Cake Before Final Decoration
After applying a crumb coat—a thin layer of frosting that locks in loose crumbs—refrigerate the purple cake for 15 to 30 minutes. This firms up the surface and makes applying the final layer of frosting much easier. For crisp edges and clean swirls, always frost a cold cake.
With these expert techniques, your purple cake won’t just taste incredible, it’ll look like it belongs in a pastry showcase. By managing color carefully, sticking to precision baking steps, and embracing decorator tricks, you’ll achieve flawless results every time.
How to Assemble and Decorate Your Purple Cake
Creating a Show-Stopping Cake Presentation
Leveling, Stacking, and Filling the Layers
Before you begin assembling your purple cake , make sure both layers are completely cool. If they have domed tops, use a serrated knife to level them for even stacking. Place one cake layer on a serving plate or cake board and apply a generous amount of white chocolate cream cheese frosting. Spread it evenly to the edges using an offset spatula, ensuring the filling stays level.
Place the second layer on top, aligning it with the base. Apply light pressure to seal the layers together, and wipe off any frosting that leaks from the sides.
Applying a Crumb Coat for a Clean Finish
A crumb coat is a thin layer of frosting that traps crumbs and smooths the surface for a more polished final layer. Spread a light coating of frosting over the top and sides of the cake, then refrigerate it for 20 to 30 minutes. This step is essential for a clean, professional look, especially if you’re aiming for smooth edges or plan to pipe decorations.
Decorative Techniques for a Purple-Themed Cake
Adding Color Contrast or Uniform Hues
For a bold appearance, use contrasting frosting—like white or pale lavender—against the deep purple cake layers. You can also tint your frosting to match the cake for a monochrome look. Swirl some purple and white together for a marbled effect or use piping tips to create rosettes and borders.
Finishing Touches with Toppings and Accents
Sprinkle cake crumbs from trimmed tops, edible glitter, sugar pearls, or fresh edible flowers to elevate the presentation. For extra visual impact, slice the purple cake to reveal the vibrant purple interior and creamy filling. Serve on a white or glass platter to enhance the visual contrast and make the colors pop.
Decorating is where you bring personality into your cake. Whether you prefer a clean, elegant look or something more playful and bold, the purple color scheme gives you a stunning base to work with.
Serving, Storing, and Customizing Purple Cake
Best Ways to Serve and Enjoy Purple Cake
Ideal Pairings and Presentation Tips
Purple cake is best served slightly chilled or at room temperature, which helps maintain its texture while allowing the frosting to soften just enough for a melt-in-your-mouth bite. This cake pairs beautifully with drinks like black tea, coffee, or a glass of cold milk. For events, slice the cake cleanly using a sharp, warm knife to showcase the layers.
If you’re hosting a celebration, serve slices on white plates to highlight the bold color. Add a swirl of extra frosting on the side or top with berries for a fresh garnish.
Portioning and Calorie Considerations
This cake recipe yields approximately 12 slices, with each serving containing around 519 calories. It’s rich and filling, thanks to the butter and cream cheese, so smaller portions still satisfy sweet cravings. For those looking to reduce calories, consider using reduced-fat cream cheese or lighter frosting alternatives like whipped cream.
How to Store and Extend Cake Freshness
Refrigeration and Freezing Tips
Once frosted, store your purple cake in an airtight container in the refrigerator. It will stay fresh for up to 5 days. If you need to prepare it ahead of time, wrap unfrosted cake layers tightly in plastic wrap and freeze for up to 2 months. When ready to use, thaw in the fridge overnight, then bring to room temperature before frosting.
Maintaining Texture and Color Over Time
To prevent drying out, always wrap exposed cake tightly and avoid placing it near strong-smelling foods in the fridge. The food coloring in the purple cake will remain vibrant for several days, especially if stored away from direct light. If you’re using natural dyes like ube or berries, expect a slight color fade after 48 hours.
Easy Customizations to Make It Your Own
Swapping Flavors and Colors
While purple cake has its own identity, it’s easy to switch things up. Add a touch of lemon zest or almond extract to the batter for a twist. Swap purple for pink, blue, or green coloring to match different themes, using the same velvet-style base.
Creating Cupcakes or Mini Cakes
This recipe works great for cupcakes or layered mini cakes. Simply divide the batter among lined muffin tins or smaller pans. Adjust baking time to 15–18 minutes for cupcakes, and always test for doneness with a toothpick. These smaller versions are perfect for parties or gifting.
With a little imagination, purple cake becomes a versatile canvas. Whether you’re dressing it up for a wedding or keeping it casual for a birthday, this colorful dessert delivers on flavor, style, and satisfaction.
Conclusion – Why Purple Cake Deserves a Spot in Your Recipe Collection
Purple cake is more than just a trendy dessert—it’s a beautiful, flavorful twist on a beloved classic. From its rich, velvety crumb and tangy cream cheese frosting to its vibrant color that lights up any celebration, this cake delivers on both looks and taste. Whether you’re using food coloring for that bold purple pop or experimenting with ube for a natural hue, the end result is always something special.
What makes purple cake so irresistible is its balance of flavors. It’s just chocolatey enough to satisfy cravings without being too rich, and the frosting’s creamy sweetness wraps it all together. With proper technique, thoughtful ingredients, and a little creativity, anyone can pull off this stunning dessert at home.
Whether you’re baking it for a party, a holiday, or simply to try something new, purple cake is guaranteed to impress. It’s not just a treat—it’s an experience. So next time you want to bake something unforgettable, let this purple velvet masterpiece steal the show.
For More Delicious And Easy Recipes Follow Me In Facebook And Pinterest.
What flavor of cake is purple?
Purple cake typically has a mild chocolate flavor, similar to red velvet cake. The base is made with a small amount of unsweetened cocoa powder, which adds depth without overpowering the cake’s color or sweetness. The flavor is often enhanced with vanilla and a touch of tang from buttermilk and vinegar. If made with ube or purple yam, the flavor shifts to a rich, nutty sweetness with earthy undertones.
What is the most expensive cake in the world?
The most expensive cake ever made was valued at over $75 million. Designed with diamonds, rare gems, and edible gold, it was created by a luxury designer for a private client. While purple cake isn’t in that league of extravagance, it can still be dressed to impress with elegant decorations, gourmet frosting, and vibrant coloring that turns a simple dessert into a stunning centerpiece.
Why is ube cake purple?
Ube cake gets its naturally vibrant purple color from ube, a type of yam popular in Filipino cuisine. Ube is rich in antioxidants and contains natural pigments called anthocyanins, which give the yam its distinct purple hue. When used in baking, ube not only colors the cake but also adds a subtle, nutty flavor that’s both unique and delicious.
What does Queen Elizabeth cake taste like?
Queen Elizabeth cake is a traditional Canadian dessert made with dates, coconut, and brown sugar. It has a moist, dense texture and a caramel-like sweetness. Unlike purple cake, which is light, airy, and subtly tangy, Queen Elizabeth cake leans toward rich and sticky, often served with a broiled coconut topping or icing. The two cakes are very different but equally indulgent in their own ways.
