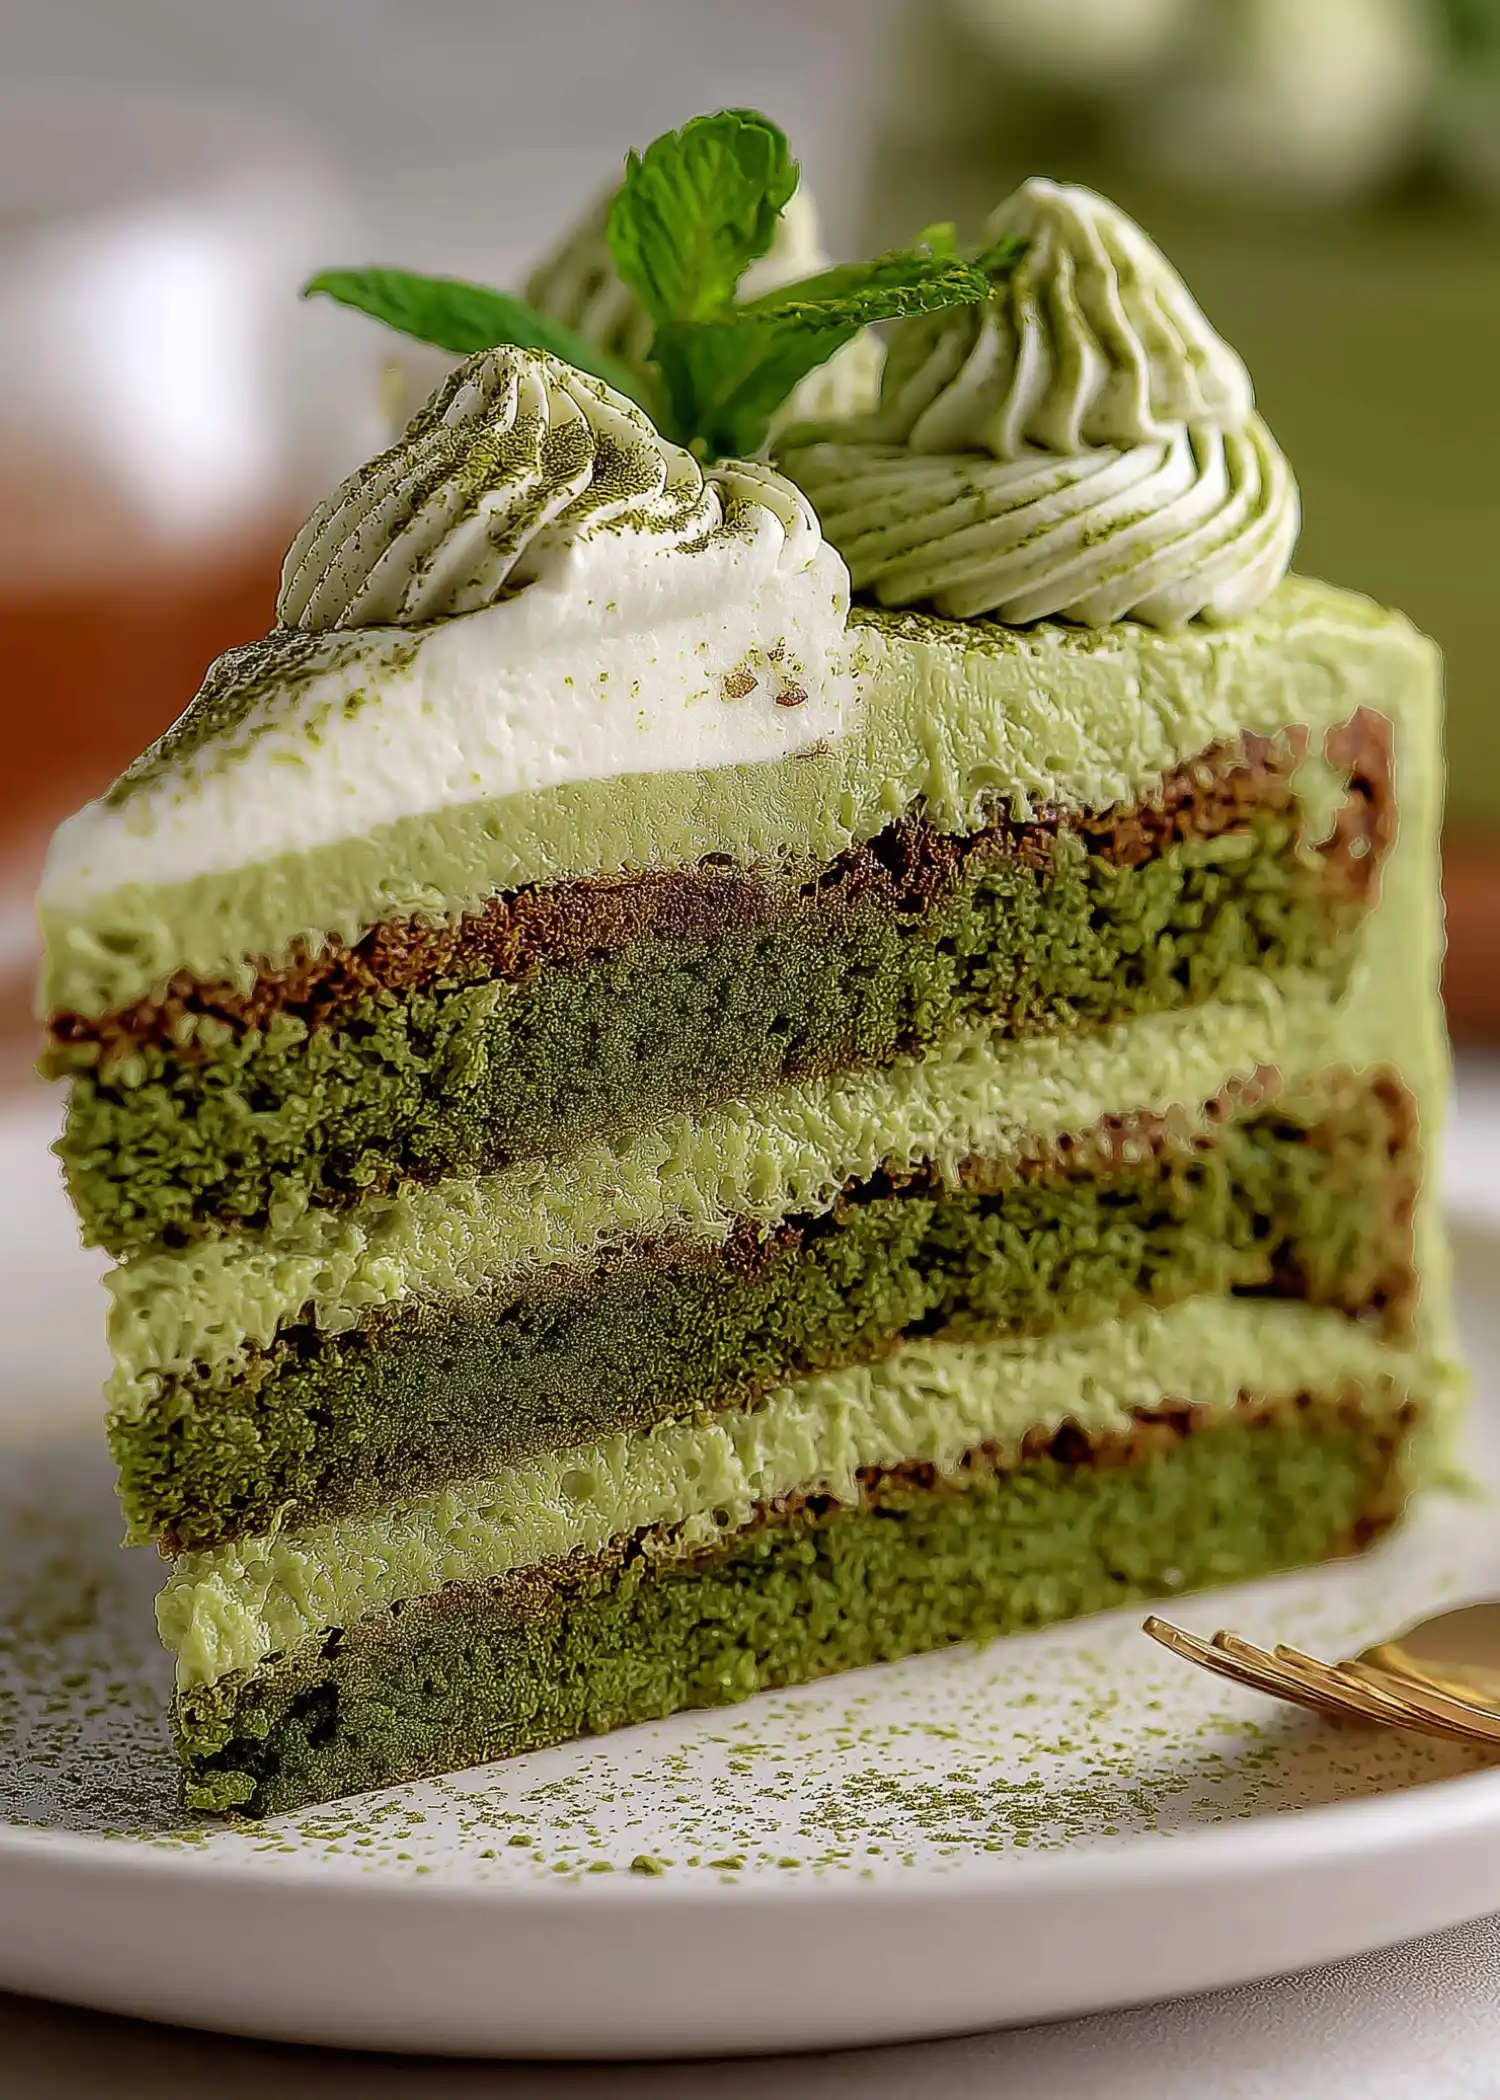
If you’re looking for a cake that’s light, airy, and uniquely flavorful, this matcha cake recipe is it. Made with earthy matcha powder and layered with creamy whipped matcha frosting, this matcha cake brings an elegant twist to your dessert table. Whether you’re baking for a special occasion or just want something different, this guide will walk you through every step of making the perfect matcha cake.
Contents
- 1 Understanding the Charm of Matcha in Baking
- 2 Essential Ingredients for the Perfect Matcha Cake
- 3 Matcha Cake Recipe
- 4 Step-by-Step Matcha Cake Recipe Guide
- 5 Baking Techniques for a Soft, Cotton-Like Matcha Cake
- 6 Assembly and Decoration of the Matcha Cake
- 7 Matcha Cake Recipe Variations to Try
- 8 Storage, Serving, and Make-Ahead Tips
- 9 Expert Troubleshooting for Common Matcha Cake Issues
- 10 Conclusion
Understanding the Charm of Matcha in Baking
What Makes Matcha Special in Cakes
Matcha, a fine green tea powder, adds more than just color to cakes. It brings a rich, slightly bitter flavor that pairs beautifully with sweet ingredients. When used in baking, it offers a smooth texture and a naturally vibrant green hue.
Why Matcha Cakes Are Trending
Originally popular in Japanese and Korean desserts, matcha cakes have become a global favorite. Their simple look, distinct flavor, and health benefits make them a hit in both home kitchens and cafés. With endless ways to use matcha—from sponge to buttercream—it’s no wonder these cakes are so loved.
Essential Ingredients for the Perfect Matcha Cake
Key Components in a Traditional Matcha Sponge Cake
To make the ideal matcha cake, you need a balance of basic ingredients and quality matcha powder. Here’s a breakdown of what each ingredient does in the recipe:
- Eggs (4 large): They provide structure, moisture, and fluffiness, especially when separated and whipped for volume.
- Whole Milk (60ml): Adds fat and liquid to create a rich, soft crumb.
- Vegetable Oil (45ml): Keeps the sponge tender and moist even after refrigeration.
- Cornstarch (55g): Lightens the texture, helping create that cloud-like softness.
- All-Purpose Flour (30g): Gives structure without making the cake dense.
- Matcha Powder (2 tbsp): The star ingredient. Choose a vibrant, high-quality powder for color and flavor.
- Granulated Sugar (90g): Sweetens and stabilizes the meringue for structure and lift.
For the whipped cream topping:
- Thickened Cream (600ml): Whips easily into a stable frosting.
- Granulated Sugar (150g): Balances the bitter notes of matcha.
- Matcha Powder (2 tbsp): Infuses the cream with flavor and a soft green tone.
Each ingredient serves a role, and even small changes can affect the matcha cake’s texture, taste, and appearance.
Choosing the Right Matcha Powder for Bold Flavor and Color
Not all matcha powders are created equal. When baking, culinary-grade matcha is your best bet. It’s affordable, blends smoothly, and delivers a robust green tea flavor. Look for:
- Bright green color – dull or brownish hues indicate low quality.
- Fresh grassy scent – high-quality matcha should smell clean and vibrant.
- Fine texture – avoid coarse or clumpy powders.
A good matcha powder makes all the difference in taste and color, especially after baking. Overheated or poor-quality matcha can lead to a dull cake and a flat flavor.
Print
Matcha Cake Recipe
- Total Time: 1 hour 40 minutes
- Yield: 1 x 8-inch cake 1x
Description
A soft and fluffy Japanese-inspired Matcha Cake layered with creamy matcha whipped cream. Light, earthy, and perfect for any celebration or afternoon treat.
Ingredients
Matcha Sponge Cake:
4 Eggs
60ml Whole milk (1/4 cup)
45ml Vegetable oil (3 tbsp)
55g Cornstarch (1/3 cup + 2 tbsp)
30g All-purpose flour (1/3 cup)
2 tbsp Matcha powder
90g Granulated sugar (1/3 cup + 2 tbsp)
Matcha Cream:
600ml Thickened cream (2 1/2 cups)
150g Granulated sugar (3/4 cup)
2 tbsp Matcha powder
Instructions
1. Preheat oven to 160°C (fan forced). Line the bottom of an 8-inch cake tin with parchment paper.
2. In a medium bowl, whisk the egg yolks, milk, oil, and cornstarch until smooth.
3. Sift in the flour and matcha powder. Mix gently until just combined.
4. Whip egg whites with sugar until stiff peaks form.
5. Fold the meringue into the yolk mixture in three batches, being careful not to deflate the batter.
6. Transfer batter into the cake tin. Place cake tin into a water bath (1cm of boiling water).
7. Bake for 70 minutes or until the cake springs back when lightly touched.
8. Let cake cool completely. Remove from tin, wrap in cling wrap, and refrigerate.
9. Whip cream, sugar, and sifted matcha powder until medium-stiff peaks form. Refrigerate until ready to use.
10. Slice sponge into three even layers.
11. Spread cream between layers and over the top of the cake using an offset spatula.
12. Pipe decorative cream borders and dust with matcha powder.
13. Refrigerate for 1–2 hours before serving.
Notes
For best results, use high-quality culinary grade matcha for a vibrant color and rich flavor.
Do not overmix the batter to preserve airiness.
Keep the cake chilled before and after serving for cleaner cuts and better structure.
- Prep Time: 30 minutes
- Cook Time: 70 minutes
- Category: Cakes Recipes
- Method: Intermediate
- Cuisine: Asian
Nutrition
- Serving Size: 1 slice (1/8 cake)
- Calories: 360
- Sugar: 31.5
- Sodium: 50
- Fat: 27.3
- Saturated Fat: 16
- Unsaturated Fat: 10
- Trans Fat: 0.3
- Carbohydrates: 40.7
- Fiber: 0.2
- Protein: 10.9
- Cholesterol: 173.6
Step-by-Step Matcha Cake Recipe Guide
Preparing the Matcha Sponge Cake Base
This matcha sponge cake is light, soft, and delicately flavored. Follow these steps carefully to get that cotton-soft texture:
- Preheat and Prepare
Set your oven to 160°C (fan-forced). Line the base of an 8-inch round cake tin with parchment paper to prevent sticking. - Mix the Egg Yolk Batter
In a medium bowl, whisk together the egg yolks, whole milk, and vegetable oil. Add the cornstarch and whisk until smooth.
Sift in the all-purpose flour and matcha powder. Gently whisk until just combined. Avoid overmixing. - Whip the Egg Whites
In the bowl of a stand mixer, beat the egg whites on medium-high speed. Gradually add the sugar. Whip until stiff peaks form. The meringue should be glossy and hold its shape when lifted. - Fold and Combine
Using a spatula, fold one-third of the meringue into the yolk mixture to loosen it. Add the remaining meringue in two more parts, folding gently each time to keep the mixture airy. - Prepare the Water Bath
Pour the batter into your prepared cake tin. Tap gently to release any large air bubbles.
Place the tin into a larger baking tray filled with 1 cm of boiling water. This gentle water bath creates a soft, steam-baked texture. - Bake and Cool
Bake for 70 minutes. The matcha cake should spring back when lightly touched.
Remove and cool on a rack. Once cooled, run a knife around the edge, invert it, and wrap in cling film. Refrigerate until ready to assemble.
Making a Creamy and Stable Matcha Whipped Frosting
This whipped matcha cream balances the sponge with smooth texture and subtle sweetness:
- Chill Equipment First
Use a cold bowl and whisk attachment for best results. Cold tools help cream whip faster. - Combine and Whip
In your stand mixer, pour in the thickened cream and sugar. Sift in the matcha powder to avoid clumps. Whip on medium speed until medium-stiff peaks form. - Refrigerate Until Use
Once whipped, cover the bowl with plastic wrap and place it in the fridge until you’re ready to assemble. This keeps the cream firm and pipeable.
This matcha cream isn’t overly sweet, which lets the earthy matcha shine. It also holds up well, making it great for decorating and layering.
Baking Techniques for a Soft, Cotton-Like Matcha Cake
Water Bath Method and Its Importance
The secret to a melt-in-your-mouth matcha sponge is the water bath technique, also called a bain-marie. This method surrounds the cake with gentle, moist heat, allowing it to cook slowly and evenly. Here’s why it matters:
- Prevents cracking: The steam from the water keeps the cake surface moist, reducing the risk of cracks.
- Creates a light, even texture: The water bath insulates the cake, helping it bake from the edges inward, resulting in an even rise.
- Locks in moisture: This method ensures your sponge stays soft without drying out, even after refrigeration.
To do this properly, place the filled cake tin inside a larger pan. Then pour about 1 cm of boiling water into the outer tray right before baking. Make sure the water doesn’t splash into your batter.
Tips to Avoid Overmixing and Achieve Perfect Rise
Overmixing is a common mistake that can deflate your meringue and result in a dense, rubbery cake. Follow these mixing tips to keep the matcha cake ultra fluffy:
- Fold gently with a spatula: Use a “scoop and turn” motion from bottom to top when folding in the meringue. This helps maintain the air bubbles.
- Mix just until combined: Stop folding once the batter is uniform. Overdoing it collapses the foam.
- Don’t let the batter sit too long: Pour it into the tin immediately after mixing. Sitting too long allows air bubbles to escape.
- Check your egg whites: Always whip to stiff peaks. Under-whipped whites won’t hold structure, while over-whipped ones become dry and hard to fold.
Also, avoid opening the oven door during baking. Sudden temperature drops can cause the sponge to deflate.
Assembly and Decoration of the Matcha Cake
Layering and Spreading the Matcha Cream Evenly
Once your cake and cream are fully chilled, it’s time to assemble. This is where precision turns a simple cake into a stunning dessert centerpiece.
- Slice the Sponge Into Layers
Carefully cut the sponge cake into three even layers using a serrated knife. A cake leveler works great for this if you have one. Make sure the layers are cool and firm from the fridge, so they don’t crumble or tear. - Start Building the matcha Cake
Place the bottom layer onto a cake turntable or flat plate. Spread a generous but even layer of matcha whipped cream on top using an offset spatula. Don’t press too hard or the sponge may compress. - Repeat the Process
Add the second cake layer, then repeat with more cream. Finally, place the last layer on top, upside down, for a flat surface. Apply light pressure to ensure the layers are stable.
Piping and Dusting Techniques for a Bakery-Level Finish
Now it’s time to polish the outside of the cake and make it look as good as it tastes.
- Crumb Coat for Clean Edges
Spread a thin layer of cream around the sides and top of the cake. This is called the “crumb coat” and helps seal in stray crumbs. Chill the cake for 15–20 minutes to set the base layer before the final coat. - Smooth the Final Layer
Apply another thin layer of matcha cream, spinning the turntable as you go. Use a bench scraper or offset spatula to smooth the sides and top. Clean edges give the cake a professional look. - Pipe Decorative Borders
Transfer remaining whipped cream into a piping bag fitted with a star tip. Pipe a simple border around the top edge of the cake. Rosettes or swirls work beautifully. - Dust with Matcha Powder
Sift a small amount of matcha powder over the top for an elegant finish. This not only enhances flavor but also highlights the matcha cake’s color. - Chill Before Serving
Let the matcha cake set in the fridge for 1–2 hours before slicing. This helps the cream firm up and keeps the layers intact when cut.
Matcha Cake Recipe Variations to Try
Matcha Swiss Roll, Cupcakes, and Tiramisu
While the classic layered sponge cake is a standout, matcha’s versatility makes it a perfect fit for many other desserts. Here are a few popular variations you’ll love experimenting with:
1. Matcha Swiss Roll
Use the same sponge cake recipe, but bake it in a sheet pan for a shorter time. Once cooled slightly, spread with matcha cream and roll it into a log. Chill and dust with matcha for a light, elegant dessert.
2. Matcha Cupcakes
Transform the sponge recipe into cupcake form by dividing the batter into lined muffin tins. Bake for about 18–20 minutes. Top each with piped matcha whipped cream for individual servings that look and taste amazing.
3. Matcha Tiramisu
Layer sponge slices soaked in milk or matcha syrup with mascarpone-matcha cream. Dust with extra matcha powder for a no-bake twist on the Italian classic. Let it chill overnight to set the flavors.
Creative Flavor Pairings: Strawberry, Red Bean, and Vanilla
Matcha’s earthy bitterness pairs well with sweet, creamy, or fruity ingredients. If you’re ready to push your recipe further, here are a few flavor combinations that work beautifully:
Strawberries
Fresh strawberry slices between the layers or on top offer color, sweetness, and acidity that cut through the richness of matcha cream.
Sweetened Red Bean (Anko)
A classic Japanese match, red bean paste layered into the matcha cake or swirled into the whipped cream adds texture and a subtle nutty sweetness.
Vanilla or White Chocolate
White chocolate complements matcha’s bitterness while adding richness. Use it in ganache drizzles or layer fillings. Vanilla extract can also soften the matcha’s sharp edge without overpowering it.
Coconut
For a tropical spin, try dusting toasted coconut flakes over the frosting or folding coconut cream into your matcha whipped topping.
Storage, Serving, and Make-Ahead Tips
Refrigeration and Freezing Options for Freshness
Once your matcha cake is assembled and beautifully frosted, proper storage is key to keeping it fresh and delicious.
Refrigeration (Recommended):
Store the cake in an airtight container or wrap it loosely with cling wrap and place it in the refrigerator. This keeps the whipped cream stable and prevents the sponge from drying out.
- Fridge life: 3 to 4 days
- Best taste: Eat within the first 48 hours for peak flavor and texture
Freezing (Optional):
Yes, you can freeze matcha sponge cake, but do it before assembling with whipped cream. The cream doesn’t freeze well and may split upon thawing.
- Slice sponge layers and wrap them individually in plastic, then foil
- Freeze up to 1 month
- Thaw overnight in the fridge before use
If you must freeze a fully assembled cake, do a flash-freeze for 30 minutes, then wrap tightly. Expect a slightly softer texture after thawing.
Ideal Occasions for Serving a Matcha Cake
Matcha cake is versatile enough for everyday indulgence and special celebrations. Its gentle green tea flavor and creamy finish make it a standout at:
- Birthdays and tea parties: A perfect centerpiece for elegant gatherings
- Spring and summer events: Its fresh flavor pairs well with seasonal fruit
- Café-style brunches or dessert bars: Slice and serve with iced matcha lattes
- Mother’s Day, Valentine’s, or Easter: Decorate with strawberries or edible flowers for a festive look
Whether you keep it simple or dress it up with piped cream, this matcha cake always impresses. It looks like something from a bakery but feels like a cozy homemade treat.
Expert Troubleshooting for Common Matcha Cake Issues
Cake Deflating After Baking – Causes and Fixes
If your matcha cake rises beautifully in the oven but collapses once out, don’t worry—it’s a common issue, especially with sponge-based recipes. Here’s why it happens and how to avoid it:
Common Causes:
- Underbaked center: If the middle is not fully set, it can sink as it cools.
- Overmixed batter: Deflates the meringue structure, making the matcha cake unstable.
- Too much moisture in the oven: An overly wet water bath or poor ventilation can soften the structure too much.
- Opening the oven door: Sudden temperature drops can cause the cake to collapse.
Fixes:
- Use an oven thermometer to ensure accurate temperature.
- Gently fold the batter to retain air bubbles.
- Bake a little longer if the center feels soft or jiggly.
- Let the matcha cake cool gradually in the oven with the door slightly ajar for the last 10 minutes.
Solving Bitter Taste or Faded Green Color in the Final Product
Matcha’s beautiful green hue and unique flavor can easily be ruined by heat, poor quality powder, or recipe imbalance. Here’s how to fix flavor and color issues:
Problem: The cake tastes bitter
- Use high-quality matcha: Culinary grade is ideal, but avoid cheap, low-grade brands with harsh flavors.
- Balance your sweeteners: If the sugar is too low, the bitterness becomes dominant. Don’t reduce sugar drastically.
Problem: The matcha cake turns brownish-green
- Avoid high temperatures: Baking above 160°C oxidizes matcha and dulls the color.
- Sift the matcha before mixing: This prevents clumps that overbake.
- Cover the matcha cake during the last 15 minutes of baking: Use foil to prevent the surface from overbrowning.
Bonus Tip: Always store matcha in a cool, dark place, sealed tightly. Light and air cause it to oxidize faster, which affects both color and taste.
Conclusion
A homemade matcha cake is more than just a trendy dessert—it’s a perfect balance of flavor, texture, and elegance. From its fluffy sponge layers to the smooth, earthy matcha cream, every bite offers a blend of tradition and creativity. Whether you stick to the classic layered version or explore unique variations like matcha cupcakes or tiramisu, this recipe gives you the foundation to experiment with confidence.
Remember, the key to a successful matcha cake lies in quality ingredients, gentle mixing, and careful baking. With the right technique, your matcha cake will not only taste amazing but look like it came straight from a high-end bakery.
For More Delicious And Easy Recipes Follow Me In Facebook And Pinterest.
