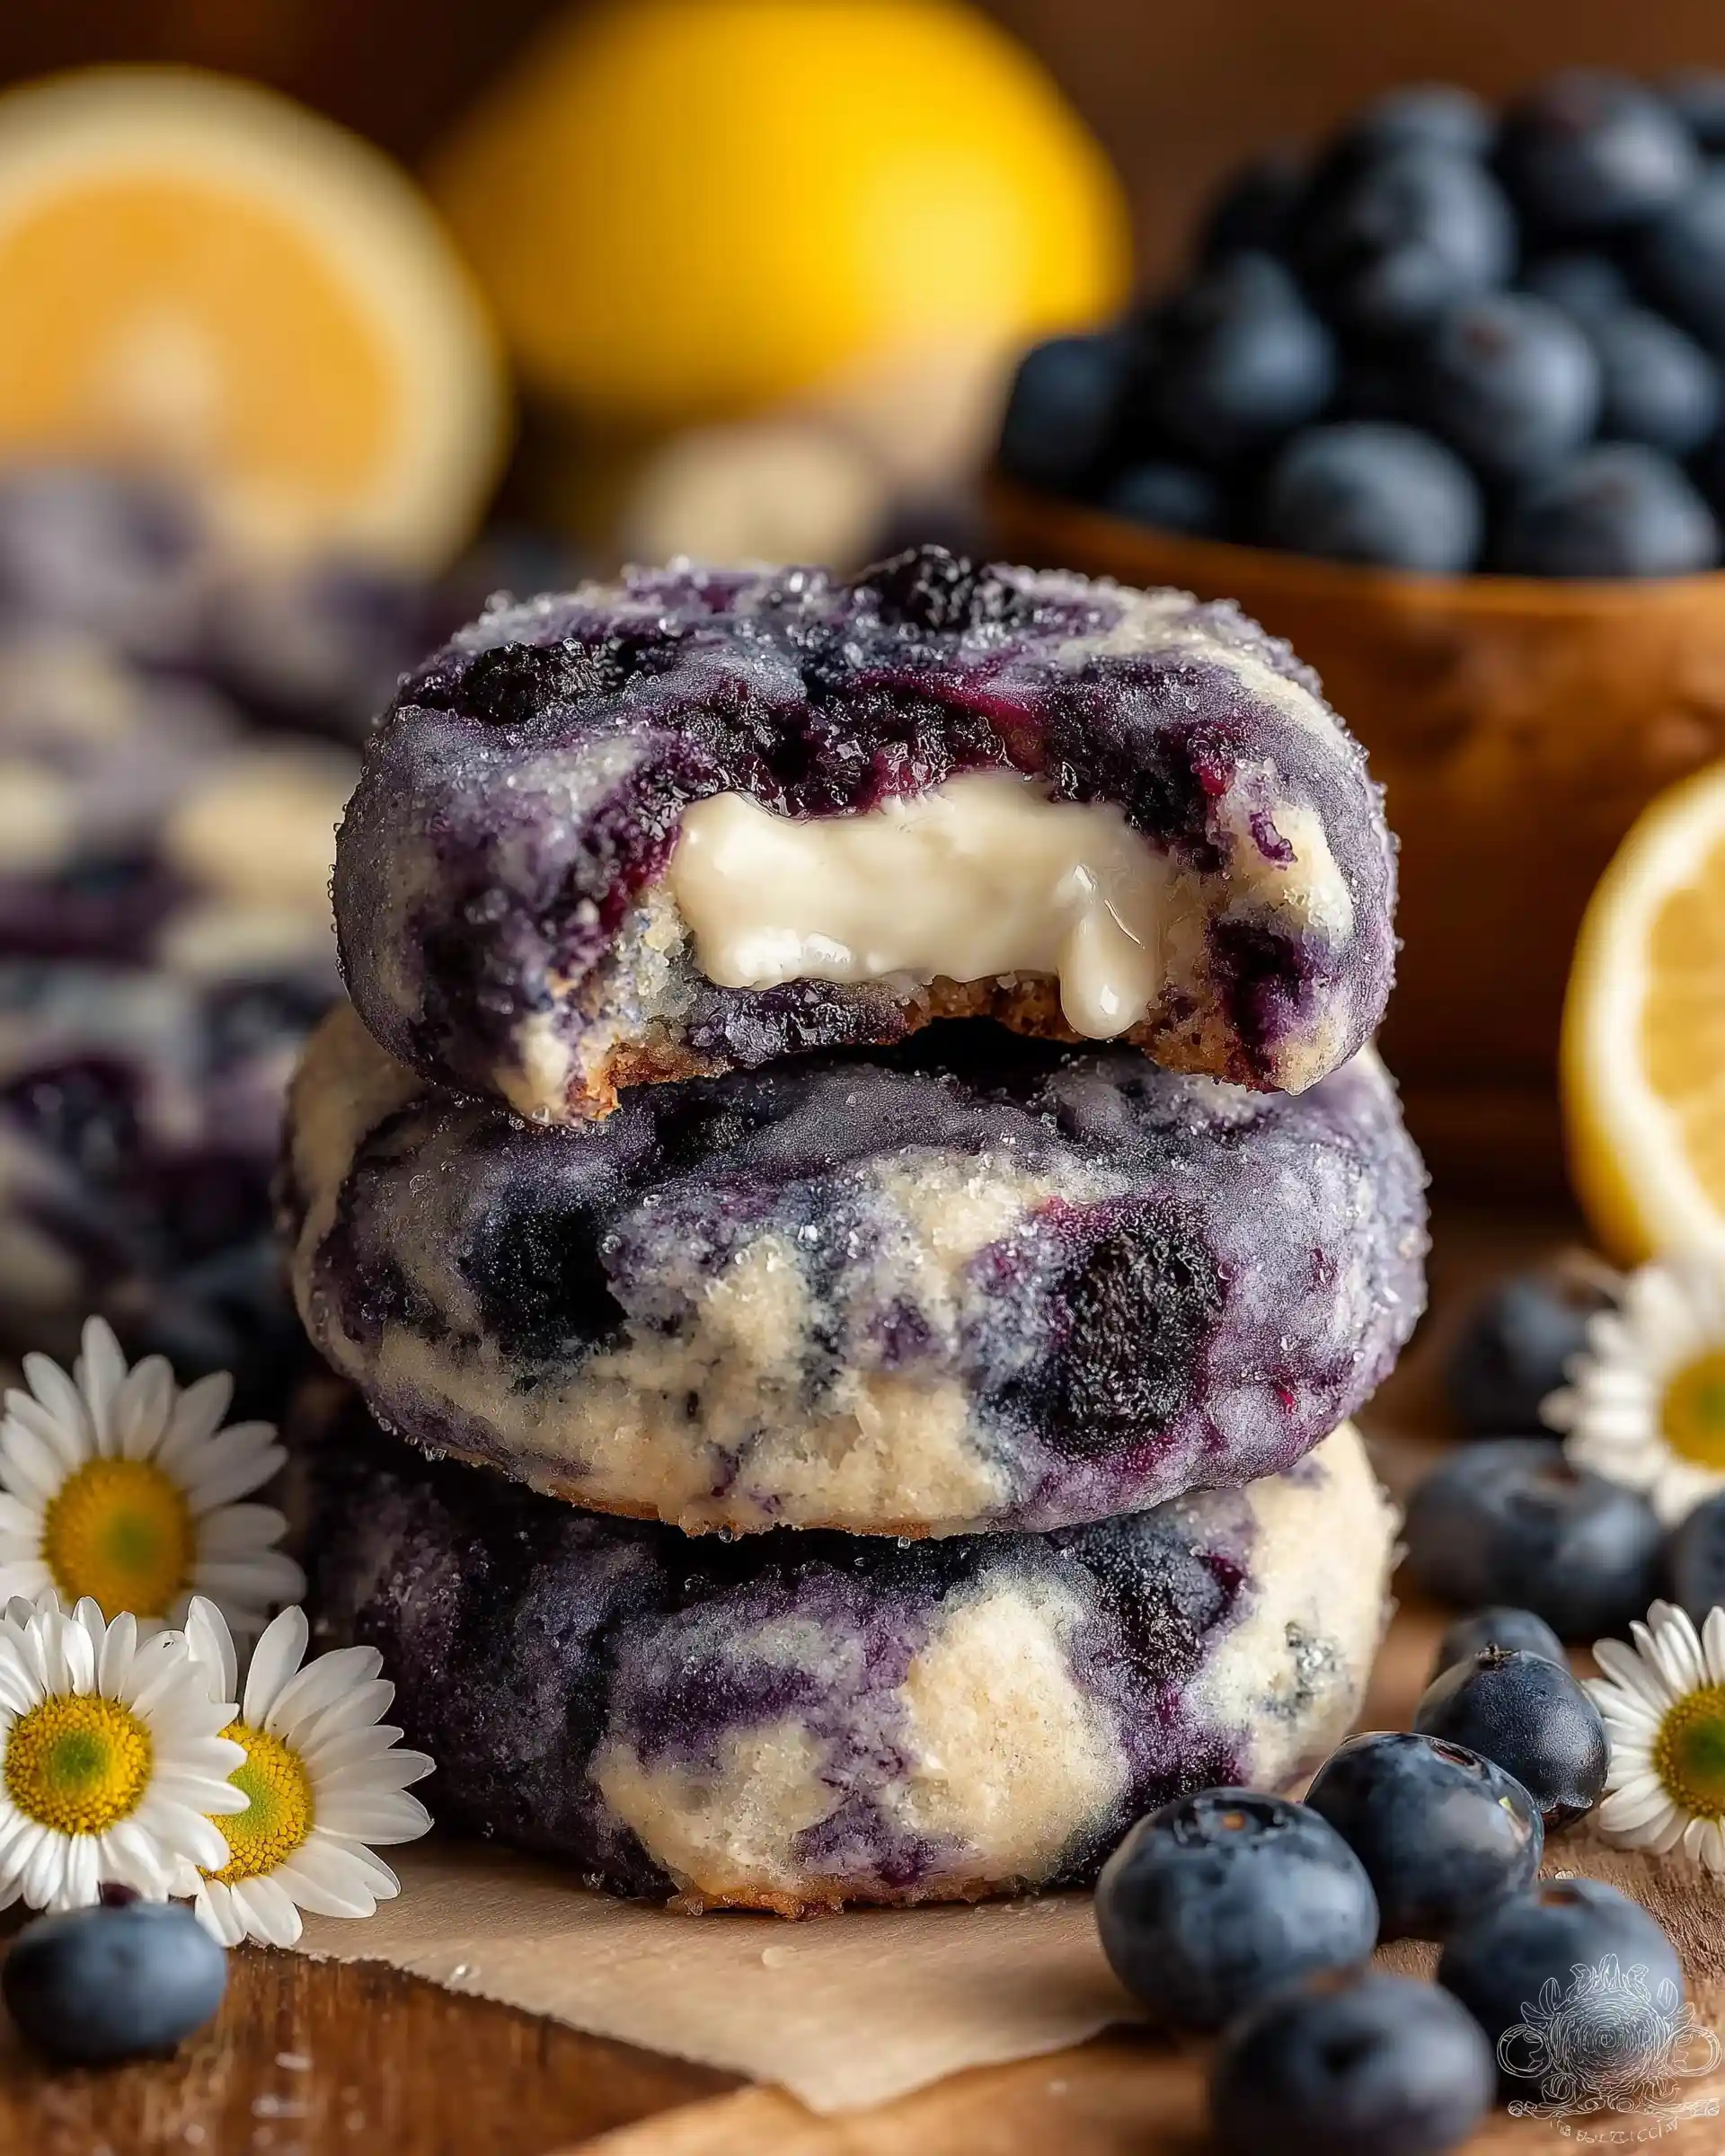
Ready to take your cookie game to luxurious new heights? This Dubai Chocolate Cookies Recipe – Pistachio & Kadayif Filled offers a gourmet twist that blends rich cocoa, sweet pistachio cream, and the irresistible crunch of toasted kadayif.
Inspired by the opulence of Middle Eastern desserts, these cookies are soft and chewy on the outside with a luscious, nutty filling inside. Whether you’re making them for a holiday tray, a gift box, or simply craving something next-level, these cookies deliver a perfect fusion of flavor and texture.
In this guide, you’ll find a streamlined version of the recipe, ingredient breakdown, essential prep tips, and expert baking techniques to ensure your cookies come out beautifully every single time.
Contents
- 1 Ingredients Breakdown for Dubai Chocolate Cookies
- 2 Dubai Chocolate Cookies Recipe – Pistachio & Kadayif Filled
- 3 How to Prepare the Pistachio & Kadayif Filling
- 4 Making the Chocolate Cookie Dough
- 5 Shaping and Stuffing the Cookies
- 6 Baking the Pistachio & Kadayif Filled Cookies
- 7 Storing and Freezing Your Cookies
- 8 Flavor Variations and Ingredient Swaps
- 9 Troubleshooting and Pro Baker Tips
- 10 Conclusion
Ingredients Breakdown for Dubai Chocolate Cookies
The foundation of any great cookie starts with the right mix of dry ingredients. For this recipe, you’ll need:
- 2 cups of KAMUT® white flour or all-purpose white flour: KAMUT® adds a slightly nutty depth, but any quality white flour will give you a sturdy dough base.
- 1/3 cup of cocoa powder: This adds the rich chocolate tone without overwhelming the pistachio flavor.
- 1/2 teaspoon fine salt: Balances out the sweetness.
- 1/2 teaspoon baking soda and 1/2 teaspoon baking powder: These leavening agents give the cookies lift and chew, creating a soft but full-bodied bite.
Mix these ingredients in a medium bowl and set aside. Whisking or sifting ensures they’re evenly combined, which prevents clumps and helps distribute the leavening agents throughout the dough.
To get that classic cookie chew with a gourmet twist, we use:
- 12 tablespoons of unsalted butter: Room temperature butter ensures the dough mixes smoothly and retains structure during baking.
- 1/2 cup white sugar and 3/4 cup brown sugar: Brown sugar adds moisture and depth thanks to its molasses content, while white sugar gives structure and sweetness.
Creaming these together in a mixer until light and fluffy helps trap air, which gives your cookies that perfect soft center with lightly crisped edges.
The wet ingredients that pull it together
Next up:
- 2 large eggs: These help bind the dough while adding richness and structure.
- 2 teaspoons of vanilla extract: Use a high-quality vanilla to bring out the warm undertones of the chocolate and pistachio combo.
Add eggs one at a time, mixing just until they disappear. Overmixing here can toughen your dough.
Print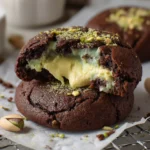
Dubai Chocolate Cookies Recipe – Pistachio & Kadayif Filled
- Total Time: 58 minutes
- Yield: 16 cookies
Description
Luxurious chocolate cookies inspired by Dubai, stuffed with creamy pistachio butter and crunchy toasted kadayif, for a decadent Middle Eastern treat.
Ingredients
Filling:
1 TBSP Unsalted Butter
1/2 cup Kadayif or Kataifi
1/2 cup Pistachio Cream or Pistachio Butter
Cookie Dough:
2 cups KAMUT® White Flour or All-Purpose White Flour
1/3 cup Cocoa Powder
1/2 tsp Fine Salt
1/2 tsp Baking Soda
1/2 tsp Baking Powder
12 TBSP Unsalted Butter
1/2 cup Sugar
3/4 cup Brown Sugar
2 Large Eggs
2 tsp Vanilla
1 cup Milk Chocolate Chips
Instructions
1. Melt 1 TBSP butter in a pan over low-medium heat, add kadayif, and toast until golden brown. Remove to cool.
2. Mix toasted kadayif with pistachio cream. Scoop 16 small mounds onto a tray and freeze.
3. In a bowl, whisk flour, cocoa powder, salt, baking soda, and baking powder. Set aside.
4. Cream 12 TBSP butter with sugars until smooth. Add eggs one at a time, then vanilla.
5. Add dry ingredients to wet and mix until just combined.
6. Stir in chocolate chips.
7. Scoop dough into 16 balls and flatten into 4-inch discs.
8. Chill discs for 30 minutes if using softened butter.
9. Place frozen filling in the center of each disc, wrap dough around, and seal. Place seam side down on trays.
10. Chill trays while preheating oven to 350°F (175°C).
11. Bake 18 minutes, rotating trays halfway. Cool on trays, then transfer to a wire rack.
Notes
If using cold butter, you can skip the initial dough chilling step.
Cookies can be frozen before or after baking for easy make-ahead treats.
For the best flavor, use pure pistachio cream with no added sugar or oils.
- Prep Time: 40 minutes
- Cook Time: 18 minutes
- Method: Baking
- Cuisine: Middle Eastern
How to Prepare the Pistachio & Kadayif Filling
Toasting the kadayif for maximum crunch
The filling is what sets these Dubai-style chocolate cookies apart. It brings a delightful contrast in texture and adds a nutty layer of flavor that pairs perfectly with the richness of the cookie dough.
To begin, you’ll need ½ cup of kadayif, also known as kataifi. This shredded phyllo dough is often used in Middle Eastern and Mediterranean desserts. Its delicate strands become incredibly crispy when toasted.
Start by melting 1 tablespoon of unsalted butter in a skillet over low to medium heat. Once the butter is fully melted and slightly foamy, add the kadayif. Stir continuously to ensure it toasts evenly without burning. This process usually takes about 5 to 7 minutes. When the strands turn golden brown and fragrant, remove the kadayif from the heat and let it cool completely on a clean plate. Allowing it to cool is essential, as you don’t want the residual heat to melt the pistachio cream in the next step.
Mixing the kadayif with pistachio cream
After the toasted kadayif has cooled, it’s time to add the creamy counterpart—½ cup of pistachio cream or pistachio butter. Look for a spread that’s smooth and made with pure pistachios for the best flavor. Avoid versions with added sugar or oils that can alter the taste and texture.
In a small bowl, combine the pistachio cream with the cooled kadayif. Stir gently to avoid breaking up the crunchy strands too much. The goal is to coat the kadayif without turning it into a paste. You should end up with a cohesive but textured filling.
Next, use a small cookie scoop to portion out the filling into 16 small mounds. Each should be about half to two-thirds full. Place these scoops on a parchment-lined baking sheet, leaving space between them, and then place the tray in the freezer. Freezing the filling is a crucial step—it firms up the mixture, making it easier to handle during assembly and preventing leakage during baking.
With the filling prepared and freezing, you’re now ready to move on to making the chocolate cookie dough that will wrap around this indulgent center.
Making the Chocolate Cookie Dough
Mixing the dry ingredients
Start by bringing together the dry ingredients you measured earlier:
- 2 cups of KAMUT® white flour or all-purpose white flour
- 1/3 cup of cocoa powder
- 1/2 teaspoon fine salt
- 1/2 teaspoon baking soda
- 1/2 teaspoon baking powder
Use a whisk or dough hook to combine them thoroughly in a large bowl. This step is simple but important—it ensures your leavening agents are evenly distributed, which helps the cookies rise properly and bake uniformly. Set the bowl aside once the mixture looks fully blended and smooth.
Creaming butter and sugars
Next, move on to your wet base. In the bowl of a stand mixer or using a hand mixer and large mixing bowl, combine:
- 12 tablespoons unsalted butter (room temperature)
- 1/2 cup white sugar
- 3/4 cup brown sugar
Beat the mixture on medium speed until it’s light and fluffy. This should take about 3 to 4 minutes. Creaming the butter and sugar properly is key for achieving cookies with the perfect soft and chewy texture. The mixture should appear pale and smooth.
Adding eggs and vanilla for structure and flavor
Once the butter and sugars are fully creamed, it’s time to add:
- 2 large eggs
- 2 teaspoons vanilla extract
Add the eggs one at a time, mixing just until each egg is incorporated. Scrape down the sides of the bowl after each addition to keep the batter consistent. Follow with the vanilla and give it one final short mix. Avoid overmixing at this stage, which can make the cookies dense and heavy instead of soft and tender.
Bringing it all together
Now take the dry ingredients and add them to the wet ingredients. Mix on low speed until just combined. You’re not looking for a completely smooth dough at this point—stop mixing once you no longer see dry flour. Overworking the dough here can lead to tough cookies, which is something you want to avoid with this indulgent recipe.
Finally, fold in:
- 1 cup of milk chocolate chips
Use a wooden spoon or sturdy spatula to incorporate the chocolate chips evenly throughout the dough. The chips should be well distributed, ensuring every bite of cookie has a burst of melty chocolate to complement the pistachio filling.
Your dough is now ready for the next step—portioning and shaping. With the base dough and filling prepped, it’s time to combine the two into one unforgettable cookie.
Shaping and Stuffing the Cookies
Now that your chocolate cookie dough is ready, it’s time to shape the cookies so they can be filled with that creamy pistachio and crunchy kadayif center.
Start by lining two baking sheets with parchment paper. Using a large 2-ounce cookie scoop, scoop out 16 even portions of dough. If you don’t have a cookie scoop, use a 1/4 measuring cup to ensure consistent sizing.
Take each dough ball and flatten it gently into a disc about 4 inches wide. There’s no need for precision—these discs don’t need to be perfectly round or symmetrical. The goal is to create enough surface area to easily wrap around the filling. If your dough is sticky, lightly flour your fingers or chill the dough for a few minutes to make handling easier.
At this point, if you used softened butter, place the trays with flattened dough discs into the fridge and let them chill for 30 minutes. This firming step will prevent the cookies from spreading too much during baking and help maintain a thick, chewy texture. If you used cold butter in the dough, you can skip this step.
Wrapping the frozen filling
Once your dough is prepped and chilled (if needed), it’s time to assemble the cookies.
Remove the pistachio-kadayif filling from the freezer. Working quickly, take one disc of cookie dough and place a single scoop of the frozen filling directly in the center. Then, fold the edges of the dough up around the filling, gently pressing and pinching the dough to seal it completely.
Roll the filled dough ball lightly in your hands to form a smooth mound, then place it seam-side down back onto the parchment-lined baking sheet. Repeat this process for all 16 cookies.
Make sure the cookies are spaced evenly apart on the trays, leaving enough room between them for minimal spreading.
Final chill before baking
With all cookies assembled, place the baking sheets back in the refrigerator. Chill them while you preheat your oven to 350°F. This final chill step locks in the shape of the cookies and keeps the filling contained during baking.
Once the oven reaches temperature, you’re ready to bake these decadent stuffed cookies to gooey, golden perfection.
Baking the Pistachio & Kadayif Filled Cookies
Preheating and baking
As your dough-filled cookies finish chilling, preheat your oven to 350°F (175°C). Be sure the oven is fully preheated before baking. This ensures even heat distribution and helps the cookies maintain their structure while achieving that soft, chewy center.
Once the oven is ready, take the trays out of the refrigerator and place them on the middle and lower racks. Bake the cookies for 18 minutes, making sure to rotate the trays halfway through the baking time. This step evens out any hot spots in the oven and ensures that both trays of cookies bake uniformly—crispy on the outside, gooey and rich inside.
The cookies are done when the edges are set and lightly crisp, but the centers may still appear soft. That’s exactly what you want. They’ll continue to set as they cool, resulting in a perfectly chewy, luxurious bite.
Cooling for texture and flavor
Remove the cookies from the oven and let them cool on the trays for about 10 minutes. This rest period allows the chocolate chips to solidify slightly and the interior to firm up, making them easier to handle without falling apart.
After cooling slightly, transfer the cookies to a wire rack to cool completely. Don’t rush this step—the filling inside retains heat longer than the cookie dough itself. Letting the cookies cool thoroughly will enhance the contrast between the creamy center and the crisp chocolate shell.
Once cooled, you’ll notice a satisfying crack when you break one open, revealing that vibrant pistachio filling surrounded by bits of crunchy toasted kadayif. It’s a stunning result that’s as impressive visually as it is delicious.
Storing and Freezing Your Cookies
How to store for lasting freshness
These cookies may look gourmet, but they’re surprisingly low-maintenance when it comes to storage. Once fully cooled, transfer the cookies to an airtight container. Store them at room temperature for up to 4 days. The pistachio filling retains its smooth texture, and the cookie stays soft without becoming overly crumbly or dry.
If you’re planning to enjoy them beyond that, refrigeration is another option. Place them in a sealed container and refrigerate for up to 1 week. Just let them sit at room temperature for about 10 minutes before eating so the filling softens again.
Freezing for future indulgence
These cookies freeze beautifully—both before and after baking.
To freeze unbaked cookies:
After assembling the dough around the pistachio-kadayif filling and shaping each ball, place the cookie dough on a tray and freeze until solid (about 2 hours). Once frozen, transfer them to a resealable freezer bag or airtight container. They’ll keep for up to 1 month. When you’re ready to bake, place them directly on a baking sheet and bake from frozen at 350°F, adding 2 to 3 extra minutes to the total bake time.
To freeze baked cookies:
Let them cool completely first, then freeze in a single layer or with parchment between each cookie to prevent sticking. Reheat at 300°F for about 5 minutes or let thaw at room temperature.
This flexibility makes the recipe perfect for batch baking or prepping ahead of time for events, holidays, or sudden sweet cravings. Whether fresh or frozen, the texture and flavor hold up impressively well, delivering that same luxurious bite every time.
Flavor Variations and Ingredient Swaps
Customizing the filling for different flavor profiles
While the original combination of pistachio and kadayif offers a uniquely rich and nutty Middle Eastern flair, you can get creative with the filling to match your preferences or available ingredients.
- Hazelnut spread: Swap the pistachio cream with a smooth hazelnut butter for a more chocolate-forward taste.
- Almond butter: Offers a mild, slightly sweet nuttiness that pairs well with dark or white chocolate.
- Tahini: For a more savory depth, try using tahini. It delivers a subtle sesame flavor that complements the chocolate beautifully.
Kadayif can be hard to find in some areas. In that case, you can substitute with:
- Finely shredded phyllo dough: It has a similar texture when toasted and delivers the same crispy contrast.
- Crushed cornflakes: If you’re in a pinch, this pantry staple adds crunch without requiring specialty shopping.
Swapping out the chocolate for new textures
Chocolate chips offer versatility. If you want to change things up:
- Dark chocolate chunks: Add a bold, bittersweet contrast to the sweet filling.
- White chocolate chips: Create a creamier, sweeter balance with the pistachio.
- Chopped ruby chocolate: For something visually stunning and unique in flavor, ruby chocolate introduces berry-like notes that brighten the entire cookie.
These substitutions allow you to tailor the recipe for different occasions, seasons, or dietary needs without losing the luxurious essence of the original.
Flour and dairy alternatives
For those looking to make these cookies a bit more accessible or diet-friendly:
- All-purpose gluten-free flour: Replace the wheat flour with a 1:1 gluten-free flour blend to make the recipe suitable for gluten-sensitive eaters.
- Vegan butter alternatives: Use a plant-based butter substitute to make the dough dairy-free. Just ensure it has a high-fat content to maintain texture.
- Egg replacement: Use flax eggs (1 tbsp flaxseed + 3 tbsp water per egg) to transform the recipe into a vegan-friendly version. The structure might be a bit softer, but the flavor remains intact.
With the right swaps, this Dubai Chocolate Cookies Recipe can suit nearly any lifestyle while still delivering a rich, indulgent experience.
Troubleshooting and Pro Baker Tips
Getting these stuffed cookies just right can feel intimidating, but a few simple tips help ensure success every time.
Don’t skip chilling the dough
Chilling is crucial, especially if you used softened butter in your dough. If you skip this step, your cookies may spread too much in the oven and lose their signature thick, chewy texture. For the best results, always chill the shaped cookies before baking, even if it’s just for 20–30 minutes.
Use cold fillings for easy handling
Keeping the pistachio-kadayif filling cold and firm makes it much easier to wrap the dough around each mound. If the filling softens, pop it back in the freezer for a few minutes.
Seal the dough well around the filling
Be sure the filling is completely enclosed in dough to prevent it from leaking during baking. Pinch and smooth the seams, and place the sealed side down on your baking sheet.
Weigh your ingredients
If you want bakery-style consistency, use a kitchen scale. Even small differences in flour or butter can affect the final texture.
Rotate baking trays
Halfway through baking, rotate and swap the trays between oven racks. This helps each batch bake evenly, preventing some cookies from being overdone while others remain underbaked.
Don’t overbake
The cookies should look slightly underdone in the center when you pull them from the oven. They’ll continue to cook from residual heat and will set up perfectly chewy and gooey.
Let them cool completely
For the best contrast between crisp edges and a creamy center, cool cookies fully on a wire rack. This also makes them easier to slice open and serve.
By paying attention to these small details, you’ll achieve professional-looking, mouthwatering Dubai Chocolate Cookies with that irresistible pistachio and kadayif filling every single time.
Conclusion
Creating these Dubai Chocolate Cookies – Pistachio & Kadayif Filled is about more than just baking a dessert. It’s about blending cultures, flavors, and textures in one unforgettable treat. With each bite, you get deep chocolate, creamy pistachio, and a whisper of crispy kadayif—a true showcase of what happens when you merge Middle Eastern inspiration with classic cookie comfort.
This recipe gives you enough flexibility to swap fillings or chocolate types, adjust for dietary needs, or prepare ahead for special occasions. The step-by-step guide helps ensure every batch turns out chewy, gooey, and visually stunning, whether you’re a beginner or seasoned baker.
Mastering the few pro tips—like chilling the dough, using cold filling, and careful baking—sets you up for consistent success. If you’re seeking an impressive dessert that’s both crowd-pleasing and unique, these Dubai chocolate cookies with pistachio and kadayif are a standout choice you’ll want to make again and again.