Looking for a quick dessert that’s rich, creamy, and guaranteed to please any crowd? This dirt cake recipe is just what you need. It’s a nostalgic no-bake treat made with crushed Oreos, creamy chocolate pudding, sweetened cream cheese, and fluffy whipped topping. Whether you’re prepping for a birthday party, holiday gathering, or just want something fun and satisfying, dirt cake is always a hit.
In this guide, we’ll cover everything from the classic recipe to creative twists, storage tips, and healthier options. You’ll learn how to layer it perfectly, avoid common pitfalls, and keep it looking great until it’s served. Plus, we’ve added answers to the most frequently asked questions and pro tips to elevate your dessert game.
Contents
- 1 What Is Dirt Cake? The Fun Behind the Favorite
- 2 Dirt Cake Recipe
- 3 Classic Dirt Cake Recipe Explained
- 4 Dirt Cake with a Twist – Fun Variations to Try
- 5 Tips for Making the Best Dirt Cake Ever
- 6 No-Bake Benefits – Why Dirt Cake Wins
- 7 Kid-Friendly Toppings and Decorating Ideas
- 8 Healthier Swaps and Diet-Friendly Options
- 9 Make-Ahead and Storage Guide
- 10 Conclusion
What Is Dirt Cake? The Fun Behind the Favorite
The origin and popularity of the dirt cake recipe
The dirt cake recipe emerged as a creative way to get kids excited about dessert. The name comes from its playful appearance, crumbled chocolate cookies resemble soil, and when paired with gummy worms or flowers, the illusion is complete. First seen in Midwestern kitchens in the 1980s, it quickly became a staple at school functions and potlucks across the U.S.
Dirt cake thrives on its simplicity. It doesn’t require baking, it’s easy to customize, and it brings a whimsical charm to any event. Over the decades, the recipe has evolved to include various puddings, toppings, and even themed versions like Halloween or garden party dirt cakes.
Why it’s called “dirt cake” and what makes it special
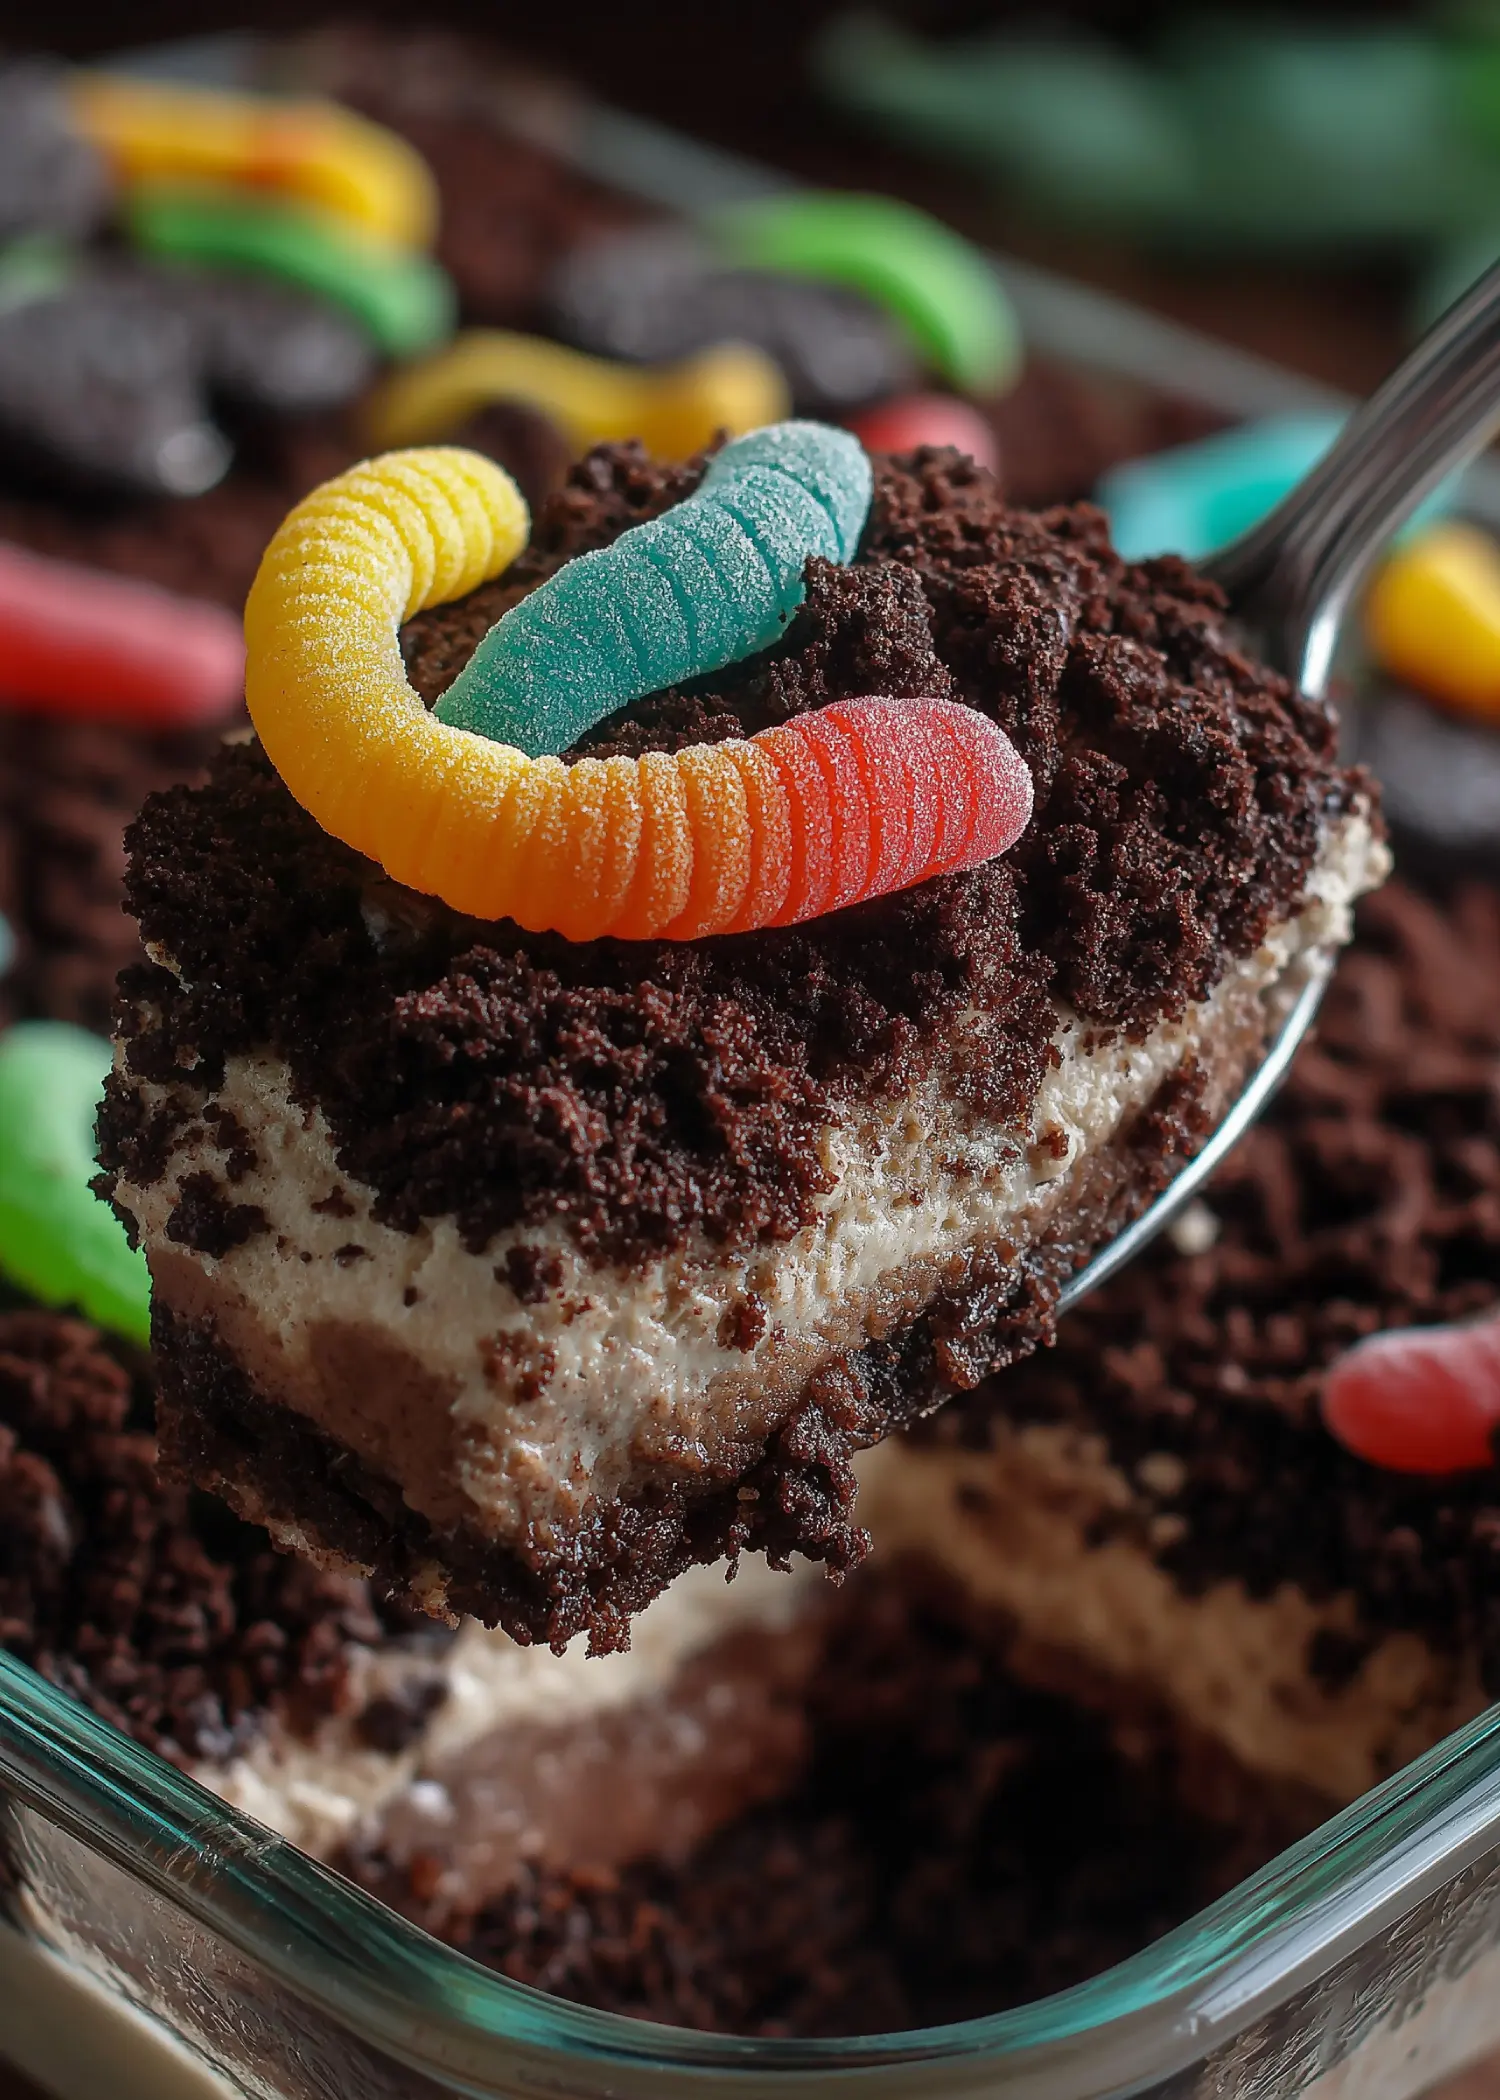
The magic lies in the presentation. Crushed Oreos resemble dirt, and when layered with smooth, sweet pudding and fluffy whipped topping, you get a dessert that’s both fun and delicious. It’s not just a visual novelty, it tastes incredible. The cookies add a slight crunch and cocoa richness, while the pudding and cream cheese layer bring a luscious, creamy texture.
Families love it because it’s easy to make with kids. Party planners love it because you can prep it ahead. And chocolate lovers? They go wild for every spoonful.
Key ingredients that define an authentic dirt cake
At its core, a traditional dirt cake recipe calls for just a few pantry staples:
- Oreos: The base of the “dirt” layer. Use original or double-stuffed for extra creaminess.
- Instant pudding: Chocolate is classic, but vanilla or French vanilla also work.
- Cream cheese: Adds tang and richness to balance the sweetness.
- Powdered sugar: Light and fine, it blends perfectly into the cream mixture.
- Milk: Used to set the pudding.
- Butter: Helps with smooth blending and richness.
- Whipped topping (like Cool Whip): Provides the fluffy, cloud-like texture that defines this dessert.
These ingredients are all easy to find, making this cake both budget-friendly and convenient.
Print
Dirt Cake Recipe
- Total Time: 2 hours 15 minutes
- Yield: 12 servings 1x
- Diet: Vegetarian
Description
This easy no-bake dirt cake recipe layers crushed Oreos, creamy chocolate pudding, and fluffy whipped topping for a fun dessert perfect for parties, kids, and chocolate lovers.
Ingredients
14.3 oz. package Oreo cookies
3 cups cold milk
2 (3.4 oz) boxes instant chocolate pudding mix
8 oz. cream cheese, softened
¼ cup butter, softened
1 cup powdered sugar
8 oz. whipped topping (like Cool Whip)
Optional: gummy worms or candy rocks for topping
Instructions
1. Crush the Oreos into fine crumbs using a food processor or rolling pin. Spread half into a 9×13″ glass baking dish.
2. In a medium bowl, mix the milk and pudding mix until smooth. Chill for 5 minutes to set.
3. In another bowl, beat together the cream cheese and butter until smooth. Add powdered sugar and mix until fully combined.
4. Fold the chilled pudding into the cream cheese mixture. Then gently fold in the whipped topping until smooth.
5. Spread the cream layer over the crushed Oreos in the pan.
6. Top with the remaining Oreo crumbs.
7. Cover and chill for at least 2 hours before serving.
8. Add gummy worms or candy decorations right before serving, if desired.
Notes
This dirt cake recipe can be made up to 24 hours in advance and stored in the refrigerator. To create variations, try using vanilla or white chocolate pudding and Golden Oreos. For a healthier version, use sugar-free pudding and dairy-free whipped topping.
- Prep Time: 15 minutes
- Cook Time: 0 minutes
- Category: Dessert
- Method: No-Bake
- Cuisine: American
Nutrition
- Serving Size: 1 slice
- Calories: 420
- Sugar: 32g
- Sodium: 330mg
- Fat: 22g
- Saturated Fat: 10g
- Unsaturated Fat: 9g
- Trans Fat: 0g
- Carbohydrates: 52g
- Fiber: 2g
- Protein: 5g
- Cholesterol: 35mg
Classic Dirt Cake Recipe Explained
Step-by-step instructions for the original dirt cake recipe
The classic dirt cake recipe is as straightforward as it is indulgent. With zero oven time and minimal prep, you’ll go from ingredients to dessert in under 20 minutes (plus chill time). Here’s how to build it layer by creamy layer.
Ingredients You’ll Need:
- 1 (14.3 oz) package of Oreo cookies
- 2 (3.4 oz) boxes of instant chocolate pudding mix
- 3 cups cold milk
- 1 (8 oz) package cream cheese, softened
- ¼ cup butter, softened
- 1 cup powdered sugar
- 1 (8 oz) tub whipped topping (like Cool Whip), thawed
Instructions:
- Crush the Oreos
Using a food processor or rolling pin, crush the Oreos into fine crumbs. You want a soil-like texture. Divide the crumbs in half. - Make the pudding
In a medium bowl, mix the cold milk and chocolate pudding mix until smooth. Let it set in the refrigerator while you prep the next step. - Cream the base
In a large mixing bowl, beat together the butter and cream cheese until smooth. Add powdered sugar and mix until fully combined. - Blend the layers
Fold the set pudding into the cream cheese mixture. Stir until smooth. Then gently fold in the whipped topping to keep it fluffy. - Layer the dessert
In a 9×13-inch dish, spread half of the crushed Oreos as the base layer. Dollop the creamy pudding mixture over the crumbs and spread evenly. Finish by topping it with the remaining Oreo crumbs. - Chill and serve
Cover and refrigerate for at least 2 hours before serving. Add gummy worms or themed candy if desired for decoration.
This basic dirt cake can easily serve 12 and holds its shape well, making it perfect for scooping at parties. The chilling time allows the layers to set, making every bite rich and satisfying.
Ingredient breakdown and recommended brands
When making the dirt cake recipe, ingredient quality affects both taste and texture. Here’s a breakdown of top-recommended picks:
| Ingredient | Recommended Brand | Notes |
|---|---|---|
| Oreo Cookies | Nabisco Original Oreos | Avoid flavored versions |
| Instant Pudding | JELL-O Chocolate | Choose instant, not cook & serve |
| Milk | Whole Milk | Creamier consistency |
| Cream Cheese | Philadelphia | Brings balance with a hint of tang |
| Whipped Topping | Cool Whip | Thaws easily and mixes smoothly |
| Butter | Unsalted Land O’Lakes | Softer texture and better blending |
These classic brands deliver consistent results. However, store brands can work just as well—just make sure to use instant pudding and a full-fat cream cheese for the best taste.
Tips for perfect layering and presentation
To get a dirt cake that not only tastes amazing but also looks great:
- Smooth the cream layer with a spatula for even distribution.
- Use a glass dish to show off the layers visually, especially for events.
- Layer gently to avoid mixing the pudding into the bottom Oreo layer.
- Chill overnight if you have time. It sets better and develops richer flavor.
Adding decorations like gummy worms, candy rocks, or edible flowers boosts the fun factor. You can even portion into clear cups for single servings, making them perfect for kids’ parties.
Dirt Cake with a Twist – Fun Variations to Try
Vanilla and white chocolate dirt cake versions
While the classic dirt cake recipe uses chocolate pudding and Oreos, the fun doesn’t stop there. You can easily create lighter, equally delicious versions using vanilla or white chocolate pudding. These options are great for those who prefer a milder taste or want a themed dessert with colored toppings.
Vanilla Dirt Cake
Swap the chocolate pudding for French vanilla or classic vanilla pudding mix. Use Golden Oreos instead of the regular ones to keep the flavor profile light and sweet. This version pairs well with pastel-colored toppings and is perfect for springtime events or baby showers.
White Chocolate Dirt Cake
Use white chocolate instant pudding and layer it with crushed chocolate or vanilla sandwich cookies. The result is a sweet and creamy dessert with a sophisticated twist. Try topping it with white chocolate shavings or edible pearls for a grown-up version of a childhood classic.
Halloween and birthday party-themed dirt cakes
Dirt cake is the ultimate canvas for creativity. Whether you’re throwing a spooky Halloween bash or a colorful birthday party, this dessert can be customized to match any vibe.
Halloween Dirt Cake
Add orange and purple layers using colored pudding or food-safe gel. Decorate with gummy worms, candy pumpkins, edible eyeballs, or graveyard toppers made from cookies. Serve it in a clear trifle bowl to show off the creepy layers.
Birthday Dirt Cake
Use colored sprinkles, candy flowers, or themed toppers like dinosaurs, princess figurines, or LEGO pieces. You can even make a rainbow version by layering different flavors of pudding. For individual servings, serve in small cups with a spoon stuck in like a mini garden pot.
Peanut butter, mint, and fruit variations of dirt cake
Craving a twist on the traditional? These flavor-forward ideas bring a gourmet edge to the classic dirt cake recipe.
Peanut Butter Dirt Cake
Add ½ cup of creamy peanut butter to the cream cheese mixture for a salty-sweet surprise. Top with chopped Reese’s cups or peanut butter chips for extra indulgence. Use chocolate Oreos to balance the richness.
Mint Oreo Dirt Cake
Use mint-flavored Oreos and add ½ teaspoon of peppermint extract to the cream mixture. A few drops of green food coloring give it a festive touch. Garnish with chocolate mint leaves or Andes mints for a cool, refreshing bite.
Strawberry or Berry Dirt Cake
Use vanilla pudding and fold in diced fresh strawberries or raspberries. Top with a mix of crushed vanilla wafers and golden Oreos. This fruity version feels lighter and makes a perfect summer dessert.
You can also combine these ideas by layering peanut butter and chocolate, or adding a fruity topping to vanilla pudding.
Tips for Making the Best Dirt Cake Ever
Mistakes to avoid during preparation
Even with a recipe as simple as the dirt cake recipe, a few small missteps can affect the final result. Here’s what to watch out for:
1. Overmixing the pudding:
Once you prepare the pudding, avoid over-stirring or re-mixing after it has set. Doing so can make it watery or grainy. Stir gently just before folding into the cream cheese mixture.
2. Not softening the cream cheese and butter:
Cold cream cheese and butter won’t mix smoothly and can leave lumps in your dessert. Make sure they’re fully softened at room temperature for a smooth and creamy blend.
3. Skipping chill time:
Dirt cake needs at least 2 hours of chilling so the layers can firm up. Skipping this step may cause your cake to be too runny when served.
4. Crushing Oreos too finely or not enough:
You want fine crumbs, but not powder. Using a food processor gives even results, while a rolling pin works well if you’re aiming for slightly chunky bits for texture.
How to keep the pudding layer smooth and fluffy
The pudding layer is the star of this cake, so getting it just right is key.
- Use cold milk. Instant pudding sets quickly with cold liquid, giving you that thick, luscious texture.
- Fold, don’t beat. When combining pudding and whipped topping, gently fold the mixture. Beating it aggressively can deflate the whipped topping and make the mixture too dense.
- Don’t let it sit too long. Mix and layer the pudding as soon as it’s thickened. Letting it rest too long before layering can result in separation.
For a fluffier texture, you can also use extra whipped topping or even layer in some marshmallow fluff for added lift and sweetness.
Storage, freshness, and serving tricks
Dirt cake isn’t just easy to make—it’s also easy to store and serve with just a little prep.
Storage Tips:
- Refrigerate covered: Use plastic wrap or a tight-fitting lid to prevent the cake from drying out or absorbing fridge odors.
- Make up to 24 hours in advance: This dessert holds up well overnight and often tastes better the next day after the flavors have blended.
- Lasts up to 4 days: It’s best enjoyed within 3 to 4 days before the cookie layer becomes too soft.
Serving Tips:
- Use a large spoon or flat spatula to serve in clean slices.
- Garnish just before serving if using toppings like gummy worms or fresh fruit to keep them fresh and vibrant.
- Serve chilled straight from the fridge. This dessert does not hold up well at room temperature for long, especially during summer.
No-Bake Benefits – Why Dirt Cake Wins
Why no-bake desserts are trending
No-bake desserts like the dirt cake recipe have surged in popularity in recent years—and for good reason. These treats are not only fast and simple to prepare but also incredibly versatile. With no need to fire up the oven, you can whip up a delicious dessert anytime, even during hot summer months.
No-bake recipes are also less intimidating for beginner cooks. They require minimal equipment, fewer steps, and offer plenty of room for customization. Whether you’re hosting a party or simply need something sweet on short notice, no-bake options save time and stress without sacrificing flavor.
Plus, they’re perfect for kids to help with—mixing pudding, crushing cookies, and layering ingredients is easy and mess-friendly fun.
Time-saving perks of no-bake treats
When time is tight, no-bake desserts offer a perfect solution. Here’s how a dirt cake recipe can save your day:
- 15 minutes or less of active prep time. Just mix, layer, and chill.
- No baking, no cooling required. Unlike traditional cakes, dirt cake doesn’t need to sit in the oven or on the counter to cool before serving.
- Fewer dishes. Since there’s no baking, cleanup is minimal. Most of the mixing can be done in one or two bowls.
- Flexible timing. You can make it several hours ahead or even the night before, freeing up time for other party prep.
Whether you’re a busy parent, student, or party host, this kind of dessert lets you get creative without overcommitting your kitchen or schedule.
Perfect for kids, parties, and hot days
Dirt cake shines brightest at casual gatherings and family events. Its familiar ingredients and fun, layered look make it a guaranteed crowd-pleaser.
Why Kids Love It:
- The cookie crumbs and “dirt” look is a hit.
- Gummy worms or candy bugs add excitement.
- It’s soft and easy to eat, even for little ones.
Why Parents Love It:
- Quick to make, minimal mess.
- Customizable for themes and allergies.
- Can be served in cups for single-serve, mess-free portions.
Why It’s a Summer Favorite:
- No oven heat in the kitchen.
- Served cold—super refreshing.
- Easy to transport and store in coolers for picnics and outdoor events.
This dessert is also a hit at potlucks, sleepovers, cookouts, and baby showers. It’s familiar, nostalgic, and indulgent—all in one chilled slice.
Kid-Friendly Toppings and Decorating Ideas
Using gummy worms and candies for creative flair
What makes the dirt cake recipe so fun for kids? It’s all in the toppings. The base may be creamy and chocolatey, but the real excitement happens on top—where imagination meets sugar.
Here are kid-approved additions that take your dirt cake from yummy to unforgettable:
- Gummy worms: The classic! Nestle them into the “dirt” so they peek out.
- Candy rocks or pebbles: These chocolate-coated candies resemble real stones, adding a realistic and colorful touch.
- Mini chocolate chips: Sprinkle them over the top to mimic gravel or tiny pebbles.
- Licorice sticks: Slice into mini garden “stakes” or use as logs or barriers.
- Chocolate sprinkles: Add depth and contrast to the Oreo “soil” topping.
You can even let kids decorate their own individual dirt cake cups, adding toppings buffet-style. It turns dessert into a fun DIY activity.
Making themed dirt cake for special occasions
The beauty of dirt cake lies in how adaptable it is. With a few changes, you can make it perfect for any holiday or event.
Holiday Ideas:
- Halloween: Add ghost-shaped marshmallows, candy eyeballs, or “gravestones” made from cookies. Use orange-tinted pudding or a layer of crushed chocolate graham crackers for variety.
- Christmas: Add peppermint candies, red and green sprinkles, or mini candy canes. Use white chocolate pudding for a snowy theme.
- Easter: Top with candy eggs, edible flowers, or marshmallow bunnies. Try golden Oreos and vanilla pudding for a spring look.
Birthday Ideas:
- Use the child’s favorite candy or action figure to theme the top.
- Add personalized name tags or mini birthday candles.
- Use layers of tinted pudding to match party colors.
Baby Showers or Gender Reveals:
- Use pink or blue pudding inside to surprise guests when serving.
- Add pastel candies, edible glitter, or “It’s a boy/girl” toppers.
By simply changing colors and toppings, your dirt cake recipe becomes a canvas for every occasion.
Tips for letting kids decorate safely
Getting kids involved is a great way to make memories. Here are some tips for keeping it fun and safe:
- Pre-crush cookies and prepare toppings in advance to minimize mess and sharp tools.
- Use plastic cups or mini mason jars so each child can make their own portion.
- Provide clean spoons or tongs for handling toppings.
- Supervise during candy decorating to avoid choking hazards for younger kids.
Letting kids take ownership of their dessert helps them feel involved and keeps them excited about eating something they made themselves.
Healthier Swaps and Diet-Friendly Options
How to make a low-sugar or dairy-free dirt cake
While the traditional dirt cake recipe is a rich indulgence, you can easily lighten it up without losing the fun or flavor. Whether you’re watching sugar intake or avoiding dairy, there are smart ingredient swaps you can make.
For a lower sugar version:
- Use sugar-free pudding mix: Most grocery stores carry sugar-free instant pudding options in chocolate, vanilla, and even cheesecake flavors.
- Swap Oreos for sugar-free cookies: Look for keto or low-carb chocolate sandwich cookies or make your own.
- Replace powdered sugar with a sugar-free substitute like erythritol or monk fruit powder. These measure cup-for-cup like traditional sugar.
- Use light whipped topping: Cool Whip Lite or Truwhip Skinny are great alternatives that offer lower sugar and calories.
For a dairy-free version:
- Use almond or oat milk for setting the pudding—just ensure it’s unsweetened and thick enough to activate the pudding.
- Choose dairy-free cream cheese like Kite Hill or Daiya brands.
- Opt for coconut whipped topping instead of traditional Cool Whip. It has a slightly nutty flavor but blends well with the chocolate base.
With these adjustments, you can make the dirt cake recipe accessible to guests with dietary needs while still keeping it crowd-pleasing.
Avoiding gluten doesn’t mean skipping dessert. There are several great substitutes available that make this recipe safe and satisfying for gluten-sensitive folks.
Gluten-Free Cookie Options:
- Glutino Chocolate Vanilla Creme Cookies
- Kinnikinnick KinniToos
- Simple Mills Chocolate Sandwich Cookies
- Homemade gluten-free sandwich cookies
Pulse these in a food processor like you would regular Oreos. The taste is still chocolaty and crunchy, and they mimic the same “dirt” texture.
Alternative pudding bases:
- Cornstarch-based homemade pudding: Cook your own using almond milk, cocoa powder, cornstarch, and maple syrup.
- Dairy-free boxed pudding: Brands like Simply Delish offer gelatin-free, allergen-conscious pudding mixes.
These alternatives work seamlessly in the layering process and maintain the silky texture that defines dirt cake.
Portion control and nutritional tips
Even with the best ingredients, portion control makes a big difference. Here’s how to enjoy dirt cake without going overboard:
- Serve in individual cups or jars: This naturally limits the serving size and makes it easier to track.
- Add fresh fruit: Layer sliced bananas or strawberries into the cake for added fiber and nutrients.
- Cut the sweetness: A small pinch of salt in the pudding layer enhances flavor while reducing the need for added sugar.
Want to keep it balanced? Serve dirt cake alongside a fresh fruit platter to give guests options that complement the indulgence.
Make-Ahead and Storage Guide
Can you freeze dirt cake? Yes, here’s how
The dirt cake recipe is known for being fridge-friendly, but it can also be frozen with the right preparation. If you’re making it ahead for a party or just want leftovers to last longer, here’s what you need to know.
Freezing Dirt Cake:
- Use a freezer-safe container: Glass or plastic with a tight-fitting lid works best. If using a foil tray, wrap tightly in plastic wrap, then again in foil.
- Leave off toppings: Add gummy worms, candy, or decorations after thawing so they don’t become soggy or sticky.
- Freeze up to 2 months: For best texture, don’t exceed 60 days. The pudding may start to separate after that.
- Thaw in the fridge overnight: Avoid microwaving or quick-thaw methods to keep the creamy texture intact.
Freezing in individual servings is a great way to have grab-and-go desserts on hand. Just pack each portion in a lidded cup or container.
Best containers and wrapping methods
Whether refrigerating or freezing, choosing the right storage method keeps your dirt cake recipe fresh and delicious.
For Refrigeration:
- Store in a 9×13-inch baking dish with a fitted lid or cover tightly with plastic wrap.
- If portioned in cups or jars, use lids or cover with plastic and secure with rubber bands.
For Freezing:
- Use shallow containers to promote even freezing and easier thawing.
- Place parchment or wax paper between the pudding and lid if storing in metal pans to prevent freezer burn.
Pro Tip: If storing multiple layers or party trays, place cardboard between stacked containers to protect the toppings and keep layers intact.
How long dirt cake lasts in the fridge
The layered pudding dessert is at its best within a few days. Here’s a breakdown of freshness timing:
| Storage Method | Shelf Life | Notes |
|---|---|---|
| Refrigerated | 3–4 days | Keep covered to avoid drying out |
| Frozen | Up to 2 months | Thaw overnight in fridge |
| Individual servings | 4–5 days | Great for packed lunches or snacking |
If your dirt cake has fruit or fresh toppings, consume within 2–3 days for best texture. Always check for changes in smell or appearance before eating leftovers.
Conclusion
The dirt cake recipe is more than just a nostalgic dessert—it’s the ultimate no-bake crowd-pleaser that’s simple to make, easy to customize, and always fun to serve. Whether you stick to the classic version with chocolate pudding and Oreos or explore creative twists with vanilla layers, gummy worms, or healthier alternatives, there’s a version of dirt cake for every occasion and dietary need.
Its kid-friendly design and quick prep time make it a staple for birthdays, potlucks, summer cookouts, and weeknight cravings. Plus, with make-ahead convenience and freezer-friendly options, you’ll always have a sweet solution ready.
For More Delicious And Easy Recipes Follow Me In Facebook And Pinterest.
