If you’re dreaming of a dessert that’s rich, warm, and impressively simple, this chocolate lava cake recipe is the one to try. With its soft cake outside and gooey chocolate center, it’s a restaurant-style favorite you can make right at home in under 30 minutes. Whether it’s date night, a celebration, or just a chocolate craving, this dessert hits the sweet spot.
Contents
- 1 PART 1: Introduction to the Chocolate Lava Cake Recipe
- 2 Ingredients and Tools You’ll Need
- 3 Chocolate Lava Cake Recipe
- 4 Step-by-Step Chocolate Lava Cake Recipe
- 5 Baking Techniques and Tips
- 6 Demolding and Serving Like a Pro
- 7 Variations of Chocolate Lava Cake Recipe
- 8 Common Mistakes and Troubleshooting
- 9 Storage, Reheating & Make-Ahead Tips
- 10 Conclusion
PART 1: Introduction to the Chocolate Lava Cake Recipe
What is a Chocolate Lava Cake?
A chocolate lava cake is a small cake with a firm outer layer and a melted chocolate center. Once you cut into it, warm chocolate flows out like lava, giving it the name. It’s soft, rich, and best served warm. You don’t need any frosting — the inside does all the work.
This dessert is perfect for anyone who loves chocolate but wants something quick and fancy at the same time.
Where Did Lava Cake Come From?
This Chocolate Lava Cake became famous in the 1980s, thanks to chef Jean-Georges Vongerichten. He accidentally underbaked a chocolate cake, and when the center stayed liquid, he turned it into a signature dessert. Since then, it’s been a top pick at restaurants and a favorite for home bakers too.
Over time, people started creating versions filled with caramel or fruit, but the original molten chocolate cake remains a classic.
Ingredients and Tools You’ll Need
Essential Ingredients for the Perfect Chocolate Lava Cake
To make the best chocolate lava cake recipe, you don’t need a long list of items. In fact, the beauty of this dessert lies in its simplicity. Here’s what you’ll need for 6 individual cakes:
| Ingredient | Amount | Notes |
|---|---|---|
| Unsalted Butter | ½ cup (113g) | Adds richness and helps create a gooey texture |
| Bittersweet Chocolate | 6 oz (168g) | Choose high-quality chocolate for deep flavor |
| Large Eggs | 2 whole eggs | Room temperature is best for easy mixing |
| Large Egg Yolks | 2 extra yolks | Adds creaminess and structure |
| Granulated Sugar | ¼ cup (50g) | Light sweetness without overpowering |
| Salt | ⅛ teaspoon | Enhances the chocolate taste |
| All-Purpose Flour | 2 tablespoons | Just enough to hold the cake together |
Pro Tip: Use room temperature eggs to blend smoothly into the batter. If needed, place cold eggs in a bowl of warm water for 5 minutes before use.
Avoid overpacking flour. Lightly spoon it into your measuring spoon — too much flour makes the center less gooey.
Must-Have Kitchen Equipment
For consistent results, make sure you have the right tools on hand. These help keep the process simple and stress-free.
| Tool | Purpose |
|---|---|
| Ramekins | 4- to 5-ounce ramekins are perfect for baking and shaping the Chocolate Lava Cake |
| Baking Sheet | Makes it easier to transfer ramekins in and out of the oven safely |
| Double Boiler | Ideal for gently melting chocolate and butter without burning |
| Mixing Bowls | Needed for beating eggs and combining ingredients |
| Electric Mixer | Helps beat eggs and sugar until light and thick |
| Spatula | For folding the chocolate and flour into the batter |
You can also use a microwave-safe bowl instead of a double boiler if preferred. Just melt in short bursts and stir every 30 seconds to avoid overheating.
Print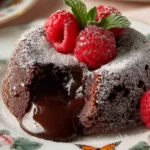
Chocolate Lava Cake Recipe
- Total Time: 22 minutes
- Yield: 6 cakes 1x
- Diet: Vegetarian
Description
A rich and gooey chocolate lava cake recipe that’s easy to make at home in just 22 minutes. With a soft outer shell and a molten chocolate center, this dessert is perfect for any special occasion or indulgent night in.
Ingredients
½ cup unsalted butter (113g)
6 ounces bittersweet chocolate, chopped (168g)
2 large eggs
2 large egg yolks
¼ cup granulated sugar (50g)
⅛ teaspoon salt
2 tablespoons all-purpose flour
Instructions
1. Preheat the oven to 450°F (232°C). Grease and lightly flour six 4- to 5-ounce ramekins. Place them on a baking sheet.
2. Melt butter and chocolate together in a double boiler or microwave in 30-second intervals until smooth. Stir well.
3. In a mixing bowl, beat eggs, egg yolks, sugar, and salt until thick and pale yellow.
4. Gently fold the melted chocolate mixture into the egg mixture.
5. Sprinkle in the flour and fold until just combined. Do not overmix.
6. Divide the batter evenly between the prepared ramekins.
7. Bake for 6 to 8 minutes, until the sides are set and the center is still slightly jiggly.
8. Cool for 1 minute. Invert each ramekin onto a dessert plate, wait 10 seconds, and lift off carefully.
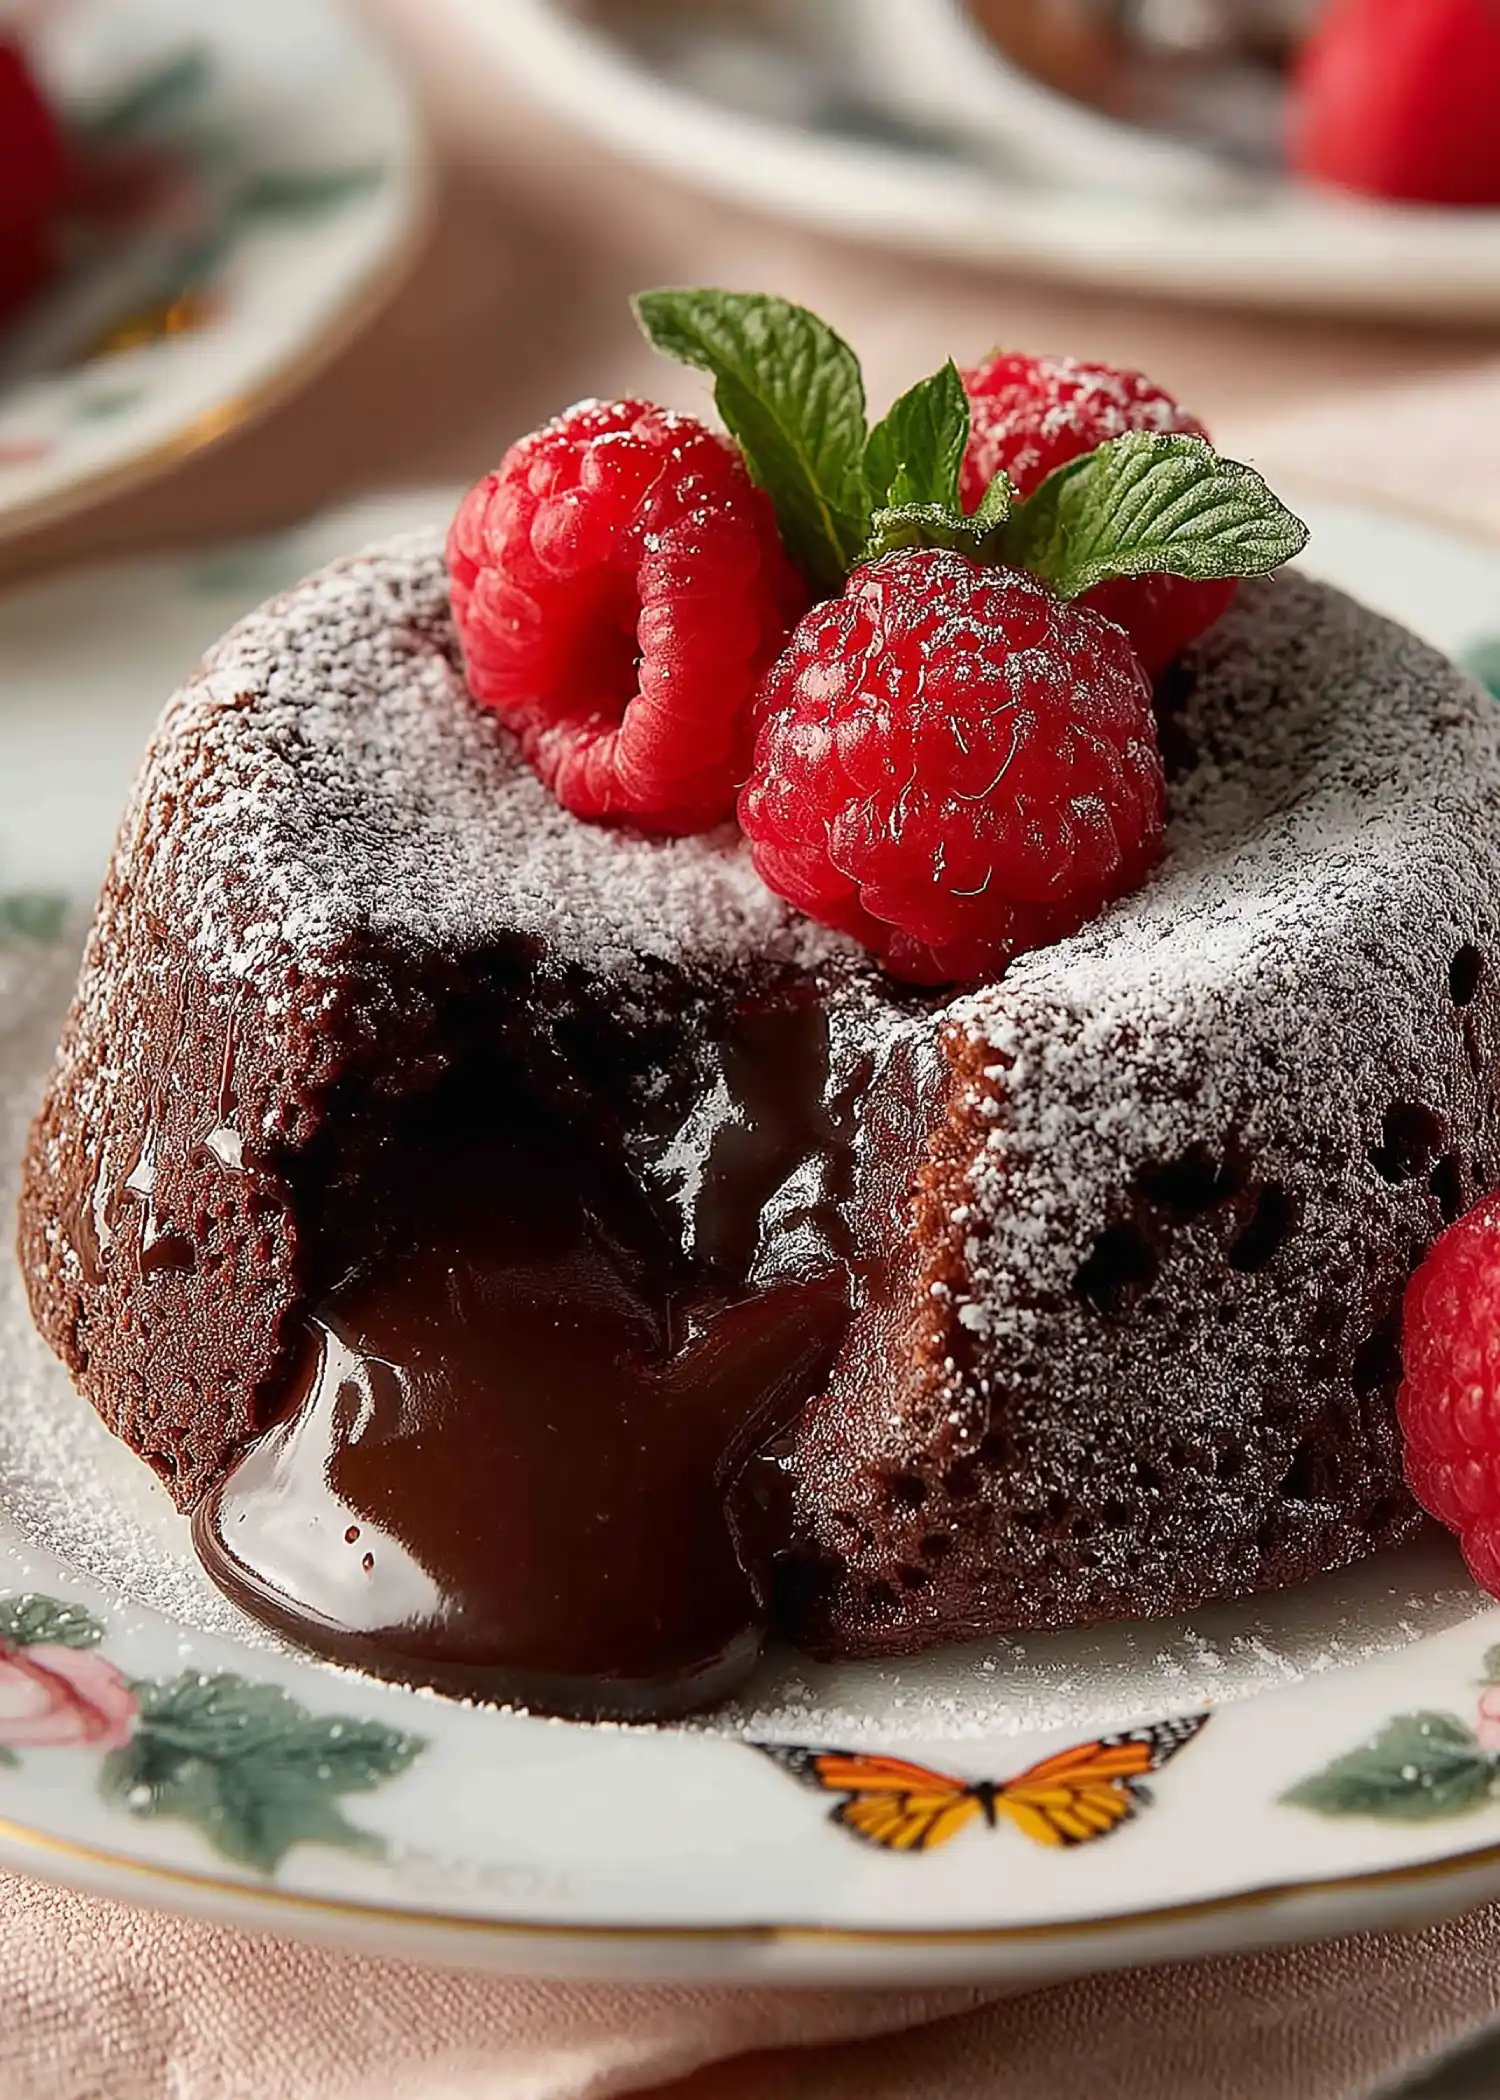
9. Dust with powdered sugar and garnish with berries if desired. Serve immediately.
Notes
Make sure not to overbake. The center should remain gooey.
Use room temperature eggs for easier mixing.
Measure flour loosely — too much can ruin the lava center.
Best served fresh, but leftovers can be stored or frozen.
Add fillings like peanut butter or caramel for fun variations.
- Prep Time: 13 minutes
- Cook Time: 8 minutes
- Category: Cakes Recipes
- Method: Baking
- Cuisine: American
Nutrition
- Serving Size: 1 cake
- Calories: 383
- Sugar: 19
- Sodium: 80
- Fat: 29
- Saturated Fat: 17
- Unsaturated Fat: 10
- Trans Fat: 1
- Carbohydrates: 25
- Fiber: 2
- Protein: 5
- Cholesterol: 166
Step-by-Step Chocolate Lava Cake Recipe
Now that you’ve got everything ready, it’s time to bring your chocolate lava cake recipe to life. Follow this step-by-step guide for gooey, rich, and perfectly baked molten cakes every time.
Preparing the Ramekins and Preheating
Before you start mixing the batter, preparation is key. Preheat your oven to 450°F (232°C). This high temperature helps the outside bake quickly while the center stays molten.
Next, grease 6 ramekins (4 to 5 ounces each) with butter, then lightly dust them with flour. This prevents sticking and helps the Chocolate Lava Cake release cleanly after baking. Place the ramekins on a baking sheet for easier handling in and out of the oven.
Melting Chocolate and Butter Properly
Using a double boiler or a microwave-safe bowl, combine:
- ½ cup unsalted butter (113g)
- 6 ounces chopped bittersweet chocolate (168g)
Double Boiler Method: Heat over low heat, stirring until fully melted and smooth.
Microwave Method: Microwave on high in 30-second intervals, stirring each time until melted. Usually, two to three rounds are enough.
Once melted, stir until the mixture is glossy and set it aside to cool slightly.
Mixing the Batter to Achieve the Right Texture
In a large mixing bowl, beat the following on medium speed:
- 2 large eggs
- 2 large egg yolks
- ¼ cup granulated sugar (50g)
- ⅛ teaspoon salt
Beat until the mixture is pale yellow, thick, and slightly foamy. This usually takes about 3–4 minutes with an electric mixer.
Now, gently fold in the melted chocolate mixture. Use a spatula to combine without deflating the air. Next, sprinkle in 2 tablespoons of all-purpose flour. Fold until everything is just combined. Be careful not to overmix — you want a light and airy texture.
Dividing and Baking the Batter
Evenly pour the batter into your prepared ramekins. Each should be about ¾ full. Place the baking sheet with ramekins into the preheated oven.
Bake for 6 to 8 minutes. The edges should be firm, while the centers should still look slightly jiggly when gently shaken.
Overbaking will cook the center too much, ruining the lava effect. So, watch closely.
Cooling and Inverting the Chocolate Lava Cake
Once out of the oven, let the Chocolate Lava Cake rest in the ramekins for 1 minute. This helps them firm up just enough to hold shape.
Then, carefully place a dessert plate over each ramekin and flip it over. Let it stand for 10 seconds, then lift the ramekin to release the Chocolate Lava Cake.
The result? A warm, soft cake with a gooey chocolate center just waiting to be enjoyed.
For a finishing touch, dust with powdered sugar and add fresh berries if desired.
Baking Techniques and Tips
Even though this chocolate lava cake recipe is beginner-friendly, a few baking tricks can make the difference between a good dessert and a perfect one. Here’s how to make sure your molten cakes come out exactly right — gooey in the middle, firm on the outside, and full of flavor.
How Long to Bake for a Gooey Center
Timing is everything when it comes to molten chocolate cakes. Since the goal is to have a soft center and fully baked edges, the typical baking window is between 6 to 8 minutes at 450°F.
- At 6 minutes, you’ll get a very soft center — almost pourable.
- At 7 minutes, the balance is perfect — gooey middle and firm outer shell.
- At 8 minutes, the center will begin to set more, with less lava flow.
Tip: Use your oven light and gently shake the tray after 6 minutes. If the sides are set and the center jiggles slightly, they’re ready. No need to insert a toothpick — that’ll give misleading results.
How to Check for Doneness Without Overbaking
The top of the Chocolate Lava Cake should look puffed and matte, not glossy or wet. If the top cracks slightly and springs back when touched, that’s a great sign.
Still unsure? Here’s a quick cheat:
| Sign | What It Means |
|---|---|
| Center is jiggly, sides are set | Perfect molten lava cake |
| Center is firm | Overbaked, less lava |
| Sides are too soft | Underbaked, won’t unmold cleanly |
Why Temperature Matters
Preheating the oven properly is non-negotiable. You want high heat to set the Chocolate Lava Cake’s edges quickly while keeping the inside liquid.
If your oven runs cool or heats unevenly, use an oven thermometer to double-check. Lava cakes need that hot blast from the start to get that signature contrast between textures.
Using the Right Ramekins
Choose ramekins that hold 4 to 5 ounces. Bigger ones may result in undercooked centers, and smaller ones may overflow. Stick to ceramic ramekins for even baking.
Tips for Consistent Results Every Time
- Use room temperature eggs. Cold eggs can cause uneven mixing.
- Lightly flour the ramekins. This prevents the cakes from sticking when you flip them.
- Fold gently. Overmixing the batter knocks out air, making cakes dense.
- Watch the clock. Set a timer. Just 1 extra minute in the oven can change everything.
Demolding and Serving Like a Pro
Once your lava cakes are out of the oven and have cooled for a minute, it’s time for the moment of truth — turning them out of their ramekins. Done right, you’ll reveal a perfectly shaped dessert with a warm, flowing chocolate center. Here’s how to do it without breaking a sweat.
How to Safely Invert and Plate the Chocolate Lava Cake
Step-by-step plating process:
- After removing the cakes from the oven, let them rest in the ramekins for 1 minute. This allows the sides to firm up slightly.
- Place a small dessert plate over the top of each ramekin.
- Hold both the ramekin and plate firmly together and flip quickly but gently.
- Let the ramekin rest upside down on the plate for about 10 seconds. This gives the cake time to release.
- Slowly lift the ramekin straight up. The Chocolate Lava Cake should slide out cleanly.
Troubleshooting tip: If the cake sticks, tap the top of the ramekin gently or run a small butter knife around the edge before flipping.
Best Garnishes to Elevate Presentation
Your chocolate lava cake is already a showstopper, but the right garnish makes it even more impressive — and delicious. Here are some of the best finishing touches:
| Garnish | Why It Works |
|---|---|
| Powdered Sugar | Classic and simple, adds visual contrast |
| Fresh Berries | Bright flavor that cuts through the richness |
| Mint Leaves | Adds freshness and color |
| Vanilla Ice Cream | Perfect temperature contrast with warm cake |
| Whipped Cream | Light and fluffy topping to balance dense texture |
| Chocolate Shavings | Intensifies the chocolate flavor |
You can also drizzle a little raspberry or caramel sauce around the plate for a fine-dining effect.
Serving Tip: Serve the cakes immediately after unmolding while the center is still warm and gooey.
Variations of Chocolate Lava Cake Recipe
Once you’ve mastered the classic chocolate lava cake recipe, why not get creative? This dessert is incredibly versatile, and with just a few tweaks, you can make it your own. Whether you’re looking for bold flavors, dietary swaps, or fun fillings, there’s a variation to suit every taste.
Adding Peanut Butter, Caramel, or Berry Centers
One of the easiest ways to change up your lava cakes is by adding a surprise center. Just drop a spoonful of your favorite filling into the middle of the batter before baking.
| Filling | How to Add It |
|---|---|
| Peanut Butter | Freeze small scoops and push them into the center of the batter |
| Salted Caramel | Use soft caramel candies or thick sauce, then cover with more batter |
| Raspberry Sauce | Spoon into the center for a tart and fruity surprise |
This adds an extra layer of flavor and texture, turning a basic lava cake into a gourmet treat.
Tip: Make sure the filling is thick or slightly frozen. This helps it hold its shape and not mix into the batter while baking.
Dairy-Free or Gluten-Free Options
With just a few substitutions, you can make this dessert work for different diets without sacrificing taste or texture.
- Dairy-Free: Use plant-based butter and dairy-free chocolate. Coconut oil can also replace butter in a pinch.
- Gluten-Free: Swap all-purpose flour with a 1:1 gluten-free flour blend. Use only 1 to 1½ tablespoons to keep the texture soft.
- Egg-Free (Advanced): Try a flax egg or commercial egg replacer. Note that this may affect the Chocolate Lava Cake’s rise and gooeyness.
If you’re adapting for allergies, always test a small batch first. Different substitutes can slightly change how the cake bakes.
Flavor Boosters to Try
You don’t need to change the whole recipe to mix things up. Here are a few small additions that can completely shift the flavor profile:
- Espresso Powder: Enhances the chocolate richness with a bold kick
- Orange Zest: Adds brightness and citrus flavor to the batter
- Cinnamon or Chili Powder: For a subtle warmth or spice
- Sea Salt Flakes on Top: Brings out the chocolate flavor with contrast
These ingredients blend right into the batter and can make your lava cake taste like it came from a pastry chef’s kitchen.
Common Mistakes and Troubleshooting
Even though the chocolate lava cake recipe is simple, it’s also easy to get wrong if you’re not careful. From overbaking to batter issues, small missteps can ruin that gooey center or cause your cake to fall apart. Below are the most frequent mistakes home bakers make — and how to fix them fast.
Overbaking or Undercooking the Chocolate Lava Cake
Timing is everything with lava cakes. If you bake them too long, the center sets and you lose the signature molten texture. Bake them too little, and they may collapse or stay raw.
How to avoid it:
- Set a timer for 6–8 minutes, no more.
- The center should jiggle slightly, but the edges must be firm.
- Use the oven light instead of opening the door repeatedly.
Sign to watch for: The tops should be puffed and slightly cracked, not sunken or shiny.
Batter Too Thick or Not Risen Well
If your cake batter feels dense or the cakes come out flat, the issue usually lies in how you mixed the ingredients.
Why this happens:
- Cold eggs or butter not mixed properly
- Overmixing the batter, which knocks out the air
- Too much flour
Quick fix:
- Use room temperature eggs to ensure smooth blending.
- Gently fold the chocolate and flour into the egg mixture, don’t stir harshly.
- Measure flour loosely by spooning it into your tablespoon instead of scooping directly from the bag.
Cakes Sticking to the Ramekins
If your lava cakes won’t release or fall apart during unmolding, they likely stuck to the ramekin sides.
Avoid this by:
- Greasing well with butter, then dusting with flour
- Letting the cakes rest in the ramekin for 1 minute after baking
- Running a knife around the edges before inverting
Pro Tip: Flip quickly but gently and let the ramekin sit upside down for 10 seconds before lifting.
Lava Isn’t Flowing
If the cake looks good but there’s no “lava,” it’s likely overbaked or contains too much flour.
What to do:
- Next time, reduce baking time by 1 minute
- Measure flour more precisely
- Use high-quality chocolate with at least 60% cocoa
Cake Too Runny or Falls Apart
This is a classic sign of underbaking or thin batter.
Fix it by:
- Increasing bake time slightly (try 7 minutes instead of 6)
- Making sure your eggs are whipped properly to give structure
- Letting the cake rest for a full minute before flipping
Storage, Reheating & Make-Ahead Tips
One of the best things about this chocolate lava cake recipe is how well it can be made ahead, stored, and even frozen. Whether you’re baking in advance for a dinner party or saving leftovers, these storage tips will keep your cakes tasting fresh and gooey.
Storing Baked Chocolate Lava Cake
If you have leftover Chocolate Lava Cake or want to store some for later:
- Let them cool fully to room temperature.
- Wrap each cake tightly in plastic wrap or place in an airtight container.
- Store in the refrigerator for up to 3 days.
The texture may firm up in the fridge, but don’t worry — the gooey center can be revived during reheating.
Freezing Instructions:
- After baking and cooling, wrap cakes individually in plastic wrap.
- Place wrapped cakes in a zip-top freezer bag.
- Freeze for up to 1 month.
To prevent freezer burn, make sure all air is removed before sealing.
How to Reheat Chocolate Lava Cakes
You can bring your cakes back to life with just a few minutes of reheating. The method depends on whether they’re refrigerated or frozen.
| Storage State | Oven Temp | Time Needed | Tip |
|---|---|---|---|
| Refrigerated | 350°F | 8–10 minutes | Let them sit at room temp while preheating oven |
| Frozen (not thawed) | 400°F | 14–16 minutes | Keep them wrapped in foil while baking |
Avoid reheating in the microwave if possible. It tends to overcook the cake edges and dry out the center.
Serving Tip: Let reheated cakes cool for 1 minute before unmolding. Dust with powdered sugar or top with whipped cream right before serving.
Make-Ahead Batter Tips
Want to prep the batter ahead? You absolutely can.
- Prepare the batter and pour it into greased ramekins.
- Cover tightly with plastic wrap.
- Refrigerate for up to 24 hours.
Before baking, let the ramekins sit at room temperature for 20–30 minutes. Then bake as usual.
This method is perfect for entertaining — all you have to do is pop them in the oven after dinner.
Conclusion
If you’re looking for a dessert that’s rich, gooey, and guaranteed to impress, this chocolate lava cake recipe delivers every time. With simple ingredients, a quick prep, and endless ways to customize, it’s a must-have in any home baker’s collection. Whether you’re serving it for a special night or satisfying a chocolate craving, Chocolate Lava Cake strikes the perfect balance between elegance and ease.
From preparing the ramekins to getting that perfect molten center, now you know exactly how to make this crowd-pleasing treat at home. Plus, with tips on storage, reheating, and variations, you can make it your own while keeping things simple.
For More Delicious And Easy Recipes Follow Me In Facebook And Pinterest.
