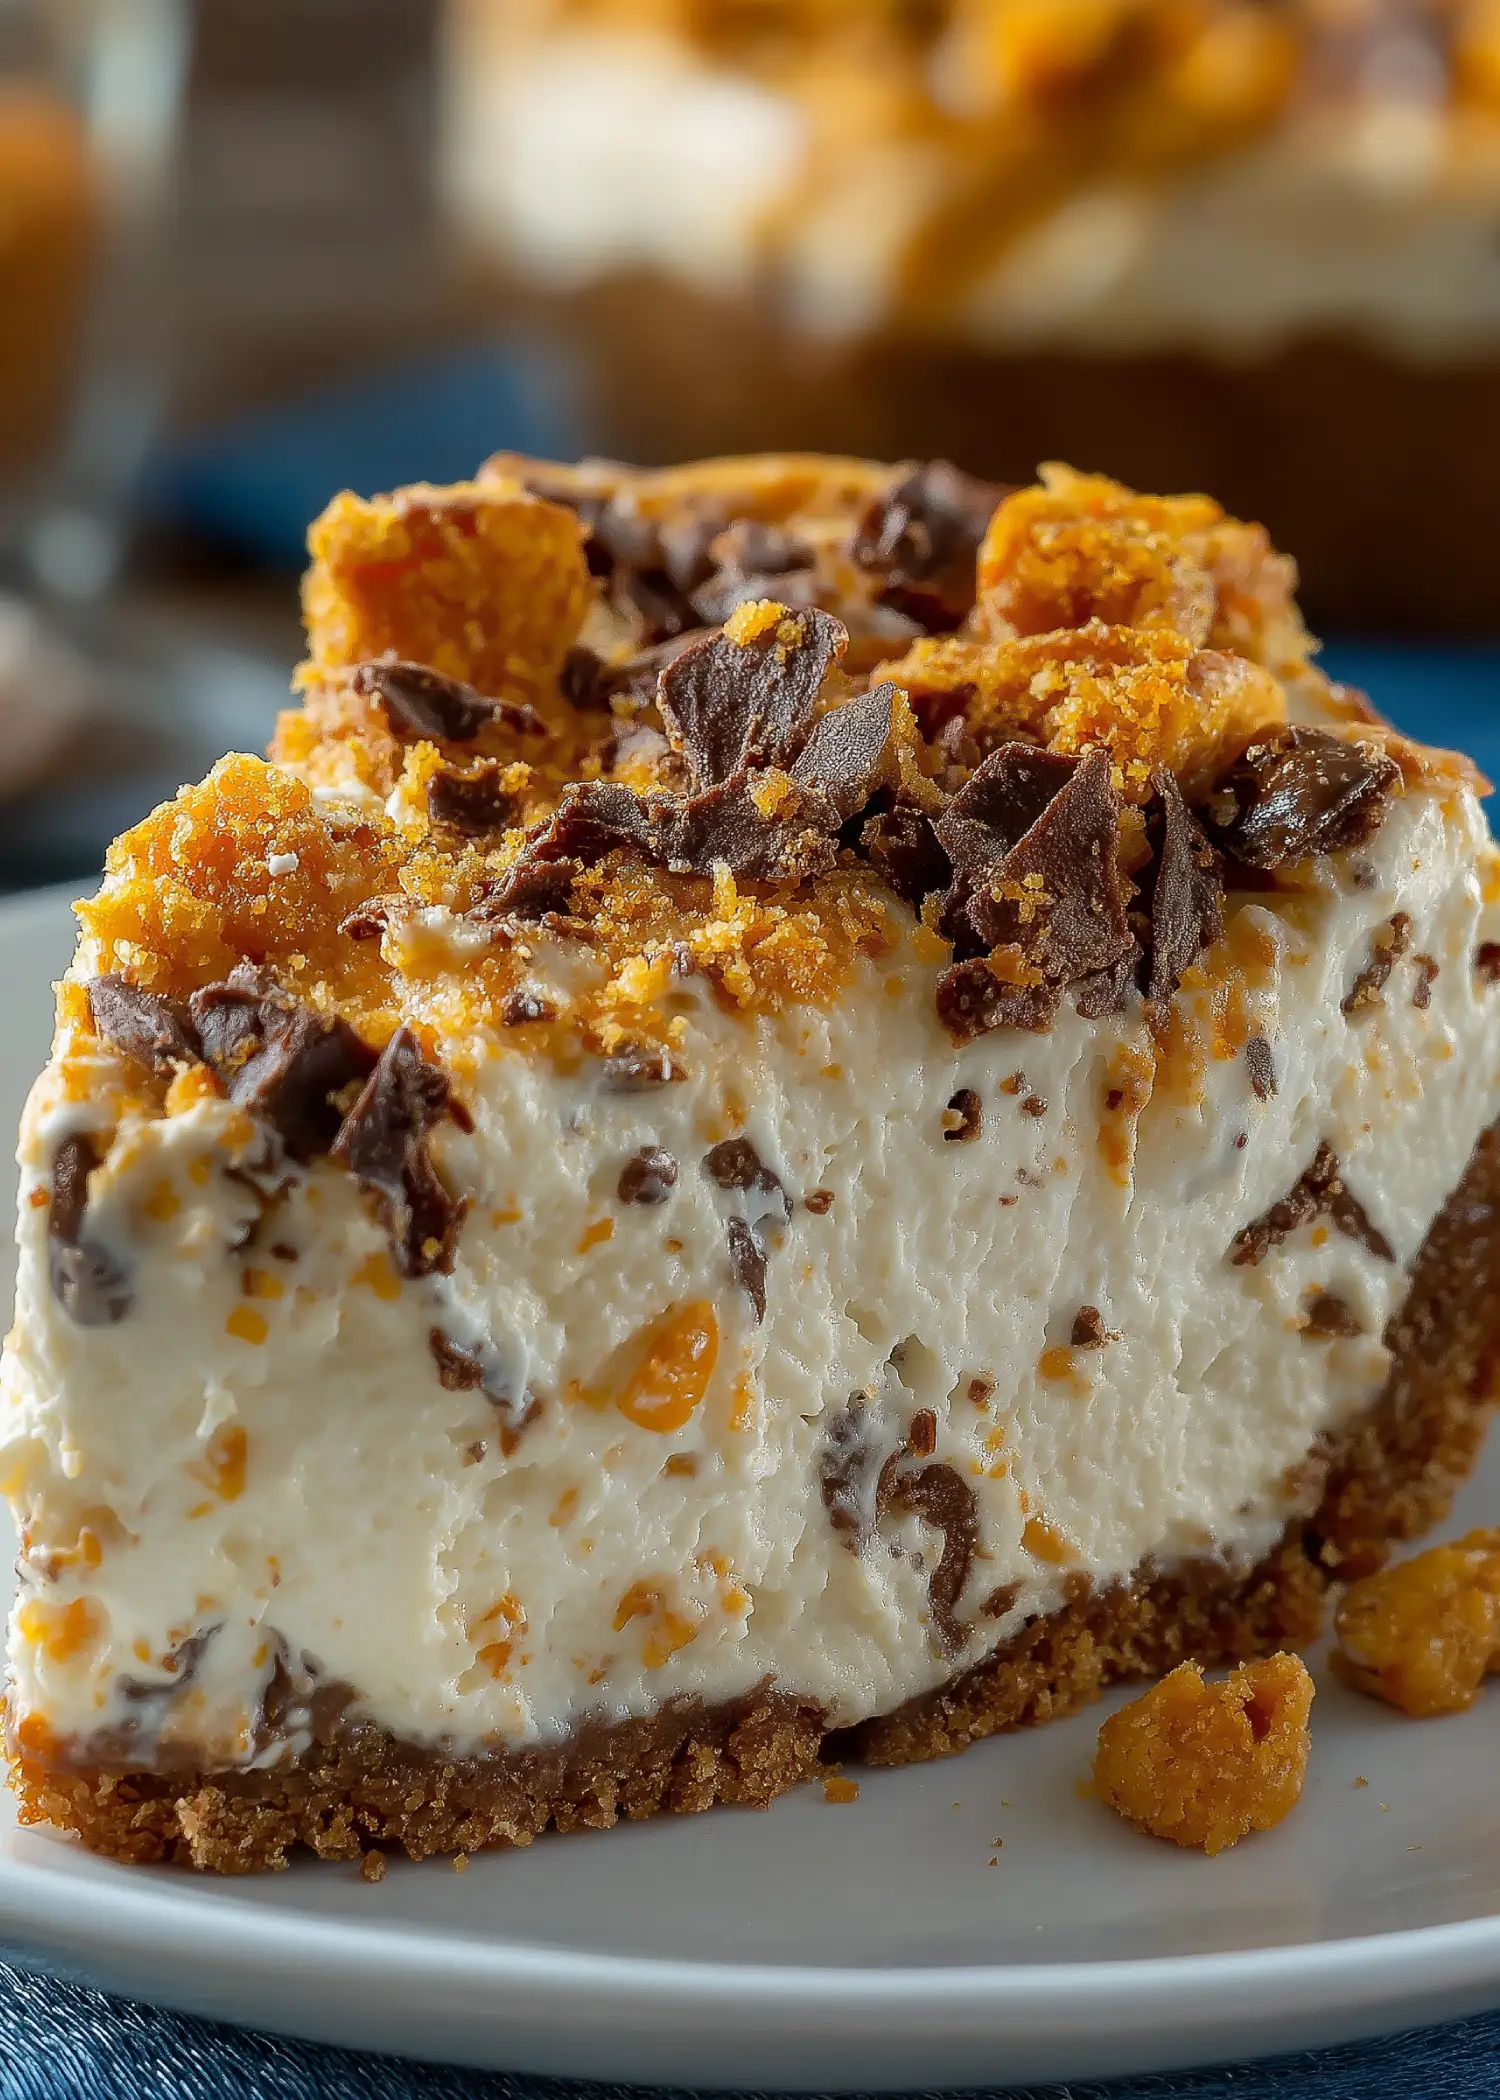
This Butterfinger pie recipe is everything you want in a no-bake dessert, creamy, crunchy, and packed with peanut butter and chocolate flavor. It comes together fast with simple ingredients like cream cheese, Cool Whip, and crushed Butterfinger candy bars. Perfect for any occasion, it’s a hassle-free treat that feels like a bakery-style indulgence.
Contents
- 1 What Makes This Butterfinger Pie Recipe So Irresistible?
- 2 Ingredients Breakdown – What You’ll Need
- 3 Essential Equipment for This Easy Recipe
- 4 Butterfinger Pie Recipe
- 5 Step-by-Step Instructions to Make Butterfinger Pie
- 6 Make-Ahead Tips and Storage Advice
- 7 Variations and Creative Twists on the Classic
- 8 Serving Suggestions and Pairings
- 9 Conclusion
What Makes This Butterfinger Pie Recipe So Irresistible?
The Ultimate Flavor Combo
Peanut butter and chocolate are a match made in dessert heaven. Add in the crunchy texture of crushed Butterfinger bars and a chocolate cookie crust, and you’ve got a rich, layered flavor profile that’s hard to resist. The creamy filling contrasts beautifully with the candy crunch in every bite.
Easy, Fast, and Crowd-Pleasing
With no baking required and just 15 minutes of prep, this dessert is perfect for busy days or last-minute events. The filling whips up smooth in minutes using a hand-held electric mixer. Plus, it chills beautifully, making it ideal for make-ahead desserts.
Ingredients Breakdown – What You’ll Need
Star Ingredients That Make This Butterfinger Pie Pop
The key to a successful Butterfinger pie recipe is using quality, well-balanced ingredients that bring out the best in each layer. Here’s what goes into this dreamy, no-bake dessert:
- Cream cheese (8 oz, room temperature) – Creates the smooth, rich base of the filling. Make sure it’s softened to blend easily.
- Creamy peanut butter (½ cup) – Adds nutty flavor and creaminess that pairs perfectly with the Butterfinger candy.
- Vanilla extract (2 teaspoons) – A small touch that brings warmth and depth to the filling.
- Powdered sugar (1½ cups) – Sweetens the filling and keeps the texture light and airy.
- Fun-sized Butterfinger bars (12.5 oz, crushed) – These bring the iconic crunch and candy flavor. Be sure to reserve two for topping.
- Cool Whip (8 oz, thawed) – Lightens the texture of the filling and helps it set up nicely in the fridge.
- Store-bought Oreo or chocolate graham cracker crust – A convenient, no-bake crust that complements the rich filling.
Choosing the Right Butterfinger Bars and Crust
For the best flavor and texture, use fun-sized Butterfinger bars rather than full-size. They’re easier to crush and blend well into the filling. You can crush them by placing the candy in a sealed bag and tapping with a rolling pin or heavy spoon. Avoid over-crushing, though, so you still get that signature crunch.
When it comes to crusts, a pre-made Oreo crust is ideal. It saves time and adds a deep chocolate flavor that pairs beautifully with the filling. Chocolate graham cracker crusts work well too if you prefer something less sweet.
Essential Equipment for This Easy Recipe
The Must-Have Tool: Hand-Held Electric Mixer
If you want a smooth, creamy filling in your Butterfinger pie recipe, a hand-held electric mixer is your best friend. It blends the cream cheese and peanut butter until silky and ensures the powdered sugar is fully incorporated. You’ll get a light and airy texture that’s nearly impossible to achieve by hand.
Mixing manually might seem like an option, but it can leave lumps in your filling, especially if your cream cheese isn’t perfectly soft. The mixer also helps gently fold in the Cool Whip, keeping the texture fluffy instead of dense.
Other Kitchen Tools to Make Prep a Breeze
Although the recipe is simple, a few extra tools will help speed things up and improve your results:
- Rubber spatula – Perfect for folding in the crushed Butterfinger bars and Cool Whip without overmixing.
- Measuring cups and spoons – For accurate ingredient portions, which is key to the pie’s texture and sweetness.
- Plastic bag and rolling pin (or a heavy object) – To crush the Butterfinger bars into small, crunchy bits.
- Pie server or sharp knife – Makes clean slices when serving.
Butterfinger Pie Recipe
- Total Time: 15 minutes
- Yield: 8 servings 1x
- Diet: Vegetarian
Description
A creamy, crunchy no-bake Butterfinger pie recipe made with peanut butter, cream cheese, Cool Whip, and a chocolate crust. Ready in just 15 minutes.
Ingredients
1 (8-ounce) package cream cheese, room temperature
1/2 cup creamy peanut butter
2 teaspoons vanilla extract
1 1/2 cups powdered sugar
1 (12.5-ounce) bag fun-sized Butterfinger bars, crushed (reserve 2 bars for topping)
1 (8-ounce) container Cool Whip, thawed
1 store-bought Oreo or chocolate graham cracker crust
Instructions
1. Beat cream cheese and peanut butter with an electric mixer until smooth.
2. Mix in vanilla extract.
3. Add powdered sugar and beat until fully combined and smooth.
4. Gently fold in crushed Butterfinger bars (reserving some for topping).
5. Fold in Cool Whip until just combined.
6. Spread the mixture evenly into the prepared crust.
7. Top with reserved crushed Butterfinger pieces.
8. Refrigerate for at least 4 hours before serving.
Notes
You can prepare this pie up to two days in advance.
Store covered in the fridge for up to 4 days.
Freeze individual slices wrapped tightly for up to 1 month.
- Prep Time: 15 minutes
- Cook Time: 0 minutes
- Category: Pie Recipes
- Method: No-Bake
- Cuisine: American
Nutrition
- Serving Size: 1 slice
- Calories: 657
- Sugar: 58g
- Sodium: 389mg
- Fat: 35g
- Saturated Fat: 16g
- Unsaturated Fat: 15g
- Trans Fat: 2g
- Carbohydrates: 81g
- Fiber: 2g
- Protein: 10g
- Cholesterol: 29mg
Step-by-Step Instructions to Make Butterfinger Pie
Preparing the Filling Like a Pro
Start by letting your cream cheese sit at room temperature. This step is important because cold cream cheese won’t blend smoothly. Once it’s soft, place it in a large mixing bowl with the creamy peanut butter. Using your hand-held electric mixer, beat them together until the texture is creamy and well combined.
Next, mix in the vanilla extract, followed by the powdered sugar. Keep the mixer on medium speed to avoid sugar clouds and beat until the mixture is smooth and fluffy.
Now comes the magic ingredient — crushed Butterfinger bars. Reserve two bars for topping and fold the rest gently into the mixture using a rubber spatula. This keeps the filling light and airy while distributing the crunch evenly.
Finally, fold in the Cool Whip just until combined. Don’t overmix — a light touch keeps the texture perfect.
The Importance of Folding and Not Overmixing
Overmixing can deflate the filling, leaving you with a dense pie instead of a fluffy, mousse-like dessert. After folding in the Cool Whip and Butterfinger pieces, spoon the mixture into your Oreo or chocolate graham crust. Spread evenly with a spatula.
Top with the reserved crushed Butterfinger bars, and cover loosely with plastic wrap or the dome lid that comes with many pre-made crusts.
Place the Butterfinger pie in the refrigerator for at least 4 hours before serving. This step helps it firm up and enhances the flavor as the ingredients meld together.
Make-Ahead Tips and Storage Advice
How Far in Advance Can You Prepare Butterfinger Pie?
One of the biggest advantages of this Butterfinger pie recipe is that it’s an ideal make-ahead dessert. You can prepare the entire pie up to 2 days in advance without sacrificing flavor or texture. In fact, letting it chill overnight often enhances the overall taste and helps the filling set perfectly.
Just assemble the Butterfinger pie as directed, cover it tightly with plastic wrap or a pie container lid, and refrigerate. It will be ready to slice and serve when your guests arrive, saving you time and effort on the day of your event.
Best Ways to Store and Preserve Freshness
After slicing, any leftover pie should be stored in the refrigerator. Keep it covered to avoid absorbing fridge odors or drying out. It will stay fresh for up to 4 days. The texture may soften slightly over time, but the flavor remains delicious.
Want to save some for later? This pie can also be frozen. Wrap individual slices in plastic wrap, then foil, and place them in an airtight container or freezer bag. When you’re ready to enjoy, thaw in the fridge for several hours or overnight.
Variations and Creative Twists on the Classic
Mini Butterfinger Pies for Parties
Hosting a party or looking for single-serve desserts? Turn this Butterfinger pie recipe into mini pies using individual graham cracker crusts or muffin tins lined with cupcake wrappers. Just divide the filling evenly and top each with crushed Butterfinger. Chill for the same amount of time—at least 4 hours—and you’ll have an eye-catching, ready-to-serve treat.
This version is perfect for birthdays, baby showers, or holiday dessert platters. Plus, they’re easier to store and serve without slicing.
Swapping Ingredients for Diet-Friendly Versions
Need a lighter take on this rich dessert? You can easily adapt the Butterfinger pie recipe for different dietary needs. Here are a few smart swaps:
| Original Ingredient | Lighter Alternative |
|---|---|
| Full-fat cream cheese | Neufchâtel or light cream cheese |
| Cool Whip | Sugar-free whipped topping |
| Butterfinger bars | Sugar-free or mini candy pieces |
| Oreo crust | Gluten-free or homemade oat crust |
These changes won’t fully replicate the original richness, but they’ll reduce calories, sugar, or gluten while still satisfying your sweet tooth.
Serving Suggestions and Pairings
Best Toppings to Enhance Flavor and Texture
While the crushed Butterfinger topping is already a crowd-pleaser, adding a few extra touches can elevate your Butterfinger pie recipe into a show-stopper. Here are a few simple yet effective topping ideas:
- Drizzle of melted chocolate – Add contrast and richness with a quick zig-zag of semi-sweet or milk chocolate.
- Peanut butter drizzle – Microwave a spoonful of peanut butter and drizzle it across the top for extra nutty appeal.
- Whipped cream rosettes – Pipe small whipped cream dollops around the edge for a bakery-style finish.
- Mini chocolate chips – Sprinkle around the border for added crunch and color.
- Toffee bits – If you’re out of Butterfingers, toffee chips also complement the peanut butter-chocolate combo well.
Ideal Moments and Occasions to Serve This Butterfinger Pie
This pie isn’t just easy to make—it’s a hit at nearly any event. Serve it chilled at:
- Birthday parties
- Family gatherings
- Potlucks and BBQs
- Game day events
- Holiday dinners (Thanksgiving and Christmas especially)
The rich flavor and creamy texture make it a reliable favorite wherever it goes. It also travels well—just pop it in a cooler or insulated bag if you’re bringing it to a party.
Conclusion
This Butterfinger pie recipe is proof that making a crowd-pleasing dessert doesn’t have to be complicated. With just a few basic ingredients, a hand-held mixer, and no oven required, you can whip up a creamy, crunchy, chocolatey pie that disappears fast at any gathering.
Whether you’re hosting a party, prepping ahead for the holidays, or just need a sweet fix, this no-bake pie fits the bill. And with easy options to customize, lighten up, or serve as minis, it’s as flexible as it is delicious.
For More Delicious And Easy Recipes Follow Me In Facebook And Pinterest.
