
Ever wish you could bottle up the joy of a summer fair and turn it into dessert? Well, darling, get ready — because this cotton candy cake is basically the sweet, cloud-like hug your week’s been missing.
Whether you’re wrangling kids, juggling work Zooms, or just craving a little nostalgia (no judgment if that includes sneaking bites of your kid’s cotton candy), this Cotton Candy Cake is here to sprinkle some magic into your kitchen.
Let’s be honest — finding a dessert that’s as stunning as it is delicious can feel like chasing a unicorn. But this cotton candy cake recipe? It’s the real deal. Dreamy colors, fluffy texture, and that unmistakable cotton candy flavor wrapped up in a buttery crumb and whipped frosting. It’s like a carnival came to your kitchen — minus the long lines and overpriced snacks.
If you’re the kind of mom who’s up early packing lunches, or the professional who needs a “wow” dessert for the office birthday bash, this recipe checks all the boxes. No fancy bakery trip needed. And if your kiddo wants a “princess cake” or your inner child is screaming for something fun — trust me, this one’s a winner.
The best part? No complicated ingredients. No pastry degree required. Just good ol’ pantry staples and a dash of whimsy. Oh, and if you’ve ever looked at food coloring like it’s a secret weapon — this recipe gives you full permission to play with it. It’s that kind of bake.
So, tie your apron, grab your favorite mixing bowl, and let’s whip up something that tastes like memories and looks like a dream. Because who says grown-ups can’t have a little fun with their cake, too?
Contents
- 1 Why You’ll Love This Cotton Candy Cake
- 2 Ingredients You’ll Need
- 3 Equipment
- 4 Recipe Steps For Cotton Candy Cake
- 4.1 Step 1: Preheat & Prep
- 4.2 Step 2: Mix the Dry Team
- 4.3 Step 3: Cream the Butter & Sugar
- 4.4 Step 4: Add the Egg Whites
- 4.5 Step 5: Pour in the Oil
- 4.6 Step 6: Cotton Candy Flavor Time
- 4.7 Step 7: Alternate Buttermilk and Dry Ingredients
- 4.8 Step 8: Add the Color (Optional but Adorable)
- 4.9 Step 9: Bake It
- 4.10 Step 10: Cool Off
- 5 Make the Cotton Candy Buttercream
- 6 Assemble Your Cotton Candy Cake
- 7 Sweet Tips for the Ultimate Cotton Candy Cake
- 8 Personal Anecdotes
- 9 Nutrition Overview
- 10 Cooking Time & Yield Details
Why You’ll Love This Cotton Candy Cake
- It’s delightfully nostalgic and fun for all ages
- Uses easy-to-find ingredients (even the cotton candy flavoring!)
- Customizable colors for your favorite pastel theme
- That cotton candy buttercream? Chef’s kiss
If you love magical, colorful desserts, try our Unicorn Cake Recipe too!
Ingredients You’ll Need
For the Cotton Candy Cake:
- 1/2 cup (120ml) vegetable oil
- 1 1/4 cups (300ml) full-fat buttermilk, room temperature (DIY recipe in notes)
- 2 1/2 cups (265g) cake flour, sifted (DIY substitute in notes)
- 2 tsp baking powder
- 1/2 tsp baking soda
- 1/2 tsp salt
- 1 1/2 cups (300g) granulated sugar
- 1/2 cup (113g) unsalted butter, softened
- 4 large egg whites, room temperature
- 1 tbsp Amoretti Natural Cotton Candy Artisan Flavor
- Optional: 1 drop blue food coloring and 1 drop pink food coloring (pastel swirl heaven!)
For the Cotton Candy Buttercream:
- 2 cups (452g) unsalted butter, at room temp
- 7 cups (840g) powdered sugar
- 1 tsp Amoretti Natural Cotton Candy Artisan Flavor
- 4 tbsp whole milk, room temp
- 1/4 tsp salt
- A tiny drop of blue food gel and a hint of purple for dreamy pastel tones
Topping:
- 1 cup of fluffy cotton candy (right before serving – it melts fast!)
Equipment
Before diving into the sweet, cloud-like world of cotton candy cake, let’s make sure your kitchen is locked and loaded. You don’t need a fancy bakery setup — just a few essentials that’ll help bring this whimsical beauty to life:
- Two 8-inch or 9-inch round cake pans
- Mixing bowls (at least two)
- Measuring cups and spoons
- Stand mixer or hand mixer
- Whisk and rubber spatula
- Fine mesh sieve (for flour sifting)
- Cooling racks
- Offset spatula or butter knife (for frosting)
- Piping bag and tips (optional, but fun!)
- Cake leveler or serrated knife (if you want extra tidy layers)
- Cake stand or serving plate
Recipe Steps For Cotton Candy Cake
Let’s bake a Cotton Candy Cake that’s as dreamy to eat as it is to look at. This cotton candy cake recipe is broken down into bite-sized (pun intended) steps that are clear, doable, and totally beginner-friendly. Grab that apron — we’re getting started!
Step 1: Preheat & Prep
Start by preheating your oven to 350°F (175°C). Grease and line your Cotton Candy Cake pans with parchment paper circles. This step is like putting on socks before your shoes — small but essential to keep things from sticking later.
Step 2: Mix the Dry Team
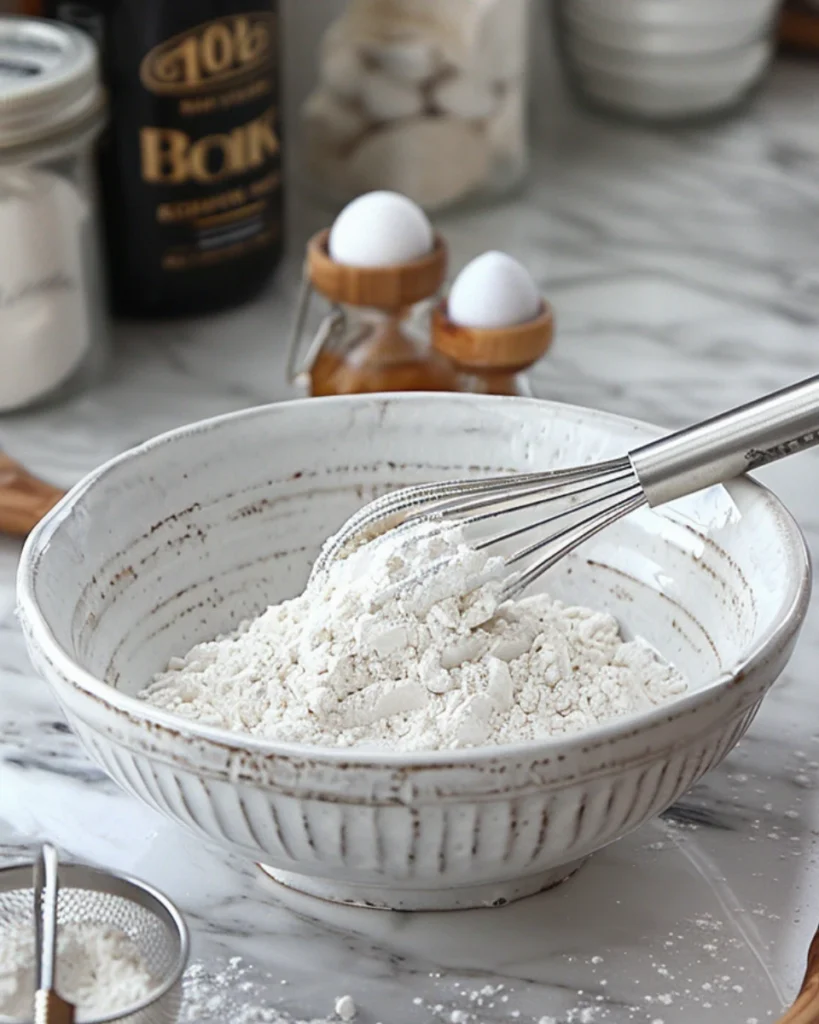
In a roomy mixing bowl, combine the cake flour (pre-sifted for smoothness) with the raising agents and a pinch of salt, giving everything a good stir to evenly distribute the dry ingredients. Sifting not only gets rid of clumps but also makes your Cotton Candy Cake fluffier. It’s like setting the mood with soft lighting — a small touch that makes the whole experience feel just right.
Step 3: Cream the Butter & Sugar
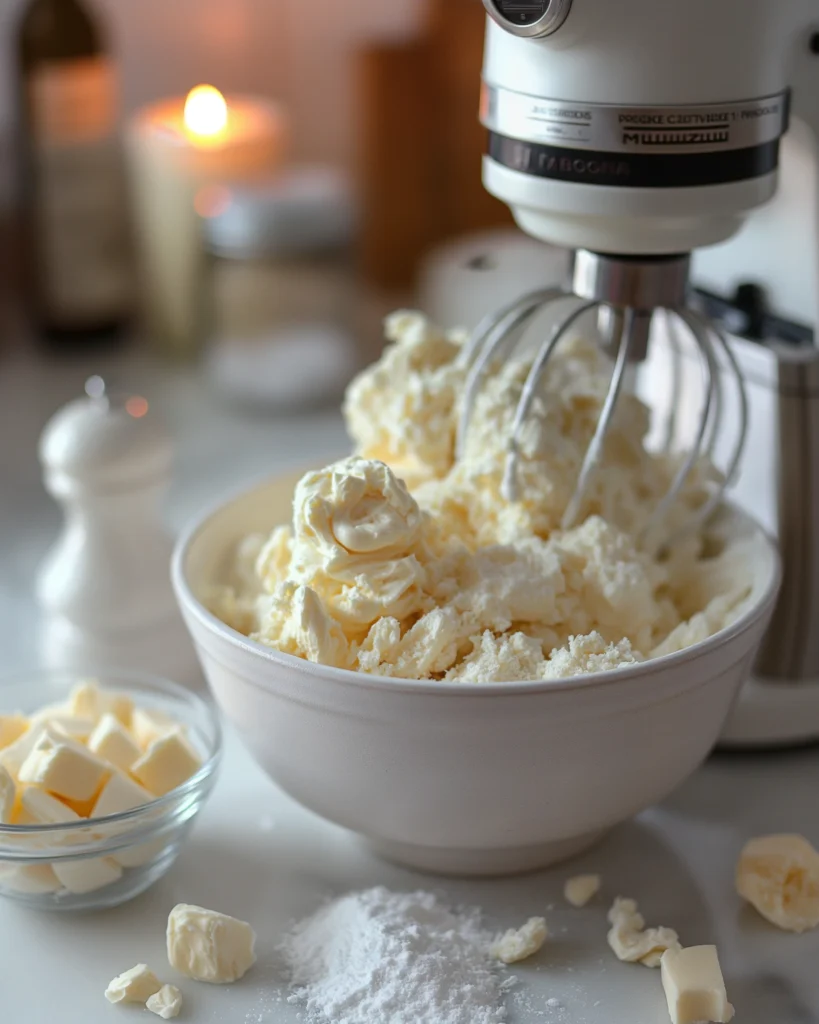
Grab another bowl and blend the plain butter with white sugar using a mixer, whipping it until the texture turns smooth and airy. This will take around 2–3 minutes. You’ll know it’s ready when the mix turns light in color and feels fluffy, almost like a smooth, whipped topping.
Step 4: Add the Egg Whites
Still mixing on medium speed, add your egg whites one at a time. Make sure each addition mixes in completely before you pour in the next one. This keeps the batter smooth and avoids curdling. (Yes, we’re avoiding the dreaded “scrambled eggs in cake” situation.)
Step 5: Pour in the Oil
Pour in the oil little by little, mixing as you go, until everything comes together with a silky texture. The oil helps keep the Cotton Candy Cake moist for days — not that it’ll last that long, trust me.
Step 6: Cotton Candy Flavor Time
Add the Amoretti Natural Cotton Candy Artisan Flavor. It’s the not-so-secret ingredient that turns this from “just a cake” to a full-blown cotton candy cake experience.
Step 7: Alternate Buttermilk and Dry Ingredients
Now we play a little back-and-forth game. Start by adding 1/3 of the dry ingredients to your butter mixture, followed by 1/2 of the buttermilk. Mix gently. Keep going with the additions, making sure to finish off with the dry ingredients last. This keeps the batter smooth and prevents overmixing.
Step 8: Add the Color (Optional but Adorable)
Planning to add color? Start by dividing the batter into two equal portions, placing each in its own bowl. Add a drop of blue to one and pink to the other. Gently swirl them into your pans for that classic cotton candy vibe. No need to go overboard — we’re going for dreamy, not neon!
Step 9: Bake It
Pour your batter into the prepared cake pans and smooth the tops with a spatula. Place in the oven and bake for about half an hour. You’ll know it’s done when a skewer poked into the middle pulls out without any sticky batter. Don’t open the oven door too early — it’s like peeking at a birthday gift before you’re supposed to.
Step 10: Cool Off
Let the Cotton Candy Cake rest in their pans for 10 minutes before gently turning them out onto wire racks to cool completely. Never frost a warm cake — unless you’re aiming for a gooey, sliding mess. Go fold laundry or catch up on your show while you wait.
Make the Cotton Candy Buttercream
Step 11: Beat the Butter
In a large mixing bowl, whip the room-temperature butter for 3 to 4 minutes, until it turns pale and airy. This is your opening act — creating the creamy foundation that makes the rest of the magic possible.
Step 12: Add the Sugar (Gently!)
Add the powdered sugar slowly, about a cup at a time, while mixing gently to keep it from puffing up into the air. Once the sweetener is fully blended, increase the speed and whip until the texture becomes smooth and airy.
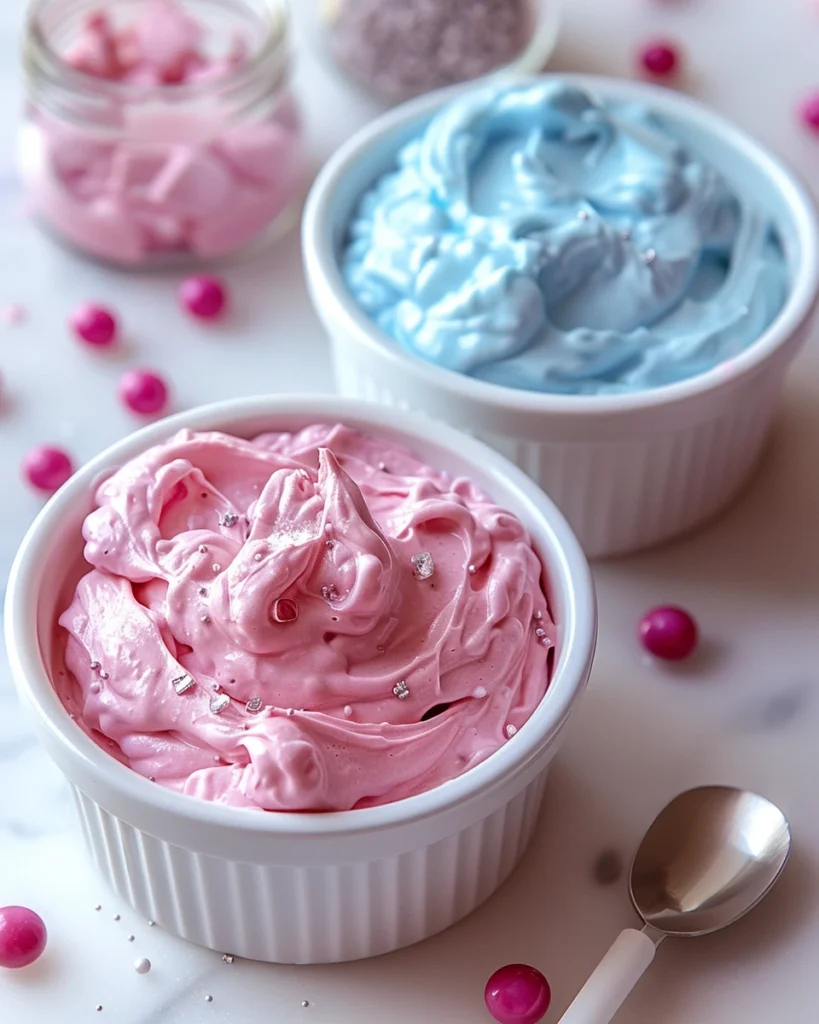
Step 13: Flavor & Color It
Add the Amoretti cotton candy flavor, whole milk, and salt. Next, add just a small dab of blue and purple gel coloring. Beat again until it’s silky, dreamy, and looks like a pastel daydream.
Assemble Your Cotton Candy Cake
Step 14: Level the Cakes (Optional)
If the Cotton Candy Cake layers have rounded tops, gently level them using a serrated knife. This helps your cake stack evenly.
Step 15: Layer & Frost
Set the first cake layer on your serving stand. Place a hearty spoonful of frosting on top and smooth it out into an even layer. Gently place the second layer on top, then frost the top and sides. Smooth it out for a sleek look or create rustic swirls — it’s your masterpiece, so make it yours.
Step 16: Add the Fluffy Finish
Just before serving, crown your Cotton Candy Cake with a fluffy cup of real cotton candy. If you toss it in too soon, it’ll melt into a gooey mess — it’s finicky and high-maintenance, kind of like a celebrity who won’t show up without their entourage.
Your soft, colorful creation is all set to take the spotlight with its sweet charm and airy texture!
Sweet Tips for the Ultimate Cotton Candy Cake
Baking is pure joy… most of the time. Want to avoid a messy kitchen and end up with a cake that looks picture-perfect? Try these simple tricks to make it all easier:
- Room temp is the vibe. Using chilled eggs or butter can throw off your batter in no time—like a surprise phone call right when you sit down to relax. Let them warm up so your ingredients mix like old friends at a bake sale.
- Don’t skip the sifting. It might feel extra, but it gives your cake that light, airy texture you’re going for — like cotton candy in cake form.
- Don’t overmix once the flour’s in. Gentle folds keep it tender. It’s a bit like wrapping up a cozy little bundle—gentle and full of care.
- Color with care. Just a little touch of food coloring can make a big impact. You want whispers of color, not highlighter hues.
- Use real buttermilk. Or make your own (just add 1 tbsp of lemon juice or vinegar to 1 cup of milk, let sit for 5 mins). It adds tang and moisture.
- The cotton candy topping melts fast. Stir it in just before serving to preserve its lightness and bring out that final touch of charm.
- Frosting too thick? Add a splash of milk. Too thin? A bit more powdered sugar will fix it up.
- Keep a damp cloth nearby. It really helps keep the mess under control when powdered sugar starts flying everywhere.
Bonus tip: If you have kiddos, let them “help” swirl the batter colors — just be ready for some colorful cleanup. (But hey, memories made, right?)
Personal Anecdotes
The first time I made this cotton candy cake, it wasn’t for a birthday party or a big event — it was just a random Tuesday when my daughter looked at me with those big eyes and said, “Can we make something pink and fluffy?”
I had a jar of cotton candy flavoring I’d been hoarding for months and a shelf full of baking supplies — so we got to work. She helped drop the food coloring (a little too enthusiastically), swirled the batter like a mini artist, and may or may not have licked the spoon more than once. But when that first slice was cut and we took a bite? Silence. Pure joy. A sugary masterpiece we didn’t know we needed.
Now it’s become a tradition. Anytime we want to celebrate something — even if it’s just surviving a long week — this Cotton Candy Cake makes an appearance. It’s not just dessert; it’s a little bit of magic we bake together.
Nutrition Overview
Cotton candy cake isn’t just a feast for the eyes — it’s also a rich, indulgent dessert that brings that nostalgic fairground flavor to your kitchen. Like most celebration cakes, it’s high in sugar and calories, meant to be enjoyed in moderation. One slice delivers a soft, buttery texture, airy crumb, and sweet cotton candy essence that makes it irresistible.
Each serving contains about 500 calories, mostly from carbohydrates and fats, thanks to the sugar, butter, and flour base. While it’s not a low-calorie treat, it does offer small amounts of essential nutrients such as calcium from the milk and butter, iron from enriched flour, and trace minerals like potassium. The egg whites contribute to its protein content and help lighten the Cotton Candy Cake without additional fat from yolks.
This recipe is free from alcohol and pork-derived ingredients, and it’s adaptable for those who may want to use plant-based milk alternatives or vegan butter — though this would slightly adjust the final nutrition.
Sugar is understandably the most dominant nutrient here, making up over 50% of the total carbohydrate count. If you’re watching your sugar intake, you may want to reduce the frosting or try a less sugary version of the topping. The cotton candy garnish also adds more sugar but no significant nutritional benefit, so feel free to skip or use sparingly.
As always, portion size is key. This Cotton Candy Cake is meant to be savored during special occasions — and even half a slice can hit the sweet spot if you’re looking to enjoy it without overdoing it.
Nutrition Facts (Per 1 Slice, 1/12 of Cotton Candy Cake)
| Nutrient | Amount |
|---|---|
| Serving Size | 1 slice (approx. 1/12 of cake) |
| Calories | 502 kcal |
| Total Fat | 24 g |
| Saturated Fat | 14 g |
| Unsaturated Fat | 8 g |
| Trans Fat | 0.5 g |
| Cholesterol | 60 mg |
| Sodium | 210 mg |
| Total Carbohydrates | 68 g |
| Dietary Fiber | 0.5 g |
| Total Sugar | 55 g |
| Added Sugars | 50 g |
| Protein | 4 g |
| Calcium | 90 mg (7%) |
| Iron | 1.5 mg (8%) |
| Potassium | 115 mg (2%) |
| Vitamin A | 400 IU (8%) |
| Vitamin D | 0.4 mcg (2%) |
| Folate | 50 mcg (13%) |
Note: Keep in mind, these nutrition figures are estimated using a daily intake of 2,000 calories as a reference point.
Cooking Time & Yield Details
Whether you’re whipping this up for a birthday bash or just a fun weekend treat, planning your time in the kitchen is half the battle. Follow this breakdown to complete everything smoothly and on time.
| Time Category | Duration |
|---|---|
| Prep Time | 25 minutes |
| Cook Time | 30 minutes |
| Chilling Time (if frosting is made ahead or cake is chilled before serving) | 45 minutes (optional but recommended) |
| Decorating Time | 20 minutes (includes frosting and cotton candy garnish) |
| Total Time | Approximately 1 hour 15 minutes (without chilling), up to 2 hours with chilling |
Yield
| Yield Type | Amount |
|---|---|
| Cake Yield | 1 standard 9-inch layer cake (2 or 3 layers) |
| Servings | 12 generous slices |
| Frosting Yield | Enough to frost and decorate a 2- or 3-layer cake |
Cuisine
| Category | Origin |
|---|---|
| Cuisine | American |
This Cotton Candy Cake captures the playful charm of fairground treats, delivering a nostalgic American flair in every bite. For another dreamy, fluffy dessert, don’t miss our Cloud Cake. Think classic buttercream meets funfair sweetness. 🎡🎂
There’s just something about a cotton candy cake that makes everyone feel like a kid again—wide-eyed, smiling, and ready for a second slice before they’ve even finished the first. This dreamy dessert brings the carnival home, minus the sticky fingers and ticket lines. With its light, cloud-like layers and frosting that tastes like spun sugar in a dream, this Cotton Candy Cake doesn’t just satisfy a sweet tooth—it makes memories.
Whether you’re celebrating a birthday, hosting a pastel-themed baby shower, or simply craving something playful and different, this cotton candy cake adds a burst of fun to any occasion. This is the kind of dessert that stops conversations—guests can’t help but ask if you actually made it yourself?” when guests take their first bite.
And the best part? You don’t need to be a pastry chef or spend hours in the kitchen to pull it off. A little creativity, a touch of color, and a good cotton candy cake recipe are all you need to spin sugar into something magical. So go ahead—tie your apron, grab your mixing bowl, and let the sweetness begin. Your inner child will thank you.
