Contents
- 1 Introduction to the Banoffee Pie Recipe
- 2 What is Banoffee Pie?
- 3 Essential Ingredients for the Perfect Banoffee Pie
- 4 Banoffee Pie Recipe
- 5 Making the Biscuit Base
- 6 Preparing the Caramel Filling
- 7 Whipping and Flavoring the Cream
- 8 Assembling the Banoffee Pie
- 9 Variations and Modern Twists
- 10 Storage, Make-Ahead, and Serving Tips
- 11 Conclusion
Introduction to the Banoffee Pie Recipe
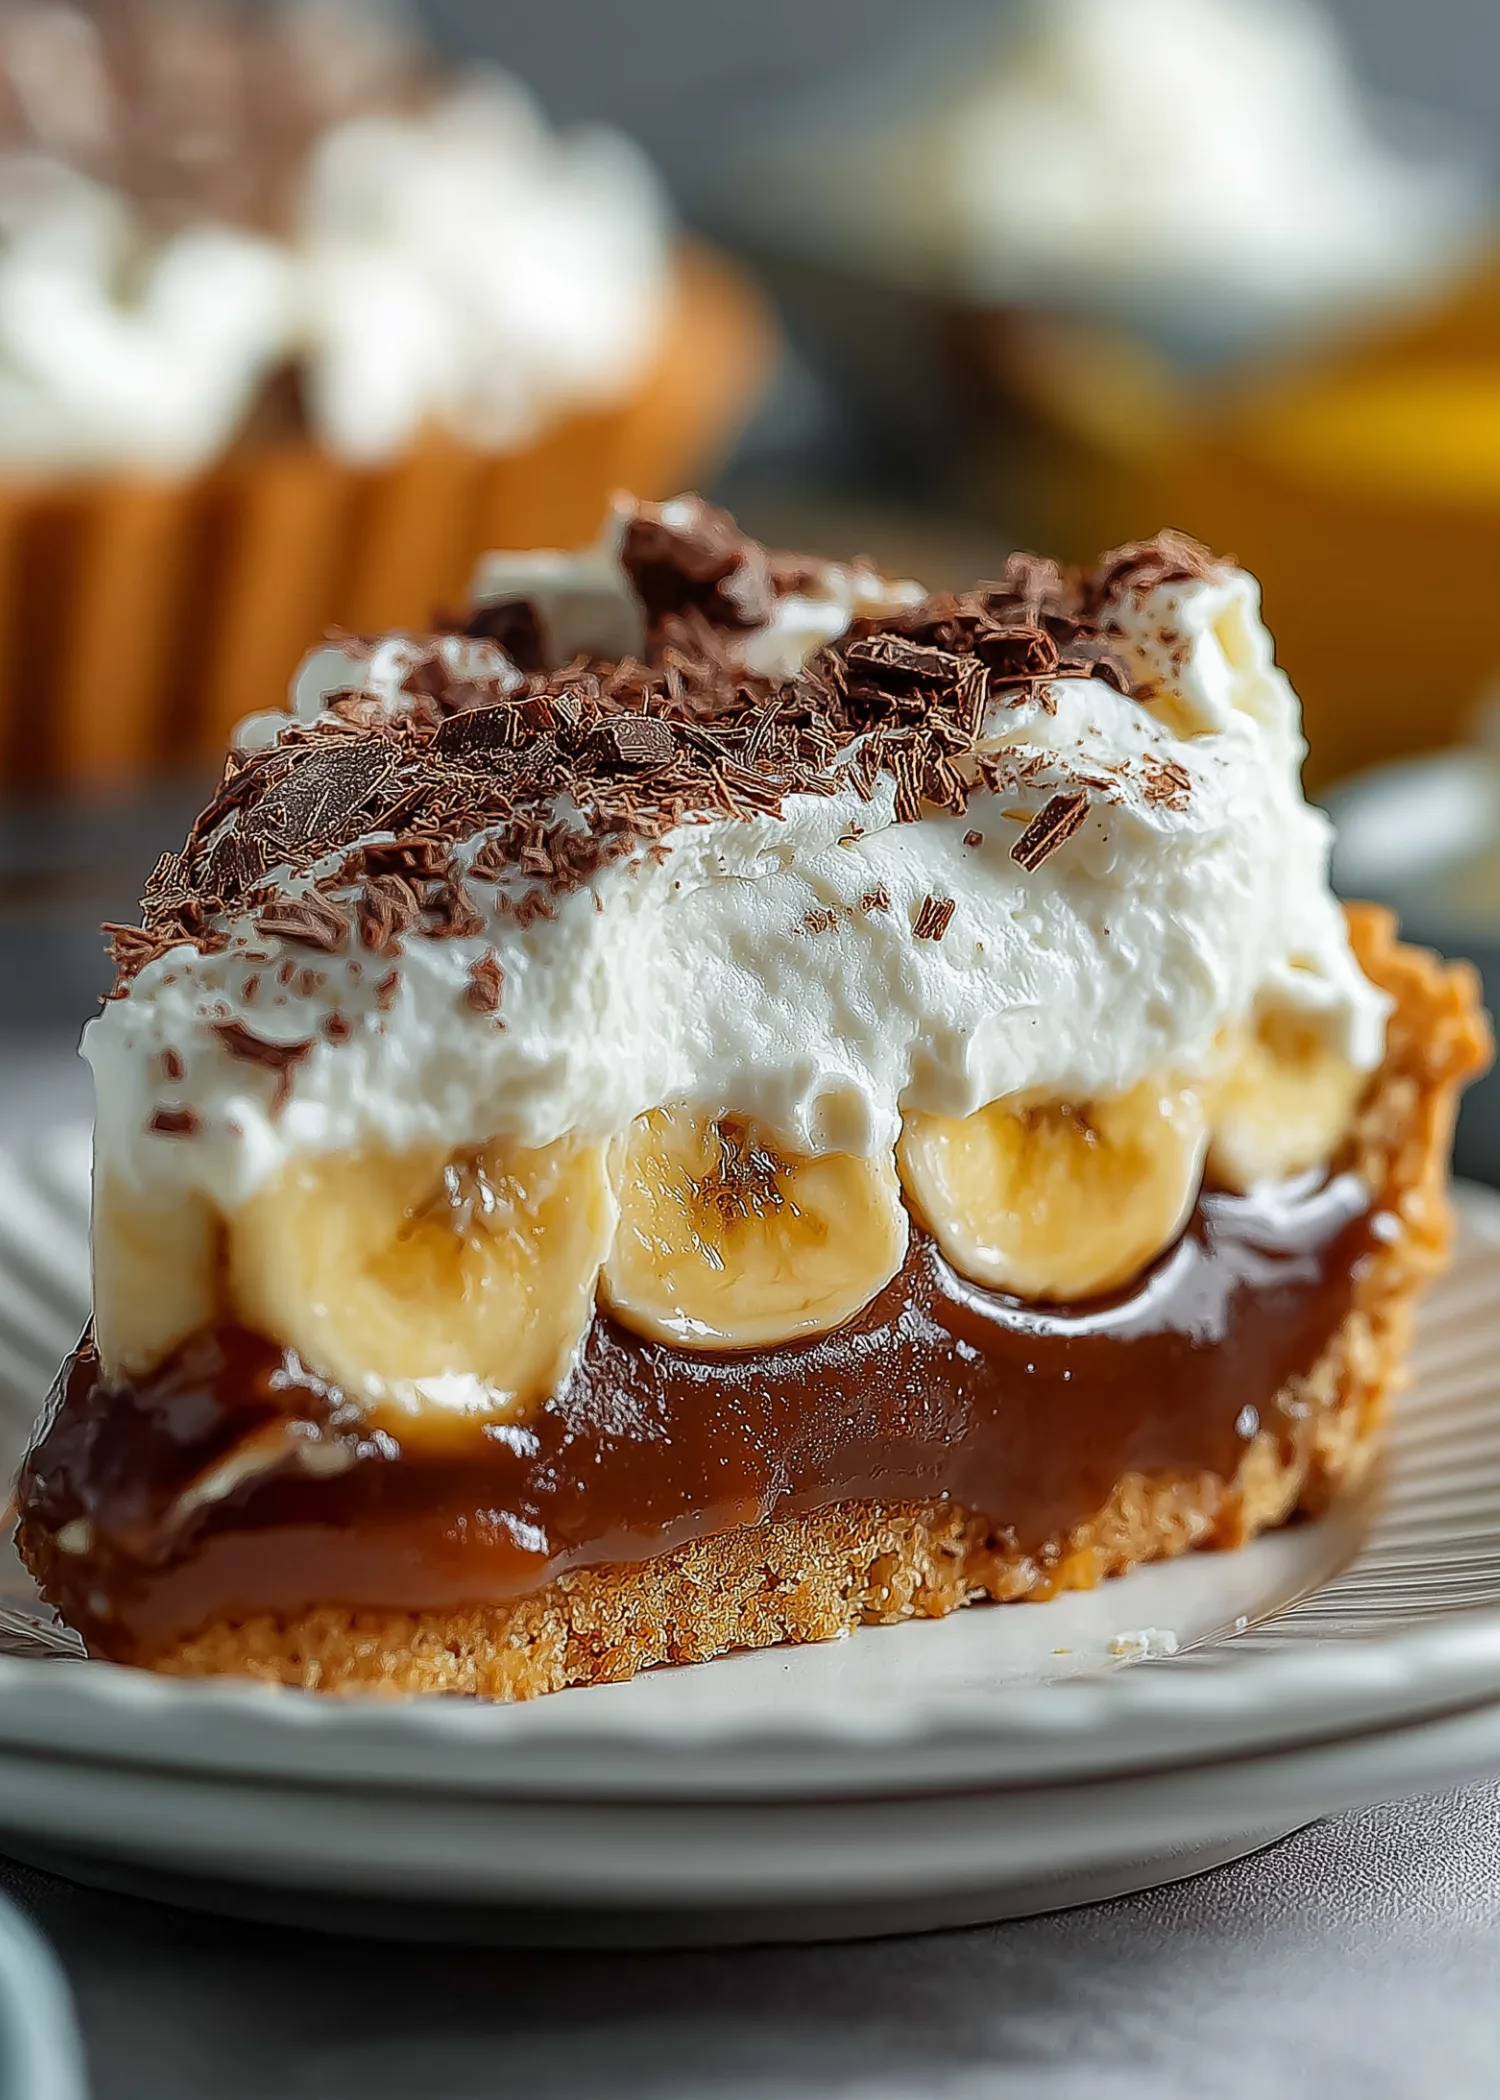
Craving a dessert that’s creamy, fruity, rich, and no-bake? The Banoffee Pie recipe is your golden ticket. A British classic that’s swept across the world, this indulgent treat brings together a crushed biscuit crust, luscious caramel, ripe bananas, and freshly whipped cream topped with dark chocolate curls.
Whether you’re preparing for a dinner party, a cozy night in, or just want to impress your family, this dessert delivers a mouthful of heaven in every bite. In this guide, you’ll learn how to make it from scratch, discover the best tips to get it just right, and explore fun variations to customize your experience.
What is Banoffee Pie?
The Origin and Meaning of Banoffee
The name “Banoffee” is a playful blend of the words banana and toffee, which pretty much sums up its delicious essence. This rich dessert originated in the UK in the 1970s, credited to the chefs at The Hungry Monk restaurant in East Sussex. The goal? Create a pie so easy and comforting that anyone could whip it up—and they succeeded. Since then, it has become a go-to dessert across kitchens worldwide, especially in English-speaking countries like the USA, Australia, and New Zealand.
This pie blends elements of classic American desserts like cream pies with a European twist thanks to the dulce de leche. While the original recipe used homemade toffee, modern adaptations often lean into the convenience of canned caramel or dulce de leche for a quicker, but equally delicious, preparation.
How Banoffee Pie Became a Global Dessert Favorite
The Banoffee Pie recipe has gained global traction thanks to a few irresistible traits:
- No-bake simplicity: Minimal cooking involved means it’s accessible to beginners.
- Readily available ingredients: Biscuits, butter, bananas, cream, and canned caramel are pantry staples in many homes.
- A perfect combo of textures: Crunchy base, smooth caramel, soft bananas, and fluffy cream—it’s a flavor symphony.
Food bloggers, celebrity chefs, and baking shows have all sung its praises. From Paul Hollywood’s refined version on The Great British Bake Off to quick versions by YouTube chefs and TikTok foodies, Banoffee Pie now comes in every form—from jars to vegan slices.
Essential Ingredients for the Perfect Banoffee Pie
Getting the ingredients right is key to making a Banoffee Pie recipe that’s creamy, crunchy, and decadently sweet without being overwhelming. Each component—base, filling, banana, and cream—contributes to the pie’s irresistible layers. Here’s a look at what makes or breaks a good Banoffee Pie.
Choosing the Best Biscuits for the Crust
The crust acts as the foundation of your pie, so choosing the right biscuit matters. Traditionally, digestive biscuits are used in the UK, but depending on your location, there are plenty of great substitutes:
| Biscuit Type | Texture | Flavor Notes |
|---|---|---|
| Arnott’s Granita | Crunchy | Mildly sweet, Australian staple |
| Graham Crackers | Crumbly | Slight honey note, great for US bakers |
| Butternut Snap | Firm | Rich and slightly nutty |
| Marie Biscuits | Light | Subtle vanilla taste |
| Digestives | Soft crumb | Malty, semi-sweet |
To make the crust:
- Crush 250 grams of biscuits into fine crumbs using a food processor or a rolling pin and ziplock bag.
- Mix with 160 grams of melted butter until combined.
- Press the mixture firmly into a tart pan and refrigerate for 20–30 minutes to set.
Pro Tip: Want more flavor? Add a pinch of salt to the crust mixture. It balances out the sweetness beautifully.
Why Dulce de Leche Beats Condensed Milk
Here’s where many home bakers make a crucial mistake: using sweetened condensed milk instead of dulce de leche. While both are milk-based, the textures and flavors are very different.
- Sweetened condensed milk is thin, sticky, and super sweet. To transform it into caramel, it requires a long cooking process.
- Dulce de leche is pre-cooked and thick with a deep, toffee-like flavor—perfect for Banoffee Pie.
For best results:
- Use 1 x 395g can of dulce de leche such as Nestlé Top n Fill.
- If desired, melt it with 75g butter and 75g light brown sugar in a saucepan. This creates a thicker set and deep flavor.
- Prefer shortcuts? Use the canned version directly—just don’t stir it too much, or it’ll become runny.

Banoffee Pie Recipe
- Total Time: 2 hours 20 minutes
- Yield: 10 slices 1x
- Diet: Vegetarian
Description
This Banoffee Pie recipe is an easy no-bake dessert with a biscuit crust, rich dulce de leche caramel, fresh bananas, and whipped cream, finished with dark chocolate shavings. Perfect for any occasion.
Ingredients
For the biscuit base
250 grams Arnott’s Granita biscuits (or Digestives, Marie, Graham Crackers)
160 grams butter, melted
For the caramel filling
1 x 395g can dulce de leche
75 grams butter, cubed
75 grams light brown sugar
For the whipped cream
500 ml thickened cream
1 tablespoon icing sugar
1 teaspoon vanilla bean paste or extract
To assemble
2–3 ripe bananas
50 grams dark chocolate, grated or shaved
Instructions
1. Crush the biscuits into fine crumbs using a food processor or rolling pin.
2. Mix in melted butter until evenly combined.
3. Press the mixture into a 22cm tart tin, covering base and sides. Chill for 20–30 minutes.
4. In a saucepan, combine dulce de leche, butter, and brown sugar.
5. Whisk over low heat until melted and smooth, then simmer 2–3 minutes. Let cool.
6. Pour caramel into crust and refrigerate 2–3 hours until set.
7. Whip cream with icing sugar and vanilla to stiff peaks.
8. Slice bananas and arrange over the chilled caramel.
9. Top with whipped cream and garnish with grated chocolate.
10. Chill until ready to serve.
Notes
Use ripe but firm bananas for the best flavor.
Brush banana slices with lemon juice to prevent browning.
You can use canned caramel straight without cooking, but it will be softer.
The biscuit base can be made ahead and frozen unfilled for up to 3 months.
Best served cold straight from the fridge.
Dulce de leche is not the same as condensed milk. Make sure to use the correct one.
- Prep Time: 10 minutes
- Cook Time: 10 minutes
- Category: Pie Recipes
- Method: No-Bake
- Cuisine: English
Nutrition
- Serving Size: 1 slice
- Calories: 513
- Sugar: 19g
- Sodium: 304mg
- Fat: 40g
- Saturated Fat: 24g
- Unsaturated Fat: 14g
- Trans Fat: 1g
- Carbohydrates: 38g
- Fiber: 2g
- Protein: 4g
- Cholesterol: 108mg
Making the Biscuit Base
The base of a Banoffee Pie is where texture and flavor begin. It’s the crunchy, buttery layer that supports all the creamy toppings and helps balance the sweetness of the filling. Getting this part right sets the tone for the entire dessert.
Step-by-Step Process for a No-Bake Crust
You don’t need to turn on the oven to create a firm, flavorful crust. Follow these steps for a crust that holds its shape and complements the creamy toppings perfectly:
Ingredients
- 250g Arnott’s Granita biscuits (or substitute with Digestives, Marie, Graham Crackers, or Butternut Snap)
- 160g melted butter (approximately ⅔ cup)
Instructions
- Crush the Biscuits
Add the biscuits to a food processor and blitz until fine crumbs form. No processor? No problem. Place the biscuits in a zip-lock bag and use a rolling pin to crush them manually. - Mix with Butter
Pour the crumbs into a bowl and mix in the melted butter. Stir until the mixture is evenly coated and starts to clump together. - Form the Base
Press the mixture firmly into a 22cm (8.6 inch) tart tin using the back of a spoon. Make sure to push it up the sides for a proper pie wall. - Chill the Base
Pop it into the refrigerator for 20–30 minutes to set. A properly chilled crust ensures a clean slice and strong support for the layers above.
Quick Tip: If you want a slightly salted touch to offset the sweetness of the caramel filling, sprinkle a small pinch of sea salt into the biscuit mixture before pressing it into the tin.
Tips to Get the Perfect Crunch and Hold
Even though it’s a no-bake crust, there are ways to ensure that it doesn’t crumble or get soggy under the layers of caramel and cream.
- Use the right butter-to-crumb ratio: Too much butter, and it turns greasy. Too little, and it won’t hold its shape.
- Press firmly and evenly: This ensures the crust sticks together and doesn’t fall apart when sliced.
- Chill thoroughly: A minimum of 20 minutes in the fridge is essential, but chilling it longer gives better structure, especially if you’re assembling ahead of time.
- Use a tart tin with a removable base: This makes transferring and serving the Banoffee Pie much easier.
Preparing the Caramel Filling
At the heart of any great Banoffee Pie recipe is the caramel layer. It’s what gives this dessert its signature toffee flavor and rich, indulgent appeal. Whether you take the classic route by gently simmering dulce de leche with butter and brown sugar or go for a shortcut with canned caramel, the result should be thick, smooth, and irresistibly sweet.
Cooking Dulce de Leche with Butter and Brown Sugar
If you’re aiming for a firmer set and deeper flavor, this quick stovetop method is your best bet. It only takes five minutes and creates a luscious caramel layer that doesn’t ooze when sliced.
Ingredients
- 1 x 395g can of dulce de leche (not sweetened condensed milk)
- 75g butter, cubed
- 75g light brown sugar
Instructions
- Combine the Ingredients
In a small saucepan, place the dulce de leche, butter, and brown sugar. - Melt and Stir
Heat over low heat, whisking continuously until the mixture is melted and well combined. - Simmer Gently
Bring it to a light simmer and keep whisking for 2–3 minutes. The mixture should become smooth and slightly thickened. - Cool Slightly and Pour
Let the caramel cool for 1–2 minutes, then pour it over the chilled biscuit base. Smooth it with a spatula for an even layer. - Chill to Set
Refrigerate the Banoffee Pie for at least 2 hours to let the caramel firm up before layering on the bananas and cream.
Important: Stir constantly on low heat to avoid burning. The sugar can easily catch at the bottom of the pan.
Shortcut Methods with Canned Caramel
When you’re short on time or just want to keep things simple, skip the stovetop and use canned dulce de leche directly.
How to Use It
- Open the can, but don’t stir the contents. Stirring introduces air and loosens the consistency.
- Spoon it carefully into the chilled crust and spread it out with a spatula.
- For a firmer texture, refrigerate the filled base for 30–60 minutes before adding other layers.
Bonus Tip: Use two cans if you like a thicker caramel layer. It adds height and drama to your Banoffee Pie.
Whipping and Flavoring the Cream
One of the standout features of any great Banoffee Pie recipe is the fluffy, lightly sweetened whipped cream that crowns the dessert. It’s more than just a topping—it’s the balance point that keeps the Banoffee Pie from feeling overly rich. In this part, we’ll master the art of making stable, flavorful whipped cream that won’t deflate or weep.
The Right Cream Consistency and Flavor Enhancements
A thick, stable whipped cream holds the Banoffee Pie together and adds that soft, creamy finish everyone loves. Here’s how to get it just right:
Ingredients
- 500ml thickened cream
- 1 tablespoon icing sugar (also known as powdered sugar)
- 1 teaspoon vanilla bean paste or vanilla extract
Instructions
- Chill Your Tools
Cold is key. Place your mixing bowl and beaters in the fridge for 10 minutes before whipping. Cold cream and tools help the fat emulsify and whip better. - Start Slow, Then Build Up
Add the cream, sugar, and vanilla to the bowl. Start beating at medium speed, then increase as the cream thickens. - Stop at Stiff Peaks
You’re looking for stiff peaks—when the cream holds a peak without collapsing. Be careful not to overbeat, or you’ll end up with butter. - Flavor Boosters (Optional)
- A pinch of salt adds depth and cuts through sweetness.
- Espresso powder or a dash of liqueur like Baileys can give your cream a gourmet twist.
Pro Tip: Don’t prepare the whipped cream too early. For the best texture, whip it just before assembling the Banoffee Pie.
Mistakes to Avoid While Whipping Cream
Even experienced bakers occasionally struggle with whipped cream. Avoid these pitfalls to ensure your Banoffee Pie stays picture-perfect:
- Using warm cream: It won’t whip properly.
- Overbeating: This causes the cream to turn grainy or even start turning into butter.
- Skipping stabilizers: While not necessary in this recipe, in warm climates you can add a spoonful of mascarpone or a pinch of cornstarch for extra stability.
- Adding flavors too early: Wait until the cream has thickened a bit before adding vanilla and sugar to ensure even distribution.
Certainly! Here’s a more concise version of PART 6 for the Banoffee Pie recipe while keeping it structured and optimized for SEO and readability:
Assembling the Banoffee Pie
Once your crust and caramel are chilled, it’s time to layer up and finish your Banoffee Pie recipe with classic toppings.
Layering Bananas, Caramel, and Cream
- Slice the Bananas
Use 2–3 ripe bananas with yellow skins and a few brown spots. Slice them thickly and arrange them over the caramel filling in a single layer. - Add the Whipped Cream
Spread or pipe the whipped cream over the bananas, covering the surface evenly. For a decorative touch, use a star piping tip. - Garnish with Chocolate
Top with 50g of grated or shaved dark chocolate. For an extra flair, try chocolate curls or dust with cocoa. - Chill and Serve
Refrigerate the Banoffee Pie for 30 minutes before serving for the cleanest slices.
Pro Tip: Lightly brush banana slices with lemon juice to keep them from browning.
Variations and Modern Twists
Looking to change up your Banoffee Pie recipe? Here are simple twists to suit different diets and flavor cravings.
Vegan, Gluten-Free, and Light Options
- Vegan: Use plant-based biscuits, coconut cream, and vegan caramel made from coconut milk and brown sugar.
- Gluten-Free: Swap in gluten-free digestives or graham-style crackers.
- Healthier Version: Mix Greek yogurt with whipped cream and use a lighter caramel or smaller portion size.
Flavor Add-Ins
- Coffee: Stir instant espresso into the caramel for depth.
- Nut Butters: Add peanut butter or almond butter to the caramel layer.
- Chocolate Hazelnut: Spread a thin layer under bananas for a Nutella-style twist.
Storage, Make-Ahead, and Serving Tips
One of the best things about the Banoffee Pie recipe is how easy it is to make ahead and store. Whether you’re prepping for a party or saving leftovers, here’s how to keep your pie fresh, firm, and full of flavor.
How to Store and Freeze Banoffee Pie
In the Fridge
- Store the fully assembled pie in the fridge, covered loosely with plastic wrap or in an airtight container.
- It stays fresh for up to 2 days, but the bananas may start to brown after day one.
In the Freezer
- Freeze the crust and caramel base (without bananas or cream) for up to 3 months.
- Wrap the tart tin tightly in plastic wrap and foil.
- Thaw in the fridge overnight before adding fresh bananas and cream.
Important: Don’t freeze the whipped cream or banana layer, as the texture will suffer once thawed.
When and How to Assemble for Freshness
To keep your layers from becoming soggy or discolored:
- Assemble just before serving if possible.
- Brush banana slices with lemon juice to slow browning.
- Store cream and sliced bananas separately if prepping a day in advance.
- Keep the entire pie chilled until the moment you serve it.
Serving Tip: Use a sharp, warm knife (dip in hot water, then wipe dry) to cut clean slices.
Conclusion
There’s a reason the Banoffee Pie recipe remains a favorite across generations and countries—it’s simple to make, doesn’t require baking, and delivers a perfect balance of flavors and textures in every bite. With its crunchy biscuit base, smooth caramel filling, sweet ripe bananas, and fluffy whipped cream topped with chocolate shavings, Banoffee Pie is a guaranteed crowd-pleaser.
Whether you stick to the classic version or experiment with modern twists, this dessert is flexible enough to suit any occasion, from family dinners to celebrations. Just remember to use quality ingredients, chill thoroughly, and assemble just before serving for the freshest result.
For More Delicious And Easy Recipes Follow Me In Facebook And Pinterest.
