


Nothing says comfort like a fresh-baked peach pie. Bursting with juicy fruit, wrapped in a flaky, golden crust, and finished with a sparkly sugar top, this peach pie recipe is a summer favorite—and a year-round indulgence. Whether you’re new to pie baking or a seasoned home cook, this step-by-step guide breaks down everything you need to create the perfect peach pie from scratch. From selecting ripe peaches to mastering the lattice crust, we’ll walk through every stage with easy instructions and expert tips.
In this article, we’ll explore how to choose the best peaches, prep your pie crust, mix and flavor your filling, and achieve that bakery-quality finish right in your home kitchen. You’ll also learn how to adapt the recipe to your taste and avoid common pie-making mistakes.
Selecting and Preparing the Peaches for Pie
Choosing the Best Peaches for Pie
The flavor and texture of your pie start with the peaches you use. For the best results, choose freestone peaches, which have pits that easily separate from the flesh. These are ideal for slicing and baking, and they’re usually in peak season from late June through August.
Look for peaches that:
- Feel slightly soft when gently squeezed
- Have a fragrant, sweet aroma
- Show vibrant skin with a mix of yellow, orange, and red hues
- Are free from bruises or blemishes
Avoid underripe peaches, as they can lead to a dry, mealy filling. Overripe peaches may become mushy during baking.
If you’re baking out of season, frozen sliced peaches can work in a pinch. Just be sure to thaw and drain them well before using to prevent a watery pie.
How to Peel and Slice Peaches Easily
Peeling peaches doesn’t have to be a hassle. Use the blanch-and-shock method for quick and clean skin removal.
Steps:
- Score a small “X” on the bottom of each peach with a knife.
- Boil water in a large pot and gently place the peaches in for 30–60 seconds.
- Remove them and plunge immediately into a bowl of ice water.
- Once cool, peel the skins off with your fingers or a small knife.
After peeling, halve the peaches, remove the pits, and slice into ½-inch wedges. Uniform slices ensure even cooking, and they help the pie hold its shape once baked.
Flavor Enhancements in Peach Pie Filling
What makes this peach pie so flavorful is the careful balance of natural sweetness and warm spice. Here’s what goes into the filling:
- Granulated sugar: Sweetens the peaches without overpowering them
- Cornstarch: Thickens the juices into a luscious filling
- Lemon juice: Adds brightness and enhances natural fruit flavors
- Vanilla extract: Offers depth and aroma
- Ground cinnamon: Infuses warmth and pairs perfectly with peaches
Some optional flavor twists include a pinch of nutmeg or cardamom to elevate the spice profile. A pinch of salt can also balance the sweetness, depending on how ripe or tart your peaches are.
After mixing the ingredients, let the peaches sit for a few minutes. This resting time helps draw out juices and allows the cornstarch to begin dissolving—essential for that thick, non-runny filling.
Important Notes on Peach Juices
It’s tempting to discard the excess juice that forms in the bowl after mixing, but don’t. Those juices contain the dissolved cornstarch, and discarding them will leave your pie with a loose, watery texture. Pour everything into the crust so the thickening process works effectively in the oven.
Print
Peach Pie Recipe
- Total Time: 5 hours 20 minutes
- Yield: 8 servings
Description
This homemade peach pie recipe features fresh peaches, a buttery double crust, and warm cinnamon flavor. Perfect for summer or anytime you crave a comforting dessert.
Ingredients
1 double pie crust
3 pounds peaches (about 8–9 peaches), peeled and sliced
⅔ cup granulated sugar
6 tablespoons cornstarch
1 tablespoon lemon juice
2 teaspoons vanilla extract
1 teaspoon ground cinnamon
2 tablespoons unsalted butter, cubed
1 egg
1 tablespoon coarse sugar for sprinkling
Instructions
1. Preheat the oven to 425°F (218°C). Let pie dough warm slightly on the counter.
2. Peel and slice peaches into ½-inch thick slices.
3. In a large bowl, mix peaches, sugar, cornstarch, lemon juice, vanilla, and cinnamon.
4. Roll out the bottom crust into a 13-inch circle and fit into a 9-inch pie plate.
5. Roll out the top crust into an 11-inch circle and cut into 1-inch strips for lattice.
6. Fill the crust with peach mixture and dot with butter.
7. Lay strips over the pie in a lattice pattern. Trim and crimp edges.
8. Beat egg with 1 tablespoon water. Brush crust with egg wash and sprinkle with coarse sugar.
9. Cover pie edges loosely with foil. Bake for 20 minutes.
10. Reduce oven to 375°F (190°C) and bake for 40–50 more minutes until golden and bubbly.
11. Cool on a rack for 4 to 5 hours before slicing.
Notes
Peeling the peaches is optional.
A pinch of salt enhances flavor.
You can add nutmeg, cardamom, or ginger for extra depth.
Use all the juice from the filling mixture.
If skipping lattice, cut vents into a full crust.
Bake on a preheated tray to help crisp the bottom crust.
Tent the whole pie with foil if the top browns too quickly.
- Prep Time: 20 minutes
- Cook Time: 1 hour
- Category: Pies
- Method: Baking
- Cuisine: American
Mastering the Pie Crust: Techniques and Troubleshooting
Choosing and Preparing the Dough
A truly great peach pie starts with a well-made pie crust. For this recipe, you’ll need a double pie crust—one for the base and one for the lattice topping. You can use homemade or store-bought dough, but homemade often yields better flavor and texture.
Your crust should be:
- Chilled but pliable
- Not overly floured when rolling out
- Rolled evenly to 1/8-inch thickness
Let your dough sit at room temperature for 10 to 15 minutes before rolling. This softens the butter just enough to prevent cracking, but still keeps the dough cool, which is essential for flakiness.
Use a rolling pin to flatten one dough disk into a 13-inch round for the bottom crust and another into an 11-inch round for the lattice. Aim for even thickness to ensure consistent baking.
Fitting the Dough into the Pie Plate
Gently place the rolled-out bottom crust into a 9-inch deep-dish pie plate. Press it into the corners without stretching—stretching causes shrinking in the oven. Let the excess dough hang over the sides. This will be trimmed and crimped later.
Pour the peach filling into the crust, making sure it’s evenly distributed. Then dot the top with cubed unsalted butter, which adds richness and helps the juices bubble beautifully during baking.
Creating a Lattice Top Crust
The lattice top not only looks stunning, but it also allows steam to escape and helps the filling thicken properly. Here’s how to build it:
- Use a sharp knife or pastry cutter to slice the second dough disk into 1-inch-wide strips.
- Lay 4 to 5 strips vertically across the top of the filling.
- Fold back every other vertical strip and lay one horizontal strip across.
- Alternate folding back and layering strips to weave a lattice.
Trim the overhanging edges of the strips and bottom crust to a 1-inch overhang. Fold it under to seal, then crimp using your fingers or a fork for a decorative finish.
If you’re short on time or want a simpler look, place the top crust whole over the filling. Cut 5 to 6 vents in the center to let steam escape, or use cookie cutters to create decorative cutouts for the top.
The Egg Wash and Sugar Finish
The finishing touch is an egg wash that helps your pie achieve a shiny, golden-brown top. Whisk 1 egg with 1 tablespoon of water, and brush it gently over the lattice and edges of the crust.
Finally, sprinkle the top with coarse sugar. This not only adds sparkle but gives a sweet crunch that contrasts nicely with the soft filling.
Before placing the pie in the oven, cover the crimped edges with aluminum foil to prevent overbrowning. You’ll remove it partway through baking.
Baking the Peach Pie to Golden Perfection
Temperature and Timing for Best Results
Proper baking is the key to turning raw dough and fruit into a bubbling, golden masterpiece. For this peach pie recipe, baking happens in two stages to ensure the crust crisps and the filling thickens:
- Start at 425°F (218°C) for the first 20 minutes. This high heat sets the crust quickly, helping it maintain structure.
- Reduce to 375°F (190°C) and continue baking for 40 to 50 minutes. This lower temperature allows the filling to cook and bubble without burning the crust.
Total bake time should be 60 to 70 minutes, but it’s more important to go by signs than the clock. Look for:
- A deep golden crust
- Juices bubbling in the center, not just at the edges
These signs confirm that the filling is hot enough to activate the cornstarch and thicken properly.
How to Avoid a Soggy Bottom
Nobody wants a soggy crust. Here’s how to prevent it:
- Use a preheated sheet tray under the pie dish. Place it in the oven while preheating. This provides direct heat to the bottom crust and helps it crisp up.
- Avoid overly juicy fillings. Don’t skip the cornstarch or drain the peaches, as the starch binds the juices during baking.
- Don’t underbake. Even if the top is golden, the filling and bottom crust need time to fully set. If the top browns too fast, tent the whole pie with foil, but keep baking.
Ceramic pie dishes insulate more than metal, so they may slow the browning process. Be patient and allow the pie to cook thoroughly for the best texture.
Checking Doneness Without Cutting
Never slice a pie straight out of the oven—it needs time to set. But how do you know when it’s ready?
Here are the clues:
- The center filling is visibly bubbling
- The lattice top is evenly browned
- You see thickened juices oozing at the edges
Cooling, Slicing, and Serving Peach Pie
Why Cooling Matters
After all the effort put into baking, it’s tempting to slice into your peach pie right away. But resist the urge. Cooling is essential for setting the filling properly and getting clean slices.
Let the pie cool on a wire rack for at least 4 to 5 hours at room temperature. This long rest allows the cornstarch to fully gel with the peach juices, resulting in a slice that holds its shape rather than running across the plate.
If you cut it too soon, the filling will spill out, and you’ll miss out on the perfect balance of texture and flavor.
Best Way to Slice a Perfect Piece
Once your pie is completely cool, it’s time to slice and serve. For the cleanest cuts:
- Use a sharp serrated knife to saw through the lattice and crust.
- Wipe the knife between each slice to prevent sticking.
- Use a pie server or offset spatula to lift out the slices gently.
Start with a cut down the center, then halve each side into quarters for 8 even servings.
The crust should be golden and flaky, and the filling thick, glossy, and packed with peaches. This is when all the baking techniques you’ve followed come together beautifully.
How to Serve Peach Pie
Peach pie can be served warm, room temperature, or chilled, depending on preference. Here are a few serving ideas:
- Room temperature for a balanced texture
- Slightly warmed (about 10 seconds in the microwave) for a soft and comforting bite
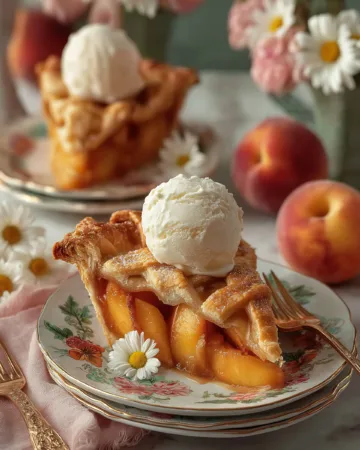
- Topped with a scoop of vanilla bean ice cream or a dollop of whipped cream
Avoid using alcohol-based sauces or pairings. The natural sweetness and spices in the pie are best complemented by classic, non-alcoholic sides.
Customizing Your Peach Pie for Flavor and Style
Adding Different Spices to Elevate Flavor
While the classic peach pie relies on cinnamon and vanilla, you can easily switch things up with other warm spices to create a more complex, exciting flavor profile. Here are a few excellent additions to consider:
- Nutmeg: Adds depth and a slightly nutty warmth. Use just ¼ teaspoon to avoid overpowering the peaches.
- Cardamom: Offers a floral, citrusy note that pairs beautifully with stone fruits. Try ⅛ to ¼ teaspoon for a unique twist.
- Ginger: Ground ginger gives a mild zing and works well with both ripe and slightly tart peaches.
Mix any of these into your filling, adjusting based on your taste. Just remember not to add too many at once—let the peaches shine.
Trying New Crust Designs
Though a lattice is traditional, there are countless ways to get creative with your pie’s top crust. Some popular alternatives include:
- Full crust with vents: Roll out the top crust whole and cut 5 or 6 slits in the center to let steam escape.
- Cookie-cutter patterns: Use small cutters to make stars, hearts, or leaves and layer them across the top.
- Braided edges or weaves: Braiding thin strips of dough creates an eye-catching finish.
These options don’t change the baking method, but they can elevate your presentation significantly, especially for holidays or gatherings.
Using Salted Butter or Adding a Pinch of Salt
The recipe calls for unsalted butter, but you can substitute salted butter to balance sweetness with a subtle savory edge. Alternatively, add a small pinch of salt—about 1/8 teaspoon—to the peach mixture before filling your crust.
Salt enhances the complexity of the flavors and works particularly well when your peaches are very sweet or very ripe. It’s a minor change with a noticeable impact.
Dealing With Overly Juicy Peaches
Some peaches release more liquid than others, especially if they’re very ripe. If you notice your fruit mixture is extra juicy:
- Don’t discard the liquid. It contains dissolved cornstarch.
- Just stir the mixture well and pour everything into the crust.
- If concerned, increase the cornstarch slightly—by ½ to 1 tablespoon—to help thicken the extra moisture.
Storing, Freezing, and Reheating Peach Pie
How to Store Peach Pie Properly
Once your pie has cooled completely, storing it correctly ensures it stays fresh and delicious for days. Here’s how:
- At Room Temperature: You can keep your peach pie covered loosely with foil or plastic wrap for up to 2 days. Choose a cool, dry spot away from direct sunlight.
- In the Refrigerator: If storing beyond 2 days, place the pie in the fridge. Cover it tightly to prevent it from absorbing odors or drying out. It will stay good for 4 to 5 days refrigerated.
Keep in mind that chilling the pie may slightly firm the crust. If you prefer a softer texture, let it sit at room temperature for about 30 minutes before serving.
Can You Freeze Peach Pie?
Yes, peach pie freezes beautifully, both baked and unbaked.
To Freeze a Baked Peach Pie:
- Allow the pie to cool completely.
- Wrap it tightly in plastic wrap, then aluminum foil.
- Label it with the date and store for up to 3 months.
- To reheat, unwrap and bake at 350°F for 25 to 30 minutes, or until heated through.
To Freeze an Unbaked Peach Pie:
- Assemble the pie but don’t brush with egg wash.
- Freeze uncovered until solid, then wrap tightly in two layers of plastic and foil.
- Bake straight from frozen at 425°F for 20 minutes, then reduce to 375°F and bake for 50–60 minutes, adding the egg wash during the last 20 minutes of baking.
This method ensures you always have a freshly baked dessert ready when guests come over or when a craving hits.
Reheating Without Drying Out
To reheat individual slices:
- Preheat the oven to 300°F.
- Place slices on a baking sheet and cover lightly with foil.
- Heat for about 10–12 minutes until warm throughout.
Avoid microwaving the entire pie, as it can make the crust soggy. For a quick single slice, use the microwave for 10–15 seconds, but keep the crispiness in mind.
Conclusion: Bake Your Best Peach Pie Ever
Whether you’re baking for summer BBQs, family dinners, or simply craving something sweet, this peach pie recipe delivers every time. It brings together the juiciness of ripe peaches, the warmth of cinnamon and vanilla, and the buttery flake of a homemade crust into one unforgettable dessert.
By following this guide, you’ve learned how to select perfect peaches, prepare a flavorful filling, master a lattice crust, and bake it to golden perfection. With customizable options and smart storage tips, this recipe is both timeless and flexible.