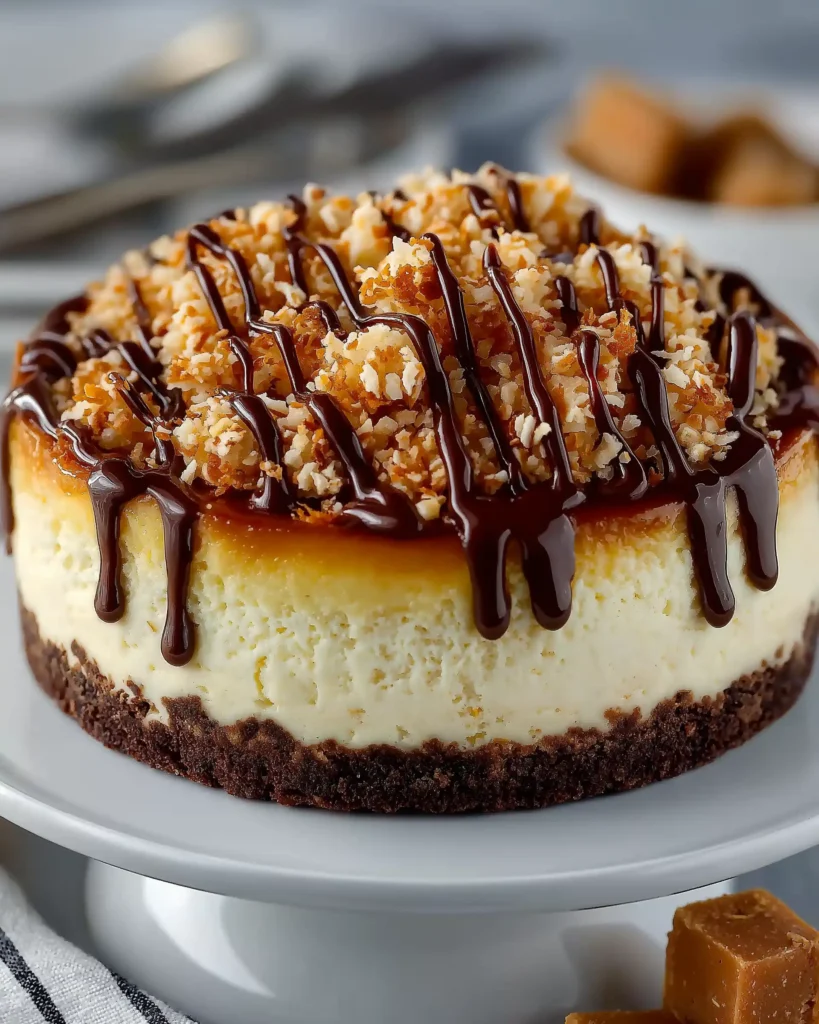
Craving a rich, creamy dessert with a tropical twist? This Caramel Coconut Cheesecake recipe combines the silky smoothness of cheesecake with the sweet crunch of toasted coconut and the deep, buttery flavor of caramel.
It’s perfect for special occasions or anytime you want to impress guests with a homemade treat that looks as incredible as it tastes. From preparing a crisp chocolate graham cracker crust to layering a decadent coconut caramel topping, this guide walks you through each step. Whether you’re an experienced baker or a beginner in the kitchen, this recipe is straightforward and rewarding.
In this article, we’ll cover the essential ingredients, equipment, and detailed steps, along with variations, storage tips, and troubleshooting for perfect results every time.
Contents
- 1 Ingredients and Equipment for the Perfect Caramel Coconut Cheesecake
- 2 Caramel Coconut Cheesecake Recipe
- 3 Preparing the Crust and Cheesecake Batter with Step-by-Step Instructions
- 4 Cooking Your Cheesecake in the Pressure Cooker Like a Pro
- 5 Creating the Coconut Caramel Topping and Final Touches
- 6 Storing, Serving, and Slicing for Best Results
- 7 Custom Variations and Helpful Troubleshooting Tips
- 8 Conclusion: A Cheesecake Worth Savoring
Ingredients and Equipment for the Perfect Caramel Coconut Cheesecake
Essential Ingredients for Flavor and Texture
The success of any dessert begins with using the right ingredients in precise proportions. Here’s what you’ll need to make this luscious caramel coconut cheesecake:
Crust Ingredients
- 1/2 cup crushed chocolate graham cracker cookies
- 2 tablespoons butter, melted
Cheesecake Filling
- 12 ounces cream cheese, at room temperature
- 1/2 cup sugar
- 1/4 cup heavy cream
- 1/4 cup sour cream
- 1 1/2 teaspoons vanilla extract
- 1 tablespoon all-purpose flour
- 2 eggs, room temperature
- 1 egg yolk, room temperature
Topping Ingredients
- 1 1/2 cups sweetened shredded coconut
- 12 chewy caramels (preferably Kraft), unwrapped
- 3 tablespoons heavy cream
- 1/4 cup chopped semisweet chocolate
Each ingredient plays a specific role. The cream cheese gives body and creaminess, the eggs help set the filling, and the sour cream and heavy cream provide balance and smoothness. Vanilla enhances sweetness while flour stabilizes the structure. The caramel and toasted coconut topping adds contrasting texture and flavor.
Must-Have Equipment to Get the Job Done
To achieve the perfect cheesecake texture and structure, having the right tools is crucial. Here are the key items you’ll need:
- Nordic Ware Leakproof Springform Pan (7 Inch): This pan is essential for shaping the cheesecake and ensuring easy removal after baking.
- Kitchenaid Handheld Mixer: A good mixer allows you to blend ingredients quickly and evenly without overmixing.
- Mrs. Anderson’s Baking and Cooling Rack (6-Inch): Cooling the cheesecake gradually on this rack prevents cracking and improves texture.
- Pressure Cooking Pot with Trivet and Foil Sling: For those using an Instant Pot or similar device, this setup allows gentle, even cooking under pressure.
A well-prepared setup leads to smooth execution, so make sure everything is measured, prepped, and within reach before you start.
Print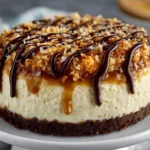
Caramel Coconut Cheesecake Recipe
- Total Time: 13 hours 10 minutes
- Yield: 6 servings
- Diet: Vegetarian
Description
This caramel coconut cheesecake recipe blends creamy cheesecake, a chocolate crust, golden toasted coconut, and rich caramel for a decadent dessert perfect for any occasion.
Ingredients
CRUST:
1/2 cup crushed chocolate graham cracker cookies
2 tablespoons butter, melted
FILLING:
12 ounces cream cheese, room temperature
1/2 cup sugar
1/4 cup heavy cream
1/4 cup sour cream
1 1/2 teaspoons vanilla extract
1 tablespoon all-purpose flour
2 eggs, room temperature
1 egg yolk, room temperature
TOPPING:
1 1/2 cups sweetened shredded coconut
12 chewy caramels (unwrapped)
3 tablespoons heavy cream
1/4 cup chopped semisweet chocolate
Instructions
1. Grease a 7-inch springform pan and coat with nonstick spray.
2. Mix crushed graham crackers and melted butter. Press into the pan and freeze.
3. In a bowl, beat cream cheese and sugar until smooth.
4. Blend in cream, sour cream, vanilla, and flour.
5. Add eggs and yolk one at a time. Do not overmix.
6. Pour batter into crust. Cover pan with foil.
7. Add 1 cup of water and a trivet to the pressure cooker. Lower the pan in using a foil sling.
8. Cook on high pressure for 35 minutes. Natural release for 10 minutes, then quick release.
9. Check for doneness. If needed, cook for 5 more minutes.
10. Cool on rack, then chill overnight or at least 4 hours.
11. Toast coconut at 300°F for 20 minutes, stirring occasionally.
12. Melt caramels with cream in microwave, stirring every 20 seconds.
13. Mix toasted coconut into melted caramel and spread over cheesecake.
14. Melt chocolate and drizzle over the top. Serve immediately.
Notes
Use a homemade foil sling for easy lifting.
For best results, slice before refrigerating leftovers.
Top the cheesecake just before serving for optimal texture.
- Prep Time: 15 minutes
- Cook Time: 35 minutes
- Category: Dessert
- Method: Pressure Cooker
- Cuisine: American
Preparing the Crust and Cheesecake Batter with Step-by-Step Instructions
Step-by-Step Crust Preparation for a Solid Base
Creating a firm and flavorful crust sets the foundation for this creamy caramel coconut cheesecake recipe. The chocolate graham crackers add a rich contrast to the sweet and tangy filling.
Steps to Make the Crust:
- Grease the Pan: Start by coating your 7-inch springform pan with nonstick spray. This prevents sticking and ensures easy removal later.
- Mix the Ingredients: In a small bowl, combine 1/2 cup of crushed chocolate graham cracker cookies with 2 tablespoons of melted butter. Stir until the crumbs are evenly moistened.
- Press and Freeze: Firmly press the mixture into the bottom and slightly up the sides of the springform pan. Use the back of a spoon or the bottom of a glass to smooth and compact the crust evenly. Place the pan in the freezer while preparing the cheesecake batter. Chilling the crust helps it hold its shape during baking.
This crust creates a rich, slightly crunchy contrast to the silky filling that follows.
Blending the Cheesecake Batter Just Right
Now, onto the heart of the cheesecake. The key here is mixing just enough without incorporating too much air, which can lead to cracks.
Steps to Prepare the Batter:
- Mix the Base: In a large mixing bowl, beat 12 ounces of room-temperature cream cheese and 1/2 cup sugar with a hand mixer on medium speed. Mix until smooth and lump-free.
- Add Liquids and Flavor: Blend in 1/4 cup heavy cream, 1/4 cup sour cream, 1 1/2 teaspoons vanilla extract, and 1 tablespoon flour. Mix on low speed until just incorporated. These ingredients add richness, tang, and stability.
- Add the Eggs Gently: Add two eggs and one egg yolk, one at a time, mixing briefly after each addition. Do not overmix. Overbeating introduces air into the batter, which can cause puffing and cracking during baking.
The resulting batter should be thick, creamy, and smooth, with no lumps or bubbles. It should pour slowly and evenly into the pan.
Assembling and Preparing for Cooking
Once the batter is ready and the crust has chilled, you’re ready to assemble.
Steps:
- Remove the crust from the freezer and pour the batter evenly over it in the pan.
- Smooth the top gently with a spatula if needed.
- Cover the pan with a sheet of aluminum foil to protect it from moisture during pressure cooking.
At this point, you’re ready to move into cooking the cheesecake using a pressure cooker for consistent, moist results.
Cooking Your Cheesecake in the Pressure Cooker Like a Pro
Why Pressure Cooking Works Wonders for Cheesecake
Using a pressure cooker might sound unconventional for a dessert, but it’s one of the best methods for a creamy, crack-free cheesecake. The moist environment mimics a water bath, delivering even heat and a luscious texture without the risk of overbaking. It’s also faster and more reliable than traditional oven methods, especially for dense recipes like this caramel coconut cheesecake.
Setting Up the Pressure Cooker the Right Way
Proper setup is essential to avoid water leakage and ensure perfect results.
Steps for Preparation:
- Add Water and Trivet: Pour 1 cup of water into the pressure cooking pot. This water generates the steam necessary to cook the cheesecake gently. Then place a trivet in the bottom to keep the cheesecake pan above the water level.
- Use a Sling for Safety: Place your foil sling under the cheesecake pan. This allows you to safely lower and lift the pan without tilting it. If you don’t have a sling, make one by folding a 20-inch sheet of aluminum foil into a long strip.
- Lower the Pan: Center the filled and foil-covered springform pan on the sling, and carefully lower it onto the trivet in the pot. Fold the sling handles down so the lid can close properly.
Cooking Process and Timing for Perfection
Cooking Instructions:
- High Pressure Cook Time: Secure the lid and set your pressure cooker to High Pressure for 35 minutes.
- Natural Release First: Once cooking time ends, turn off the cooker and allow pressure to release naturally for 10 minutes. This step is important to prevent sudden temperature changes, which could cause the cheesecake to crack.
- Quick Release Remaining Pressure: After 10 minutes, carefully do a quick pressure release to let out the remaining steam.
- Check for Doneness: Remove the lid carefully, and check the center of the cheesecake. It should be mostly set with a slight jiggle in the middle. If it still looks wet, re-cover with foil, return to the pot, and cook for 5 more minutes on high pressure, followed by another 10-minute natural release.
- Cool Gradually: Remove the cheesecake from the pot and place it on a wire cooling rack. Take off the foil. If any moisture has collected on top, dab it gently with the corner of a paper towel.
Let the cheesecake come to room temperature, then cover it tightly with plastic wrap and refrigerate for at least 4 hours, preferably overnight. This chilling time allows the texture to set fully and intensifies the flavor.
Creating the Coconut Caramel Topping and Final Touches
Toasting Coconut for Texture and Flavor
Toasted coconut adds an irresistible crunch and a slightly nutty flavor that elevates this caramel coconut cheesecake recipe from simple to stunning. Toasting also enhances the aroma and color, giving the dessert a beautiful golden finish.
Steps to Toast Coconut:
- Preheat Oven: Set your oven to 300°F. It’s important to toast at a low temperature to prevent burning.
- Spread Coconut Evenly: Line a baking sheet with parchment paper and spread 1 1/2 cups of sweetened shredded coconut evenly across it.
- Toast and Stir: Bake for about 20 minutes, stirring every few minutes. This ensures the coconut browns evenly and doesn’t burn in any spots.
- Cool Completely: Once golden and crisp, let the toasted coconut cool on the baking sheet. It will crisp up even more as it cools.
This step is essential for getting that signature chew and golden topping that contrasts beautifully with the creamy cheesecake layer.
Making the Smooth Caramel Coconut Mixture
Now that your coconut is toasted and ready, it’s time to mix it with warm, melty caramel. This creates the sticky-sweet layer that tops the cheesecake.
Steps to Make the Caramel Topping:
- Melt Caramels: In a microwave-safe bowl, place 12 chewy caramels with 3 tablespoons of heavy cream.
- Microwave in Intervals: Heat on High for 1 to 2 minutes, stirring every 20 seconds until the mixture is smooth and creamy. Be careful not to overheat or let it bubble over.
- Stir in Toasted Coconut: Once the caramel is completely melted and smooth, stir in the toasted coconut until evenly combined.
- Spread Topping Carefully: Spoon the warm caramel coconut mixture over the chilled cheesecake. Use a spatula or back of a spoon to spread it evenly, being gentle to avoid pulling up the cheesecake layer underneath.
This topping adds layers of rich, chewy sweetness with a touch of crunch, perfectly complementing the dense and creamy body of the cheesecake.
Drizzling with Melted Chocolate for a Finishing Touch
The final detail that ties everything together is a drizzle of semisweet chocolate. It adds a subtle bitterness that balances the sweetness of the caramel and coconut.
Steps to Add Chocolate Drizzle:
- Melt Chocolate Gently: Place 1/4 cup of chopped semisweet chocolate in a microwave-safe bowl. Heat at 50% power, stirring every 20 seconds, until smooth.
- Prepare a Piping Bag Substitute: Spoon the melted chocolate into a small zip-top plastic bag. Push it into one corner and snip off a tiny corner with scissors.
- Drizzle with Style: Gently squeeze the bag to drizzle chocolate over the top of the caramel-coconut layer. Create a zigzag pattern or spirals, depending on your style.
- Serve Immediately: Once drizzled, the cheesecake is ready to enjoy. For cleaner slices, run a knife under hot water and wipe clean between cuts.
This final touch not only makes your cheesecake Instagram-worthy but also adds complexity to each bite with chocolate’s rich, slightly bitter depth.
Storing, Serving, and Slicing for Best Results
How to Properly Chill and Store Cheesecake
One of the biggest keys to nailing this caramel coconut cheesecake recipe is in the chilling and storing process. Rushing this step can ruin the texture, so patience pays off.
Post-Bake Cooling Tips:
- Cool Gradually on Rack: After removing the cheesecake from the pressure cooker, always let it come to room temperature slowly on a wire rack. Rapid cooling can cause the top to crack or collapse.
- Cover and Refrigerate: Once at room temperature, cover the cheesecake securely with plastic wrap. This prevents it from absorbing odors from other foods in the fridge and keeps the surface from drying out.
- Minimum Chill Time: Refrigerate for at least 4 hours, but overnight chilling is highly recommended for the best texture and flavor fusion.
A properly chilled cheesecake will be firmer, easier to slice, and hold together beautifully when plated.
Best Practices for Slicing Cheesecake Neatly
Slicing cheesecake can be tricky if you don’t have the right method. Follow these tips for clean, professional-looking slices every time.
Tips for Perfect Slices:
- Use a Hot Knife: Run a sharp knife under hot water, then dry it before each cut. This melts through the dense cheesecake layer smoothly.
- Clean Between Slices: Wipe the blade clean after each cut to avoid dragging crumbs or filling across the surface.
- Pre-slice Before Refrigerating Leftovers: This step makes storing easier and helps the slices hold their shape better when served later.
For parties or gatherings, consider slicing the cheesecake in advance and storing the slices in individual airtight containers. This also helps maintain presentation and makes serving effortless.
Storing Leftovers the Right Way
Refrigeration:
Store leftover slices in an airtight container in the refrigerator for up to 5 days. The flavor will stay rich and satisfying, and the coconut topping remains chewy and flavorful.
Freezing (Optional):
If needed, cheesecake slices freeze well. Wrap individual pieces in plastic wrap, then in foil, and place them in a freezer-safe bag. Label with the date and freeze for up to 2 months. Thaw in the fridge overnight before serving.
With these storage techniques, you’ll enjoy every last bite of your cheesecake—without any waste or drop in quality.
Custom Variations and Helpful Troubleshooting Tips
Easy Variations to Customize Your Cheesecake
This caramel coconut cheesecake recipe is delicious as written, but if you’re feeling creative or have dietary needs, there are a few easy tweaks you can make without compromising flavor or texture.
Flavor Variations to Try:
- Nutty Crunch: Stir in 1/4 cup chopped pecans or toasted almonds into the coconut-caramel topping for added texture and flavor.
- Mini Cheesecakes: Use a silicone muffin pan or mini springform pans to create individual servings. These are perfect for parties or portion control.
- Gluten-Free Crust: Swap out the graham cracker crumbs with gluten-free chocolate cookies or almond flour mixed with cocoa powder for a gluten-free version.
- Dairy-Free Option: Use plant-based cream cheese, dairy-free sour cream, and coconut cream in place of the traditional dairy ingredients. Note that the texture may be slightly different, but still creamy and delicious.
Flavor Boosts:
- Add a pinch of sea salt to the caramel mixture for a salted caramel coconut finish.
- Mix 1/2 teaspoon of coconut extract into the cheesecake batter to amplify the tropical flavor.
These changes let you tailor the recipe for different occasions and preferences, making it even more versatile.
Troubleshooting Common Cheesecake Problems
Even seasoned bakers run into cheesecake challenges. Here are the most frequent issues and how to fix them.
Problem 1: Cheesecake Cracked on Top
- Likely Cause: Overmixing the batter or rapid temperature changes.
- Fix: Always mix at low speed and let the cheesecake cool slowly at room temperature before chilling.
Problem 2: Cheesecake Didn’t Set in the Middle
- Likely Cause: Underbaking or using cold ingredients.
- Fix: Ensure your cream cheese and eggs are at room temperature before mixing, and always check doneness by gently jiggling the center. If it’s too loose, return it to the pressure cooker for 5 more minutes.
Problem 3: Water on Top of Cheesecake
- Likely Cause: Moisture seeped through the foil during pressure cooking.
- Fix: Use a nonstick or tightly sealed foil, and if water collects, gently blot it with the edge of a paper towel right after removing the foil.
Problem 4: Topping is Too Hard or Too Runny
- Too Hard: Caramels were overheated or left to cool too long before spreading.
- Too Runny: Caramels weren’t melted enough or had too much cream. Stick to 3 tablespoons, stir often, and spread while warm.
Tips for First-Time Bakers
- Read the full recipe first: Familiarizing yourself with all steps avoids surprises.
- Prep everything ahead: Mise en place ensures a smoother experience.
- Don’t skip cooling time: It’s tempting, but your cheesecake needs time to set properly.
Understanding these common issues means fewer mistakes, less stress, and a more rewarding baking experience.
Conclusion: A Cheesecake Worth Savoring
This caramel coconut cheesecake recipe blends rich cream cheese, a crunchy chocolate crust, chewy coconut, and smooth caramel into a dessert that’s unforgettable. Whether you’re preparing it for a holiday gathering, a birthday, or just to treat yourself, it’s a recipe that impresses without being overly complex.
With detailed steps, customizable options, and helpful tips to avoid common mistakes, even beginner bakers can confidently create a dessert that looks and tastes like it came from a high-end bakery. Follow the chilling times, don’t skip the coconut toasting, and top it just before serving for best results.
With every slice, you’ll enjoy the balance of creamy filling, crunchy topping, and a hint of chocolate and caramel in every bite. Your only regret? Not making two.