If you’re craving a luscious dessert that requires zero baking, the Philadelphia No-Bake Cheesecake Recipe is your perfect match. Whether you’re entertaining guests, prepping for a holiday feast, or just treating yourself on a lazy weekend, this no-fuss, creamy cheesecake delivers every time. It’s smooth, tangy, fluffy, and sweet, all in one bite, thanks to a rich blend of Philadelphia cream cheese, cool whip, and a buttery graham cracker crust.
What sets this recipe apart is its simplicity. You don’t need fancy tools, baking experience, or even an oven. It’s all about minimal effort and maximum flavor. In this article, you’ll learn everything you need to know to make this classic American dessert — from choosing the right ingredients to achieving the perfect texture and flavor.
Contents
- 1 Making the Perfect No-Bake Cheesecake Crust
- 2 Philadelphia No-Bake Cheesecake Recipe
- 3 Creating the Creamiest Cheesecake Filling Without Baking
- 4 Tips and Tricks for the Best No-Bake Cheesecake Texture
- 5 Customizing Your No-Bake Cheesecake with Toppings and Variations
- 6 Storing and Serving Your No-Bake Cheesecake the Right Way
- 7 Conclusion
Making the Perfect No-Bake Cheesecake Crust
Why the Crust Matters in a No-Bake Cheesecake
The crust of any cheesecake is more than just a base — it’s the stage that sets the tone for the flavor and texture of the whole dessert. A good no-bake crust needs to be firm, buttery, and slightly sweet, complementing the creamy filling without falling apart or overpowering it.
Since this is a no-bake cheesecake, the crust plays a crucial structural role. It must hold together when sliced, resist crumbling, and deliver that signature crunch to contrast with the soft, creamy filling. Skimping on the crust or using the wrong ratio of crumbs to butter can make or break the entire dessert.
Ingredients Breakdown for a Firm Crust
Here’s what goes into creating the ideal no-bake cheesecake crust:
- 2 cups of graham cracker crumbs: These provide the base. You can crush whole crackers in a food processor or by hand using a zip-top bag and rolling pin. The finer the crumbs, the firmer the crust.
- 1 tablespoon of granulated sugar: A touch of sugar adds a hint of sweetness and enhances the golden color when chilled.
- ½ cup of melted unsalted butter: This binds everything together and adds richness. Melt it fully and stir it into the crumbs evenly.
Mixing and Shaping the Crust Properly
After crushing the graham crackers, combine them in a mixing bowl with the sugar and melted butter. Use a spoon or spatula to mix until all crumbs are moistened. The texture should feel like damp sand and hold its shape when pressed between your fingers.
Transfer the mixture to a 9-inch springform pan, then press it evenly into the bottom of the pan. Use the back of a spoon or the bottom of a flat glass to compact it tightly. Don’t forget to press some up the sides if you like a thicker edge.
Next, place the pan in the freezer for at least 15 minutes. This helps the butter solidify and gives the crust a stable, firm structure to support the filling. While it chills, it’s time to prepare that iconic Philadelphia cheesecake filling.
Print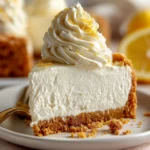
Philadelphia No-Bake Cheesecake Recipe
- Total Time: 5 hours 8 minutes
- Yield: 10 slices
- Diet: Vegetarian
Description
A rich and creamy Philadelphia No-Bake Cheesecake with a buttery graham cracker crust. No oven needed – perfect for holidays, parties, or everyday indulgence.
Ingredients
Crust:
2 cups Graham crackers
1 tablespoon Granulated sugar
½ cup Butter, melted, unsalted
Cheesecake filling:
15.87 oz Philadelphia cream cheese
⅓ cup Sour cream
12 oz Cool Whip
2 teaspoons Vanilla extract
1 cup Powdered sugar
1 teaspoon Lemon zest
Instructions
1. Pulse graham crackers in a food processor until fine crumbs form. Alternatively, place in a ziplock bag and crush with a cup.
2. In a bowl, mix graham cracker crumbs, granulated sugar, and melted butter until coated.
3. Press mixture evenly into a 9-inch nonstick springform pan. Freeze while making filling.
4. In a large bowl, combine softened cream cheese, powdered sugar, vanilla extract, sour cream, and lemon zest. Mix until smooth.
5. Fold in the Cool Whip gently using a rubber spatula.
6. Pour filling over crust, smooth the top, cover with plastic wrap.
7. Chill in the fridge for at least 5 hours or overnight until set.
8. Top with whipped cream or your favorite toppings before serving.
Notes
Use room-temperature cream cheese for best texture.
Keep Cool Whip cold but thawed before mixing.
Avoid overmixing to prevent a runny filling.
Use a nonstick springform pan for easy release.
Chill the cheesecake overnight for best results.
- Prep Time: 8 minutes
- Cook Time: 0 minutes
- Category: Cheesecake
- Method: No-Bake
- Cuisine: American
Creating the Creamiest Cheesecake Filling Without Baking
Choosing the Right Cream Cheese: Why Philadelphia Matters
When making a no-bake cheesecake, your choice of cream cheese can significantly impact both flavor and texture. Philadelphia cream cheese is a top pick for a reason. Its full-fat content gives the filling its rich, velvety texture, and its signature tang brings balance to the sweet ingredients. You’ll need about 15.87 oz of it for this recipe. Make sure the cream cheese is at room temperature before mixing to avoid lumps and achieve that smooth, cohesive filling.
Using full-fat cream cheese ensures that your cheesecake sets properly and maintains a luxurious mouthfeel. Avoid low-fat or spreadable varieties, which can lead to a loose, soupy filling that never quite firms up.
Key Supporting Ingredients for Balance and Texture
In addition to the cream cheese, you’ll blend in a few crucial components to enhance structure, flavor, and creaminess:
- 1 cup powdered sugar: This sweetens the filling without making it grainy. It dissolves easily and doesn’t weigh down the mixture.
- 2 teaspoons vanilla extract: For added depth of flavor.
- ⅓ cup sour cream: This might seem unusual, but sour cream adds tanginess and silkiness to the filling. It also helps lighten the mixture.
- 1 teaspoon lemon zest: Just a touch of zest brightens up the overall flavor and gives it a fresh twist.
Blend all these ingredients with the softened cream cheese using a hand mixer. Beat for 1 to 2 minutes, until completely smooth. Scrape down the sides and bottom of the bowl to avoid pockets of unmixed ingredients. Overmixing should be avoided. We’re looking for creamy, not airy.
Folding in Cool Whip for Fluffiness
Next comes the 12 oz of Cool Whip, a vital component for achieving that light, mousse-like texture. Unlike traditional baked cheesecakes that rely on eggs and baking for lift, this no-bake version uses whipped topping to introduce volume.
Gently fold the Cool Whip into the cream cheese mixture using a rubber spatula. Avoid stirring too vigorously or using a mixer at this stage. Folding helps maintain the airiness and ensures the filling remains light and fluffy. Be sure to scrape along the bottom and sides of the bowl as you fold to keep the texture consistent throughout.
Once combined, the filling should look pale, smooth, and pillowy.
Assembling and Chilling the Cheesecake
Remove the crust from the freezer and pour the cheesecake filling on top. Smooth the surface with a spatula or the back of a spoon. Cover the cheesecake with plastic wrap and place it in the refrigerator for at least 5 hours. For best results, chill it overnight.
This chilling period allows the filling to firm up without any baking. The cool environment helps stabilize the whipped topping and cream cheese blend, giving you perfect slices every time.
Tips and Tricks for the Best No-Bake Cheesecake Texture
Let Your Cream Cheese Reach Room Temperature
One of the most common mistakes when making a Philadelphia no-bake cheesecake is using cold cream cheese straight from the fridge. This makes it hard to blend smoothly, often leading to a lumpy mixture that won’t fully incorporate with other ingredients. Instead, let your cream cheese sit out for 30 to 45 minutes before starting. It should feel soft to the touch but not melted.
Room temperature cream cheese ensures a creamy, homogeneous texture and blends effortlessly with sugar, sour cream, and whipped topping. This simple step creates a smooth base that’s key to the final consistency of your dessert.
Chill the Cool Whip, But Don’t Freeze It
While cream cheese should be softened, your Cool Whip should remain cold but fully thawed. This helps maintain its light structure while allowing it to fold into the mixture easily. If it’s too warm, it can deflate, and if it’s too frozen, it won’t incorporate evenly. A properly thawed Cool Whip enhances the fluffiness and structure of your cheesecake.
Avoid using homemade whipped cream unless you’re experienced. Store-bought Cool Whip offers consistency and better holding power, especially for no-bake recipes.
Use a Nonstick Springform Pan for Easy Release
When it comes to assembling and serving your cheesecake, the type of pan matters. A nonstick springform pan is ideal because it allows you to remove the sides easily without disturbing the crust or filling. If you try to use a standard pie dish or cake pan, you might struggle to slice and lift clean pieces.
Line the bottom with parchment paper if you want extra insurance against sticking, though it’s not always necessary with a good nonstick pan.
Don’t Overmix Your Filling
While it might seem like more mixing equals a smoother filling, overmixing can actually ruin the texture of your cheesecake. When you beat the mixture too long, especially after adding Cool Whip, you risk incorporating too much air. This can result in a loose or weepy filling that doesn’t hold its shape.
Stick to 1 to 2 minutes of mixing when combining the cream cheese with the other ingredients, and fold gently when adding the Cool Whip. A light hand makes a firm, sliceable cheesecake.
Give It Time to Set — Patience Pays Off
No-bake cheesecake needs time to chill and set properly. That means at least 5 hours in the refrigerator, though overnight is even better. While it’s tempting to cut into it early, slicing too soon can cause it to collapse or ooze.
Plan ahead. Make the cheesecake the night before you need it. This gives the filling enough time to firm up and the flavors time to meld. The result is a dessert that’s easy to slice and holds its shape beautifully.
Customizing Your No-Bake Cheesecake with Toppings and Variations
Classic and Creative Topping Ideas
One of the best things about a Philadelphia No-Bake Cheesecake is how well it pairs with different toppings. Its smooth, neutral base acts like a blank canvas for a variety of textures and flavors. Whether you’re going traditional or bold, here are some topping ideas to consider:
- Whipped Cream Rosettes: Pipe swirls around the edges for a bakery-style finish. It adds elegance and softness to every slice.
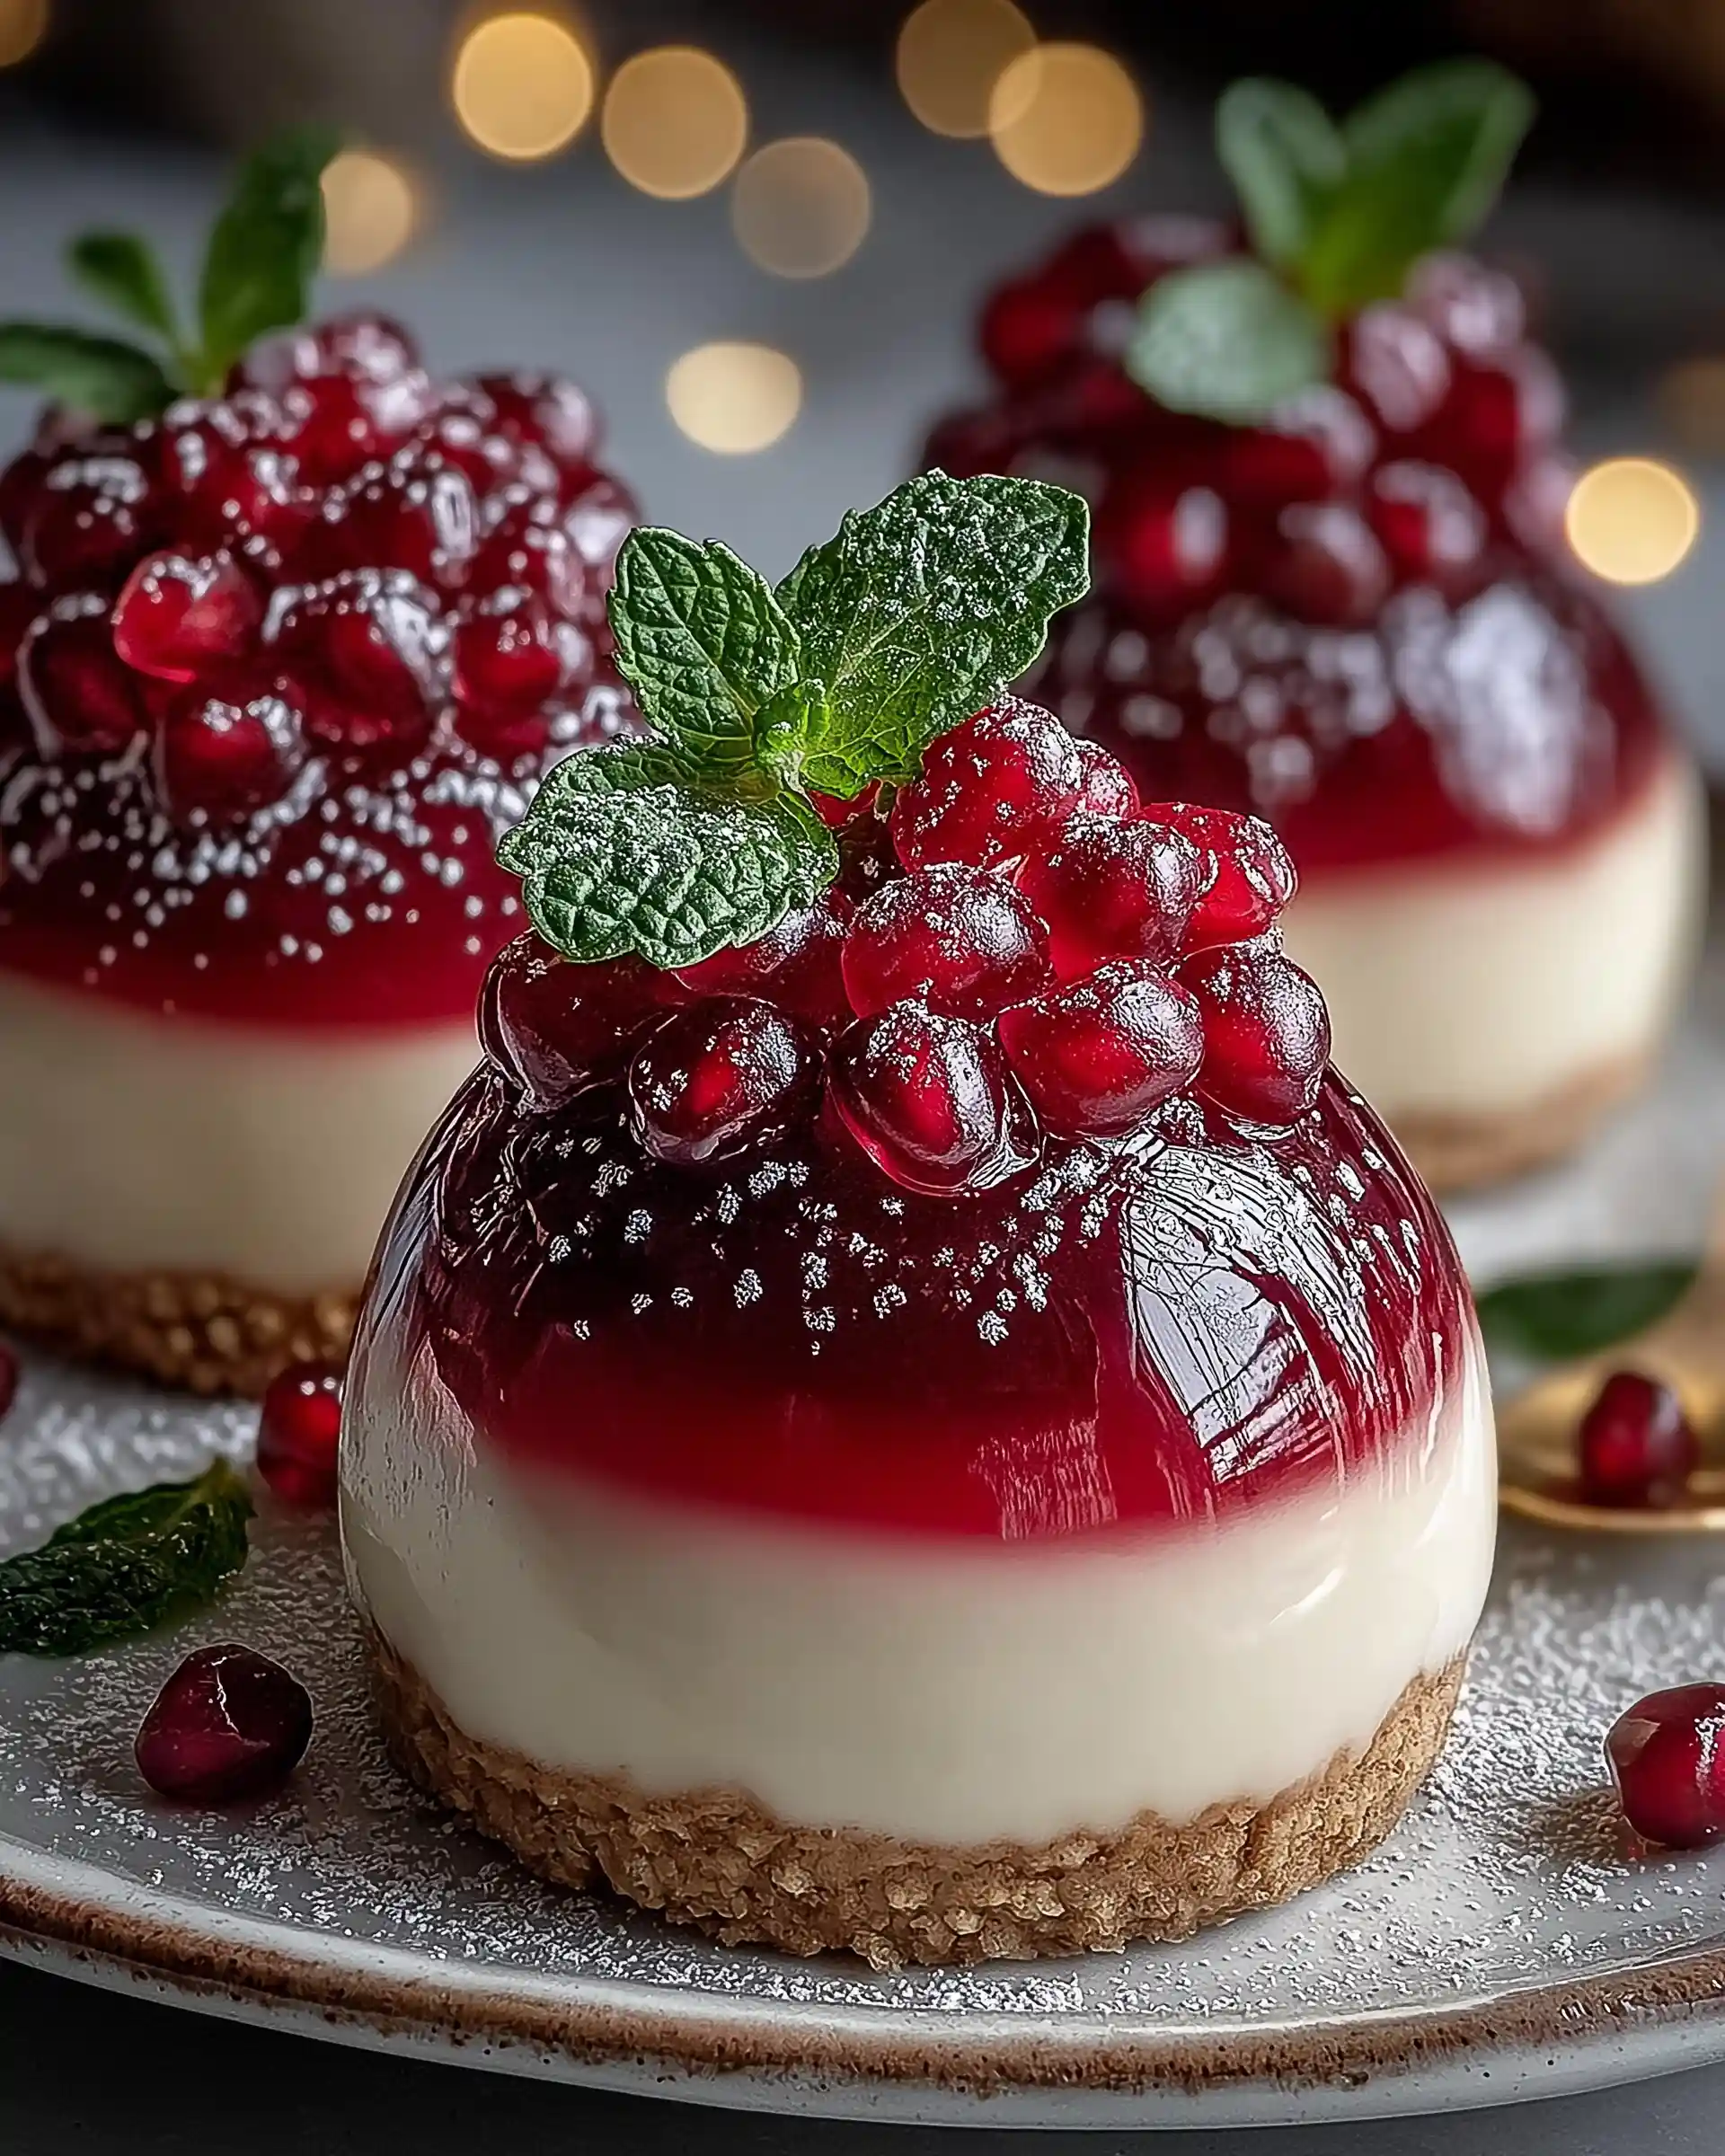
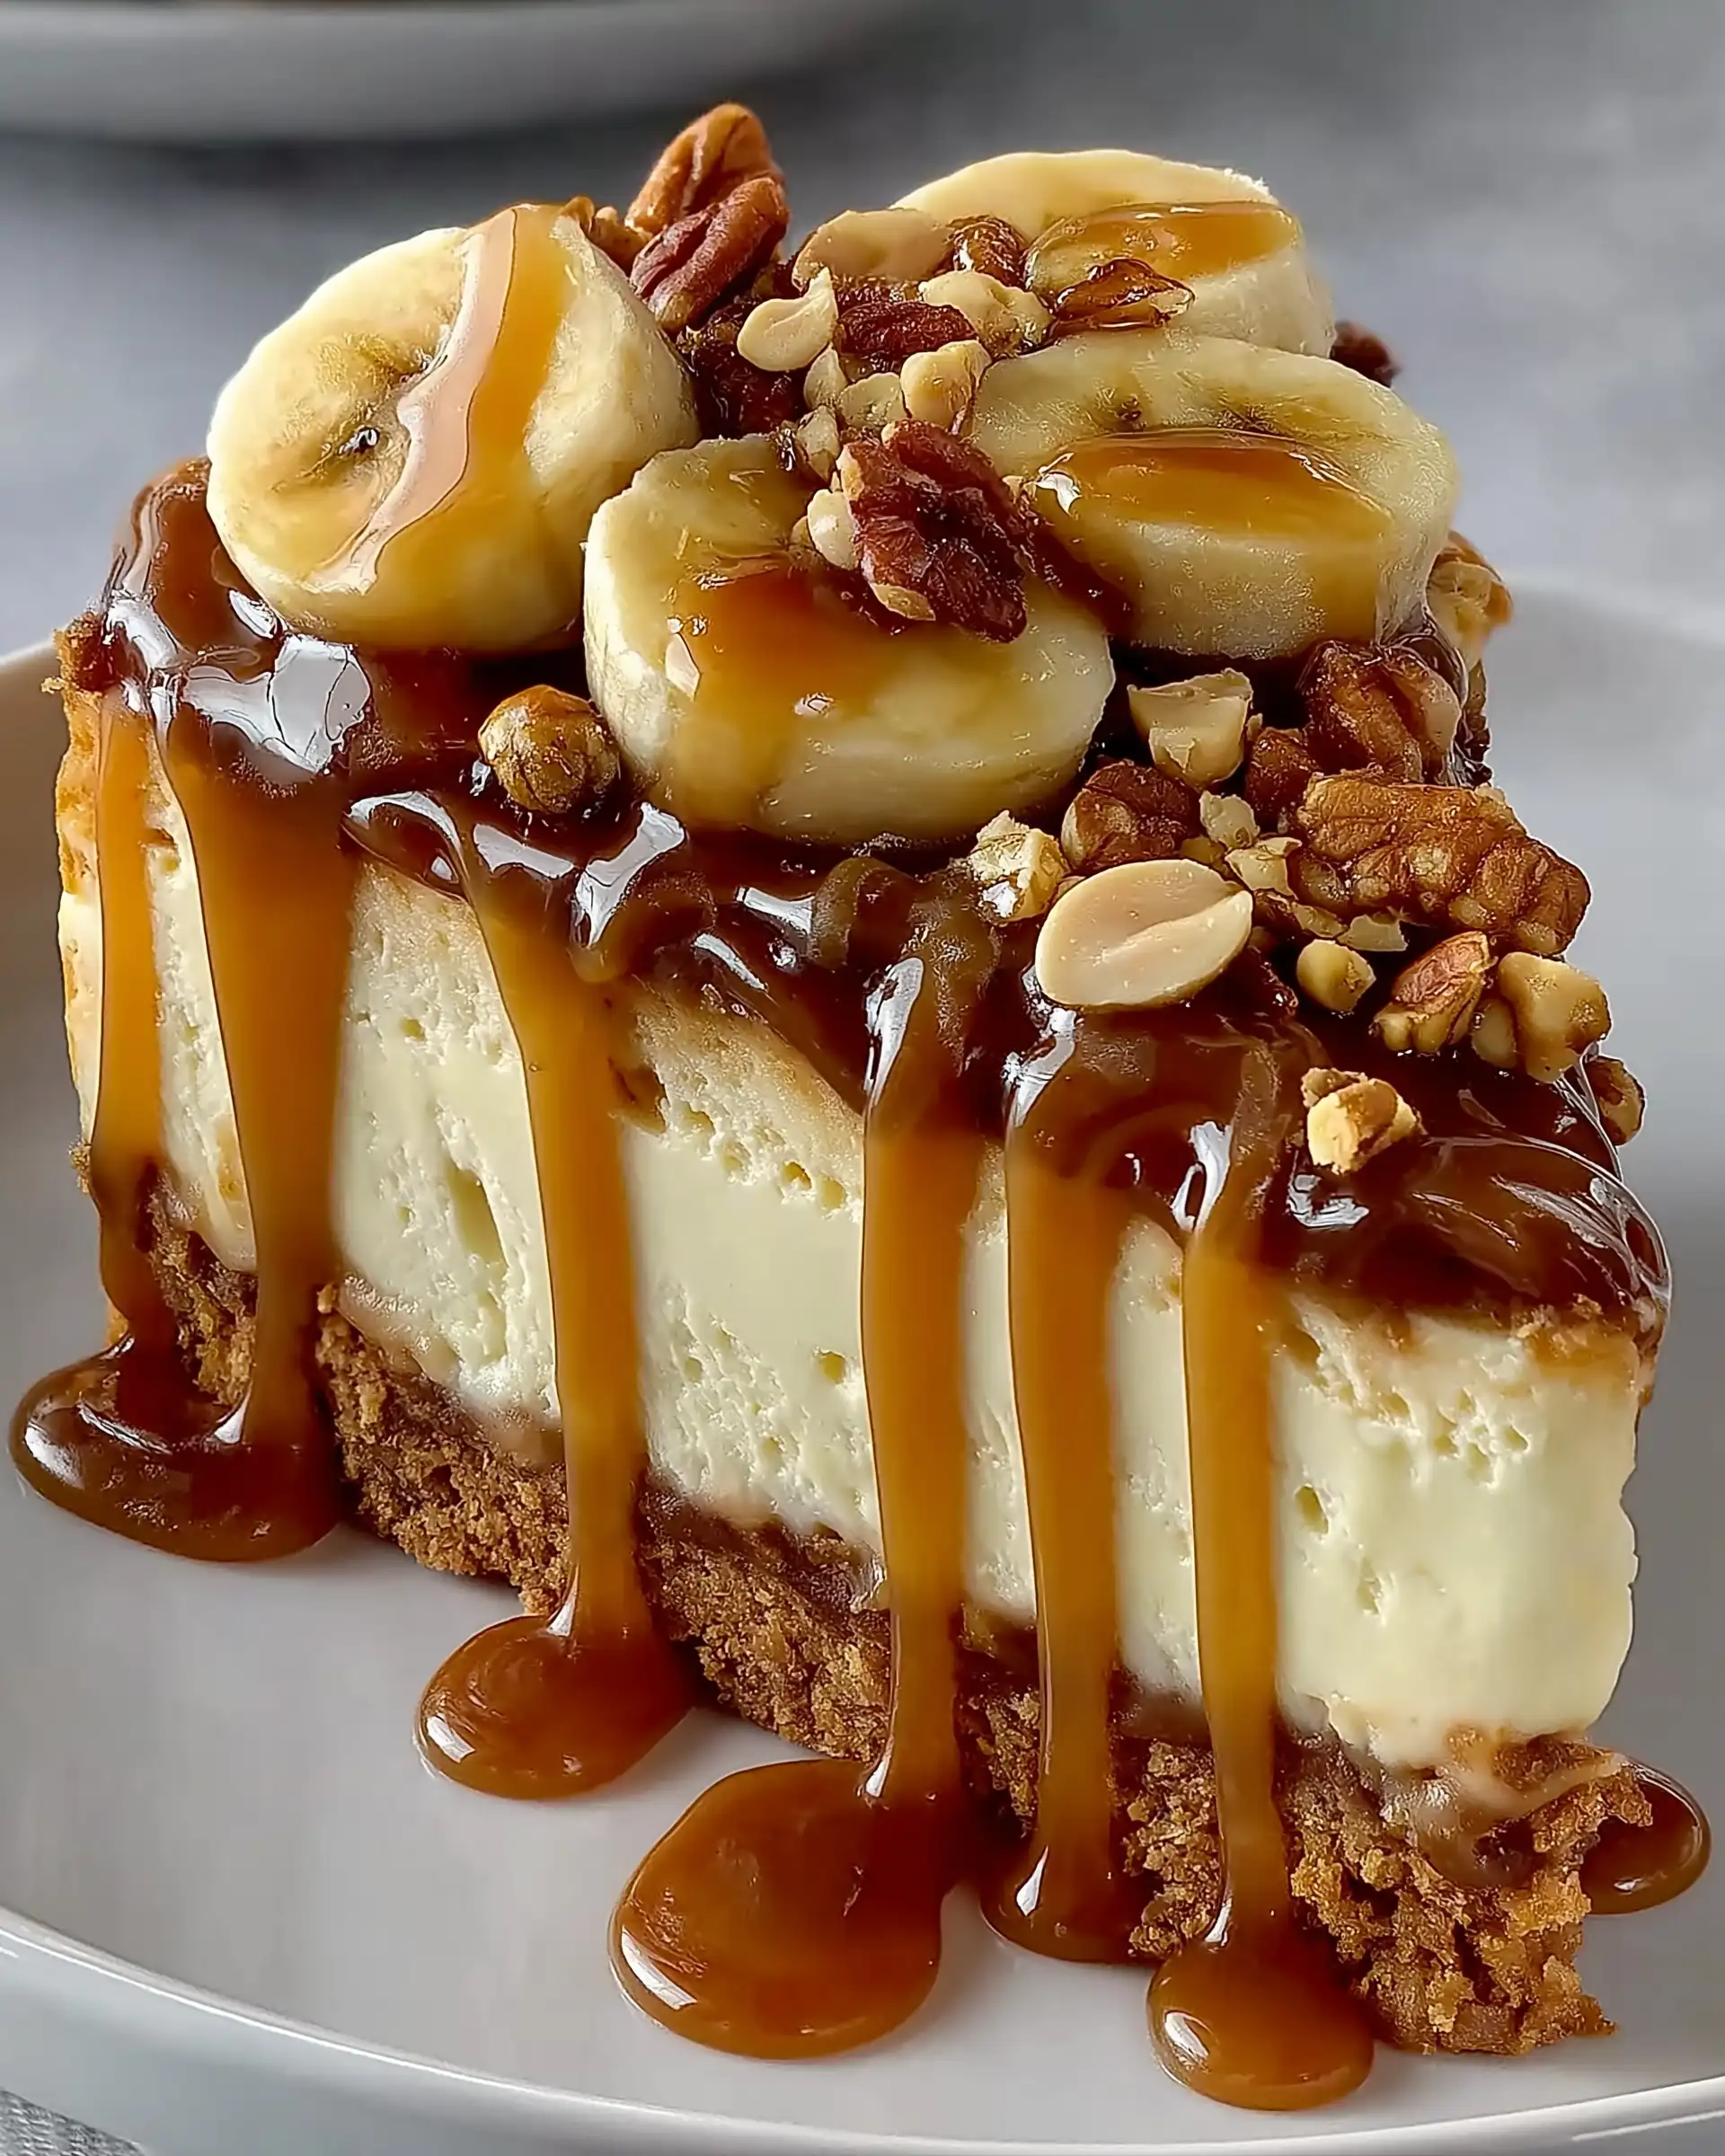
- Fresh Fruit: Strawberries, blueberries, raspberries, or thin slices of kiwi give a fresh, tangy contrast to the sweet, creamy filling.
- Fruit Compotes or Sauces: A simple berry compote made from simmered berries and a bit of sugar adds a rich, jammy topping.
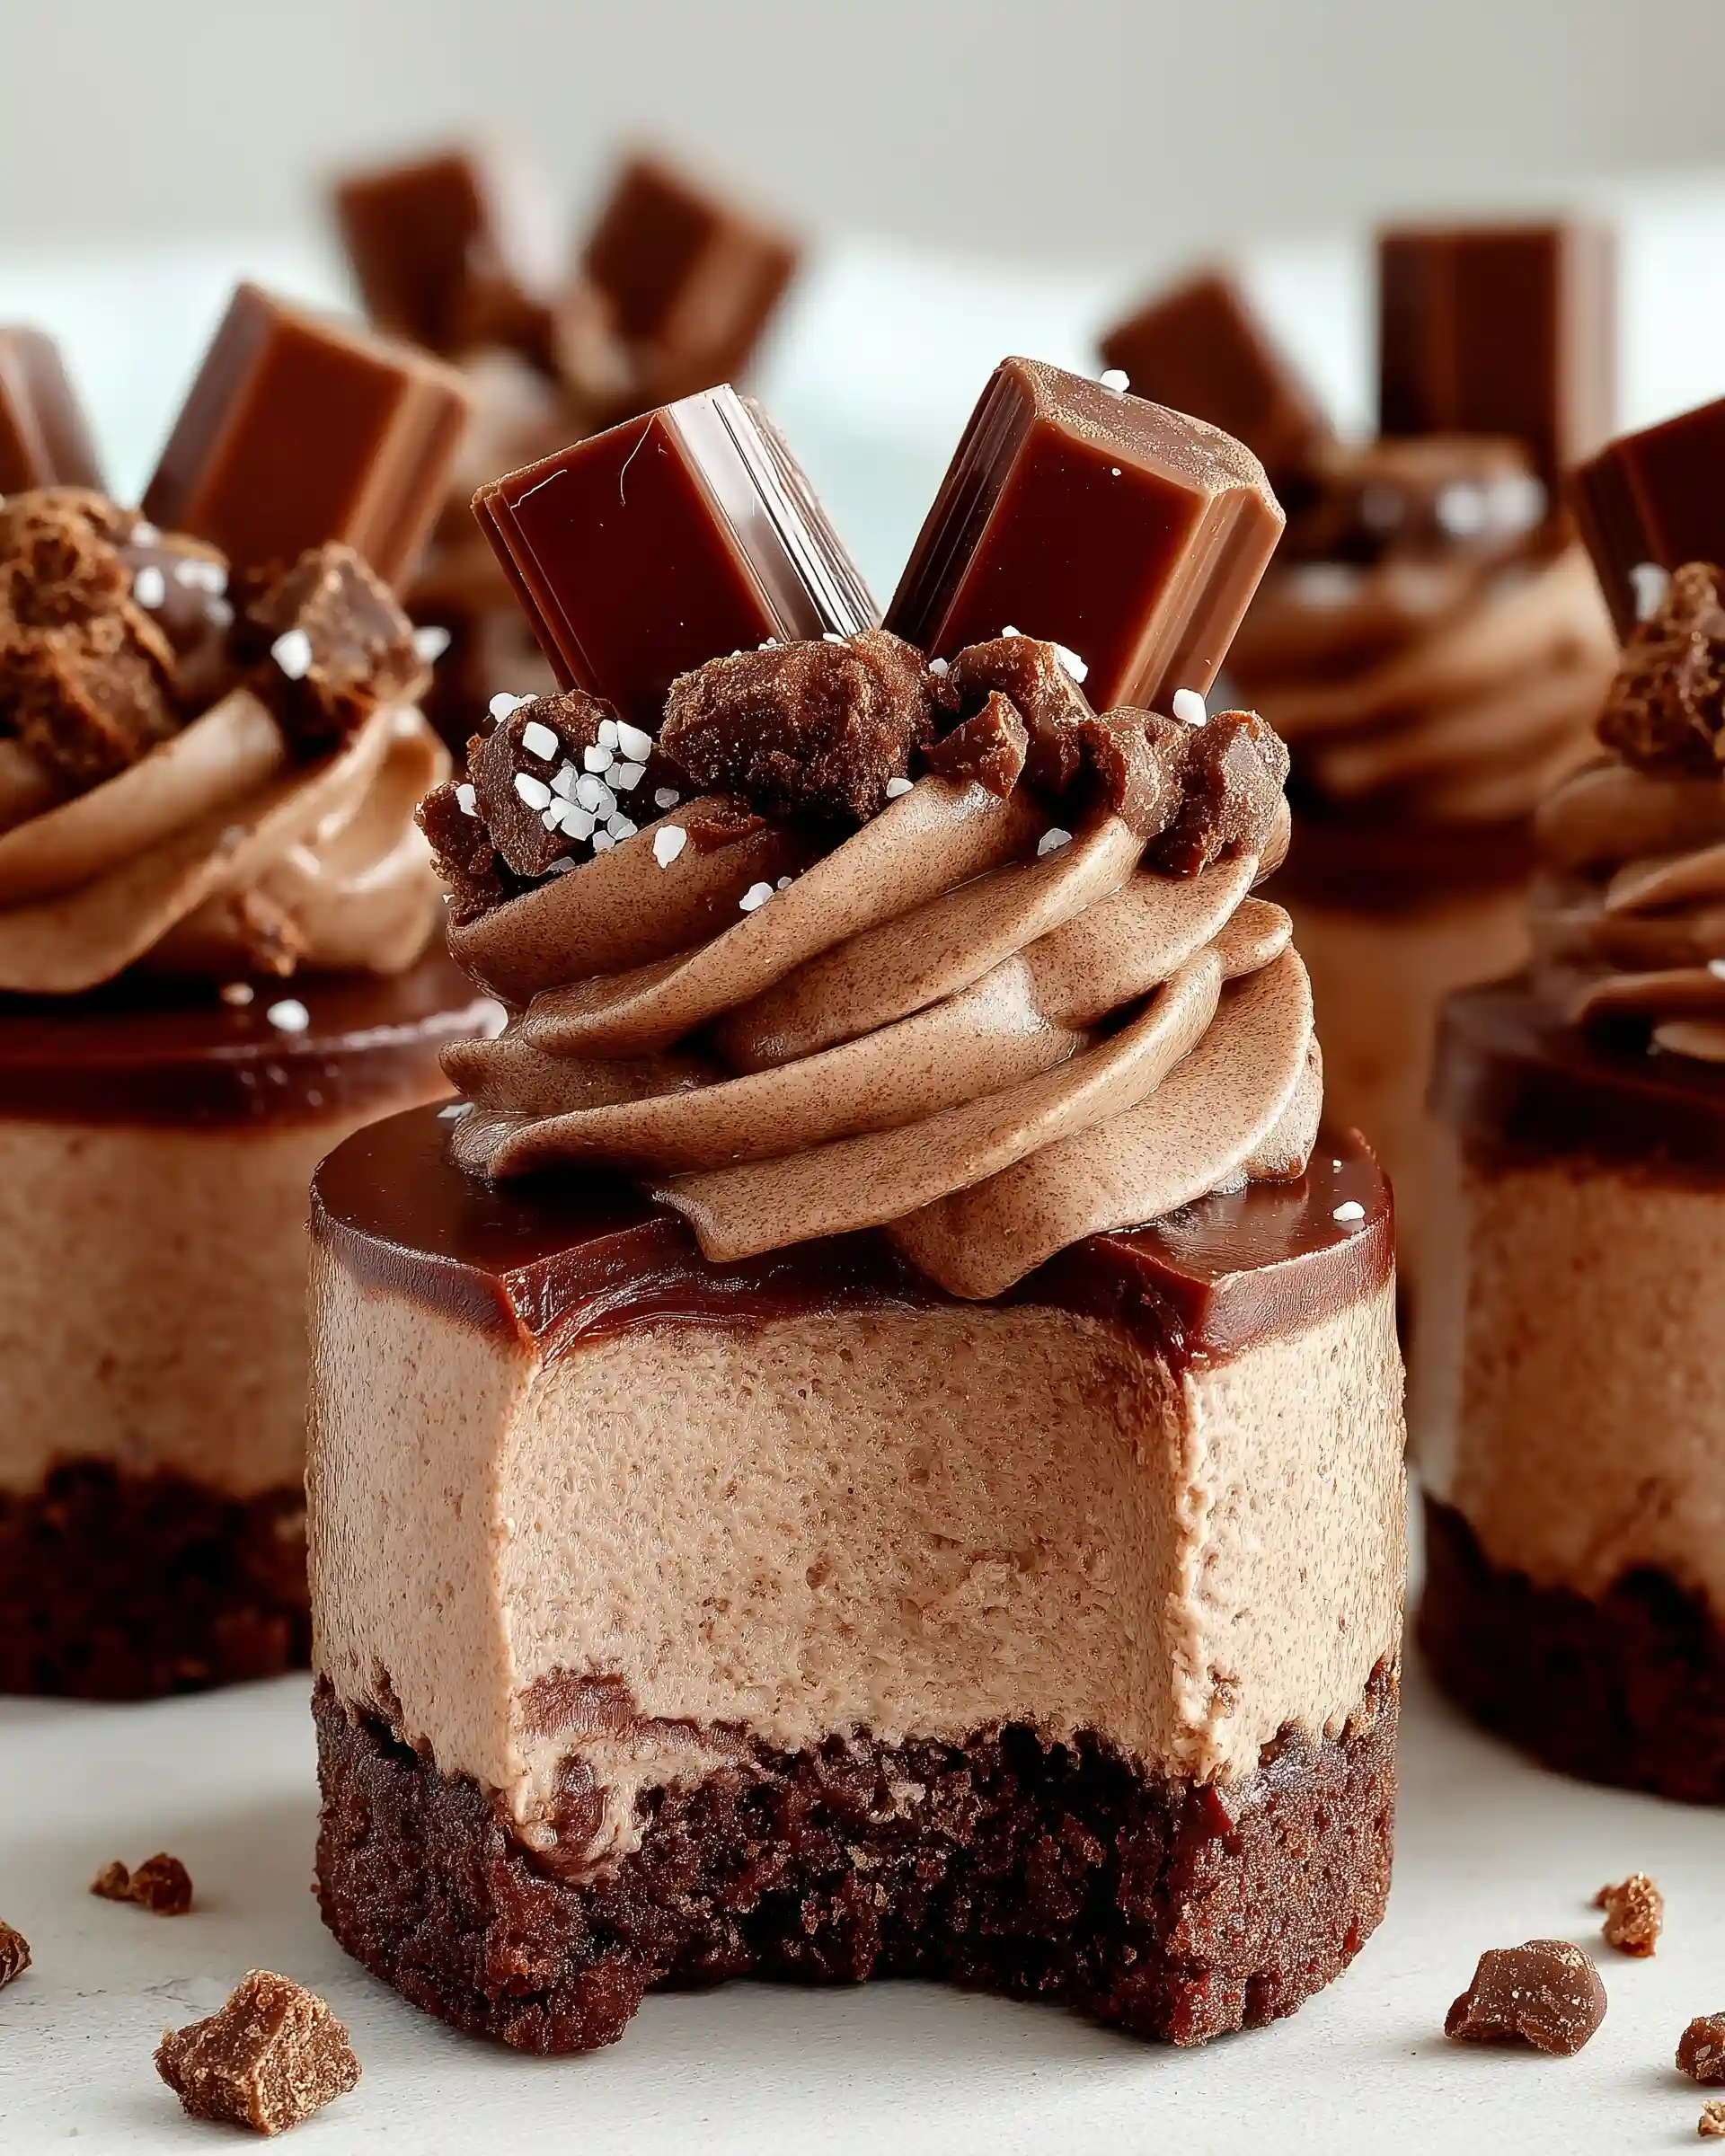
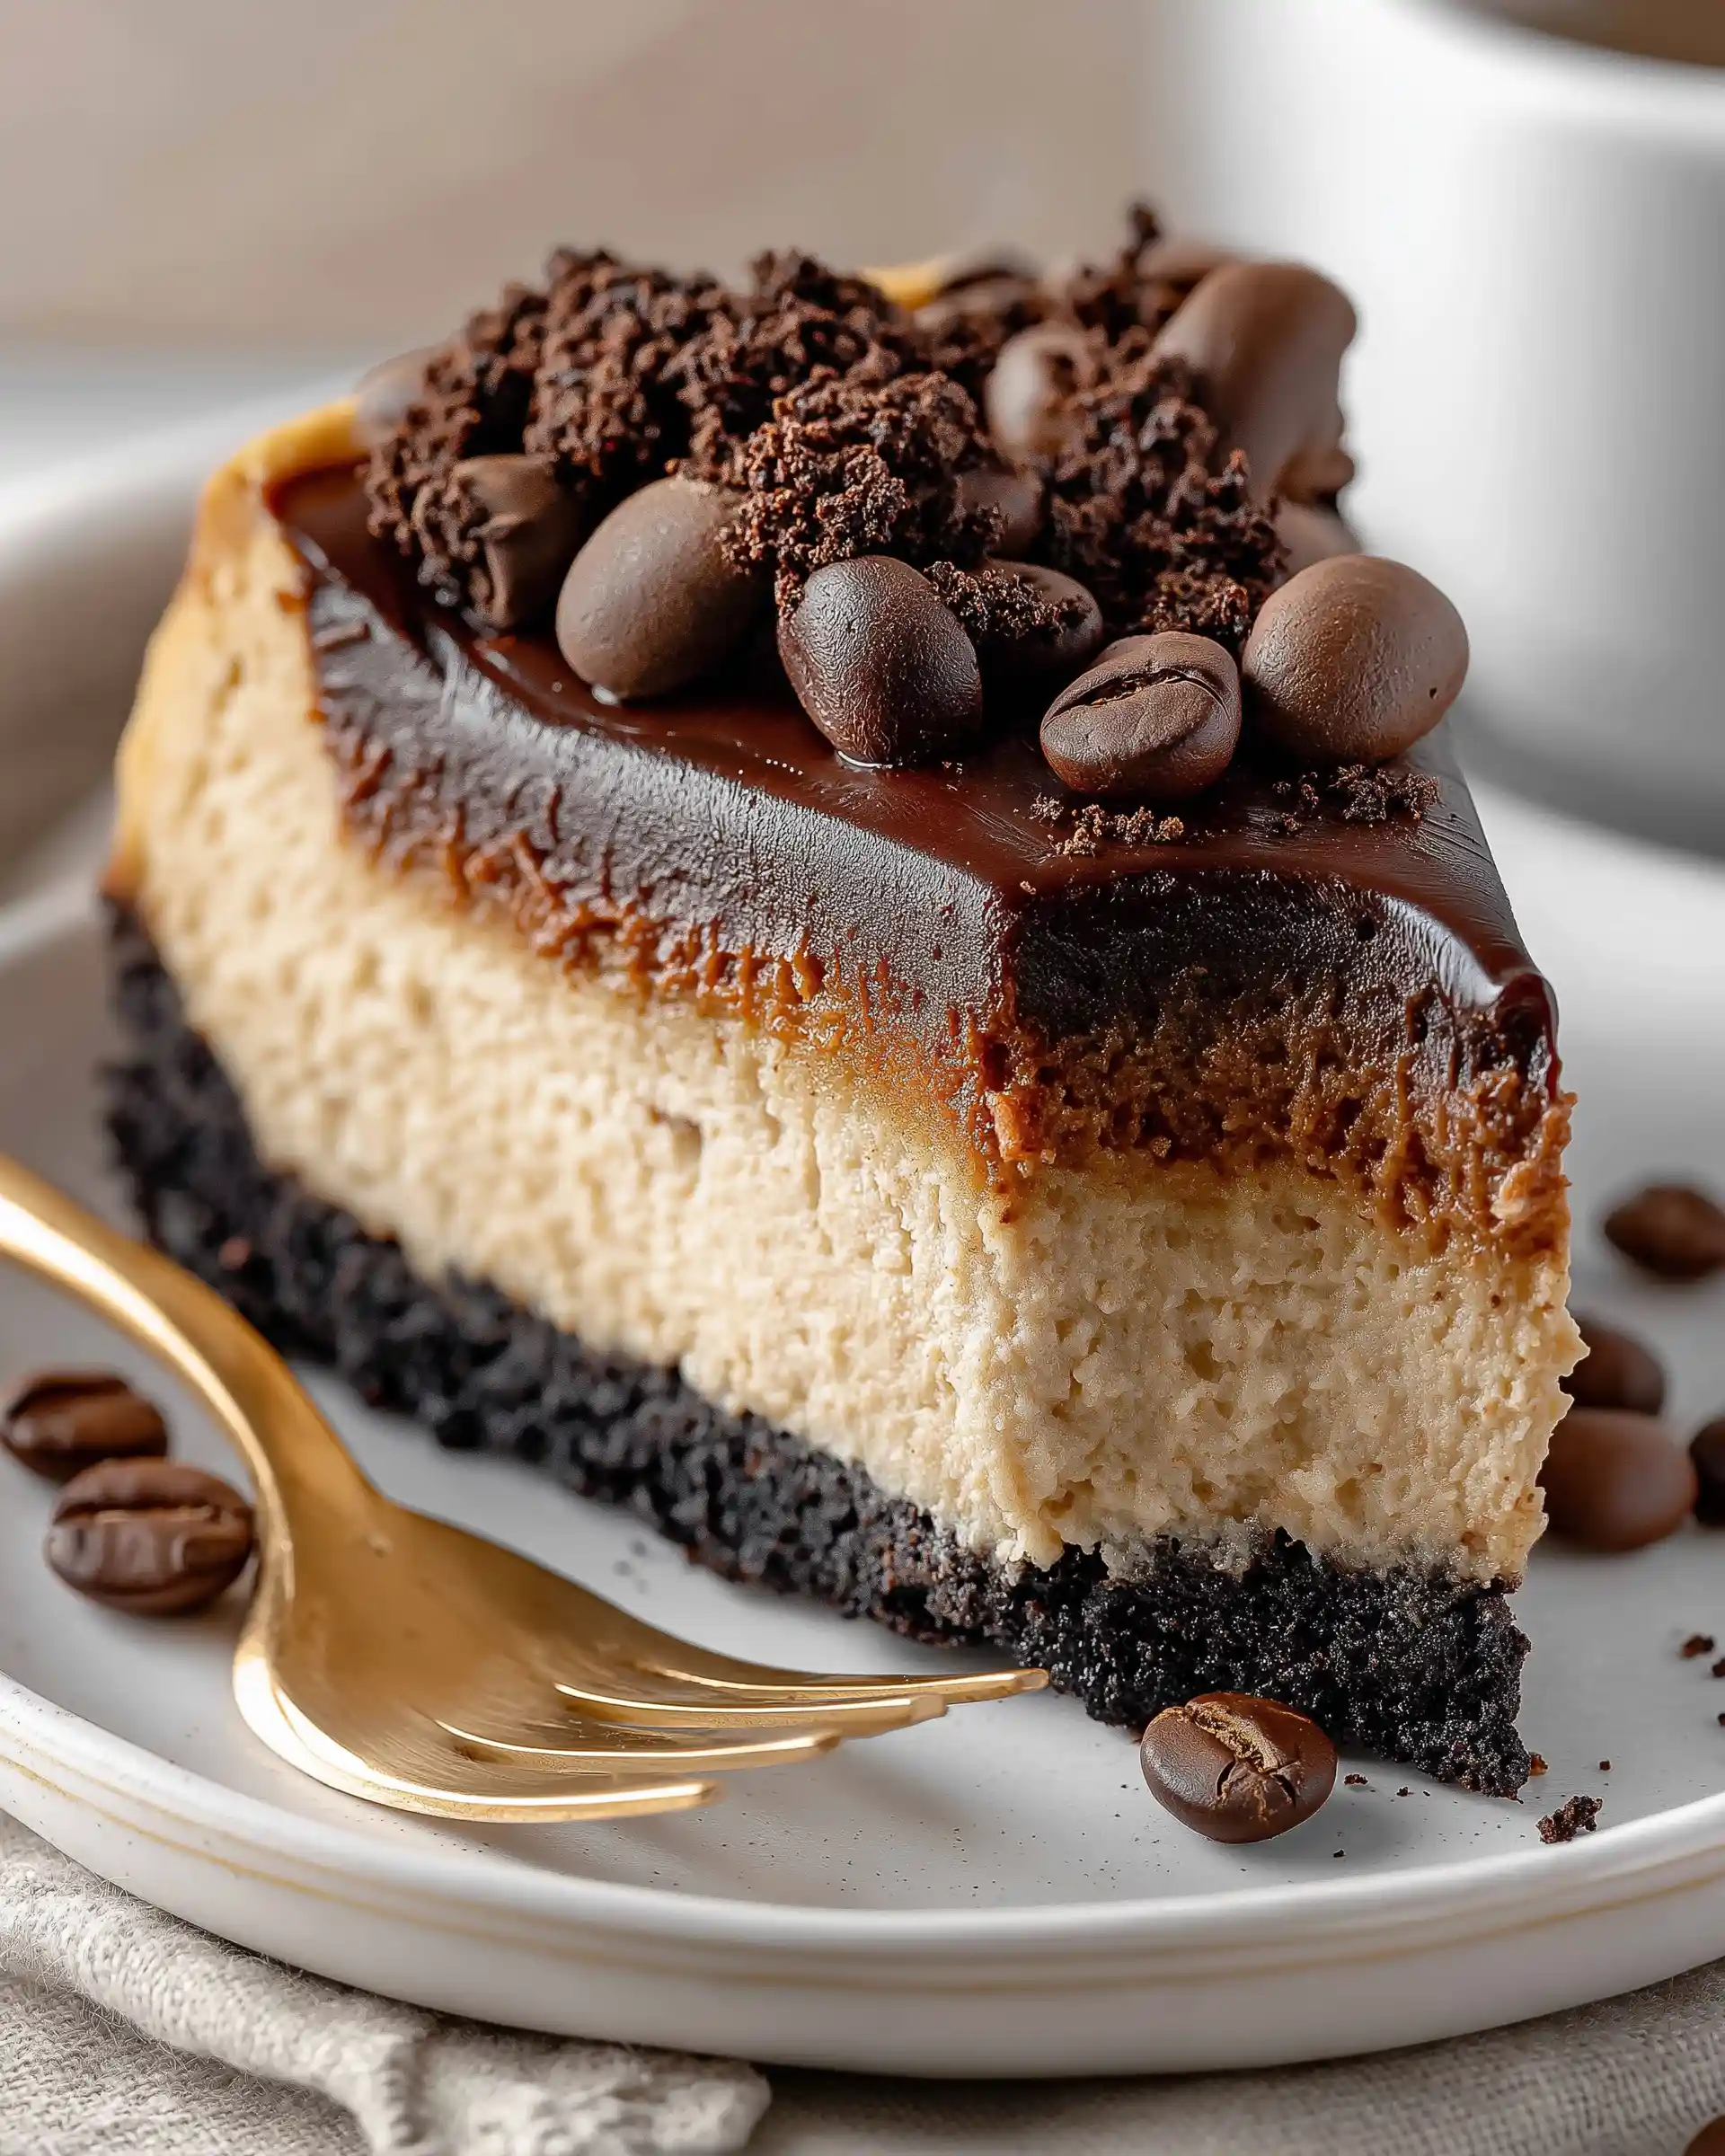
- Shaved Chocolate or Chocolate Drizzle: For a decadent twist, add curls of dark chocolate or a drizzle of melted chocolate over the top.
- Crushed Nuts or Cookies: Add texture with chopped pecans, almonds, or a sprinkle of crushed graham crackers or Oreos on top.
These toppings not only enhance the flavor but also create visual appeal, making your dessert Instagram-worthy with very little effort.
Seasonal Variations to Try Year-Round
Want to switch things up depending on the season or occasion? The base recipe stays the same, but you can personalize the flavors easily:
- Summer: Add lemon or lime zest to the filling and top with a citrus glaze or slices of fresh tropical fruit.
- Fall: Mix in a bit of cinnamon and nutmeg to the crust and add a topping of caramel and sliced apples or pumpkin puree.
- Winter: Stir peppermint extract into the filling and top with crushed candy canes or shaved white chocolate.
- Spring: Use edible flowers for garnish or a swirl of strawberry coulis on top.
You can also use food coloring to tint your cheesecake filling for holidays or themed parties. Just remember to use gel food coloring to avoid changing the consistency.
Mini Cheesecake Bites or Jars
If you’re planning to serve this dessert at a party or gathering, consider making individual-sized portions in muffin tins or small jars. These are easy to serve, transport, and eat without needing to cut slices. Simply press a smaller amount of crust into the base of each container, spoon in the filling, and chill as usual.
They’re just as delicious and make a great impression on guests.
Make It Gluten-Free or Dairy-Free
For guests with dietary restrictions, this recipe is easy to adapt. Here’s how:
- Gluten-Free: Use gluten-free graham crackers or digestive biscuits. Most stores carry them now, and the taste is nearly identical.
- Dairy-Free: Use dairy-free cream cheese and whipped topping. Keep in mind that the consistency may change slightly, so always chill longer and serve cold for best results.
These modifications allow you to serve a wide range of dietary needs without sacrificing flavor or quality.
Storing and Serving Your No-Bake Cheesecake the Right Way
How to Properly Chill and Set Your Cheesecake
Once you’ve poured the creamy filling over your crust and smoothed out the top, refrigeration becomes the most important step. Letting your Philadelphia No-Bake Cheesecake sit undisturbed in the fridge is what gives it the firmness and sliceable structure we all love.
- Minimum chill time: 5 hours.
- Best chill time: Overnight, around 8–10 hours.
Place it on a flat shelf in your fridge, and make sure it’s covered with plastic wrap to prevent it from absorbing other food odors. Don’t place anything on top of it while chilling — you don’t want to ruin that beautiful surface.
The cheesecake should be cold and firm to the touch before slicing. If it still feels soft in the center, give it more time.
Tips for Slicing Clean and Neat Pieces
Serving a cheesecake can get messy fast if you don’t follow a few simple tricks. Here’s how to get clean, restaurant-style slices every time:
- Use a sharp knife: Preferably a thin-bladed one.
- Warm the knife under hot water, then dry it off before slicing. This allows the blade to glide through the cheesecake more easily.
- Wipe the blade clean between each slice to avoid smearing the filling.
These tips may seem small, but they make a big difference when presentation matters — especially if you’re hosting guests or preparing this dessert for a special occasion.
Storing Leftovers Safely
If you have any leftovers — and that’s a big “if” — store them correctly to keep the texture and taste intact.
- Refrigerator: Cover the cheesecake tightly with plastic wrap or place it in an airtight container. It will stay fresh for up to 5 days.
- Freezer: Want to make it ahead or save some for later? No problem. Place individual slices or the entire cheesecake in the freezer, tightly wrapped. It can be frozen for up to 1 month. When ready to enjoy, thaw overnight in the fridge — never at room temperature.
Avoid refreezing once thawed. That can negatively impact the texture and flavor.
Best Way to Serve
For the ultimate taste and texture, serve the cheesecake cold but not frozen. Take it out of the fridge about 10–15 minutes before serving, especially if it’s been chilled overnight. This brings the flavors out and softens the texture slightly without compromising the structure.
Pair it with a fresh cup of coffee or a glass of milk for the perfect after-dinner treat. It’s simple, classic, and satisfying.
Conclusion
The Philadelphia No-Bake Cheesecake Recipe is proof that decadent desserts don’t have to be complicated. With its creamy, fluffy filling and buttery graham cracker crust, this no-bake version delivers all the richness of a traditional cheesecake—without ever turning on the oven. Whether you’re hosting a party, preparing a holiday treat, or simply satisfying a sweet craving, this recipe offers reliability, ease, and flavor in every slice.
By following the tips outlined in this guide—like using room-temperature cream cheese, chilling thoroughly, and selecting your toppings wisely—you can create a flawless cheesecake that’s both beautiful and delicious. It’s versatile, customizable, and perfect for any season or occasion. Once you try it, it’s bound to become a staple in your dessert rotation.