If you’re a dessert lover on the hunt for something a little extra special, the Vanilla Bean Brown Butter Cheesecake is about to become your new favorite treat. This recipe takes the indulgent smoothness of traditional cheesecake and infuses it with the deep, nutty flavor of brown butter and the warm sweetness of real vanilla bean. From the crunchy pecan-studded crust to the silky cream cheese filling and fluffy whipped topping, every bite of this dessert offers rich textures and luxurious taste.
In this article, you’ll learn step-by-step how to make this impressive yet approachable dessert. We’ll break down the process into manageable parts, starting with browning the butter perfectly, then moving on to the crust, creamy filling, and finally the whipped topping. We’ll also cover essential baking tips, cooling instructions, and storage suggestions to make sure your cheesecake turns out perfectly every time. Whether you’re baking for a holiday gathering, special occasion, or just a sweet weekend treat, this guide will walk you through every detail to create the best vanilla bean brown butter cheesecake at home.
Let’s start by diving into the flavor foundation of this dessert, the browned butter.
Contents
Mastering Brown Butter for Cheesecake Magic
What is Brown Butter and Why It Matters
Brown butter, also known as beurre noisette, is regular butter that’s been gently cooked until the milk solids toast and settle into flavorful brown bits. The result is a golden liquid with a nutty aroma and rich flavor that adds depth and warmth to sweet and savory dishes alike.
For this cheesecake, browned butter doesn’t just add flavor, it builds an essential layer of complexity. Used in both the crust and the filling, it balances the sweetness and enhances the creamy richness of the cheesecake.
How to Make Brown Butter Perfectly
Start with one cup of unsalted butter. Place it in a medium saucepan over medium heat. As it melts, stir occasionally. The butter will foam and then begin to sizzle as the water content evaporates. Soon, you’ll notice tiny brown specks forming at the bottom of the pan, and the butter will take on a toasty, nutty scent. Once you see that golden color and smell the difference, remove it from the heat right away and pour it into a heatproof bowl.
Use a spatula to scrape all those flavorful brown bits from the bottom of the pan. This is where the real flavor lives. You’ll use most of the clear golden butter for the crust, but the darker bits will be reserved for the cheesecake filling. Let the brown butter cool slightly before using.
Common Mistakes to Avoid with Brown Butter
- Overheating: Don’t walk away. Butter can go from brown to burnt in seconds.
- Using salted butter: Stick with unsalted to control the saltiness of your dessert.
- Skipping the brown bits: Those flecks at the bottom are packed with flavor, don’t leave them behind.
Now that you’ve mastered brown butter, it’s time to use it to create a crust that adds texture, nuttiness, and just the right level of sweetness to complement the creamy filling.
Building the Perfect Brown Butter Crust
Ingredients Breakdown for Flavor and Texture
The crust is where flavor and texture begin. Instead of just relying on traditional graham crackers, this recipe brings in a richer, more nutty base using a mix of cookie crumbs and ground pecans. Combined with brown butter and a touch of powdered sugar, the crust comes out toasty, crumbly, and full of flavor.
Here’s what goes into it:
- 2 cups of cookie crumbs: You can use graham crackers, digestive biscuits, or golden Oreos (just make sure to remove the cream). The cookies bring sweetness and structure.
- 1 cup of ground pecans: Adds a buttery texture and deep, earthy flavor.
- ½ cup plus 1 tablespoon of browned butter: Use mostly the golden liquid from your browned butter batch. Save the darker bits for the filling.
- 2 tablespoons powdered sugar: Gives just a hint of sweetness and helps with binding.
This combination results in a crust that’s slightly sweet, nutty, and perfectly crisp after baking.
How to Assemble and Bake the Crust
Start by preheating your oven to 350°F. Grease a tall 8- or 9-inch cake pan and line it with parchment paper. It’s totally fine if the paper wrinkles, and using metal clips can help keep it in place.
In a large mixing bowl, combine the cookie crumbs, ground pecans, and powdered sugar. Pour in the measured brown butter and stir everything together until the crumbs are evenly coated and the texture resembles damp sand.
Pour the crust mixture into the prepared pan and press it firmly into the bottom and about halfway up the sides. Use the back of a measuring cup or spoon to pack it down tightly and evenly.
Bake the crust for 10 minutes to set it, then immediately reduce the oven temperature to 325°F to prepare for baking the filling. The result is a crisp base that holds together beautifully once cooled.
Crust Tips for Best Results
- Pack the crumbs tightly: A loose crust will fall apart when sliced.
- Use parchment paper generously: It makes for easy removal later.
- Don’t skip the bake step: Pre-baking locks the structure and prevents sogginess.
Once your crust is baked and your kitchen smells deliciously nutty, it’s time to move on to the heart of this recipe — the creamy, rich cheesecake filling.
Print
Vanilla Bean Brown Butter Cheesecake Recipe
- Total Time: 1 hour 45 minutes
- Yield: 10 servings
- Diet: Vegetarian
Description
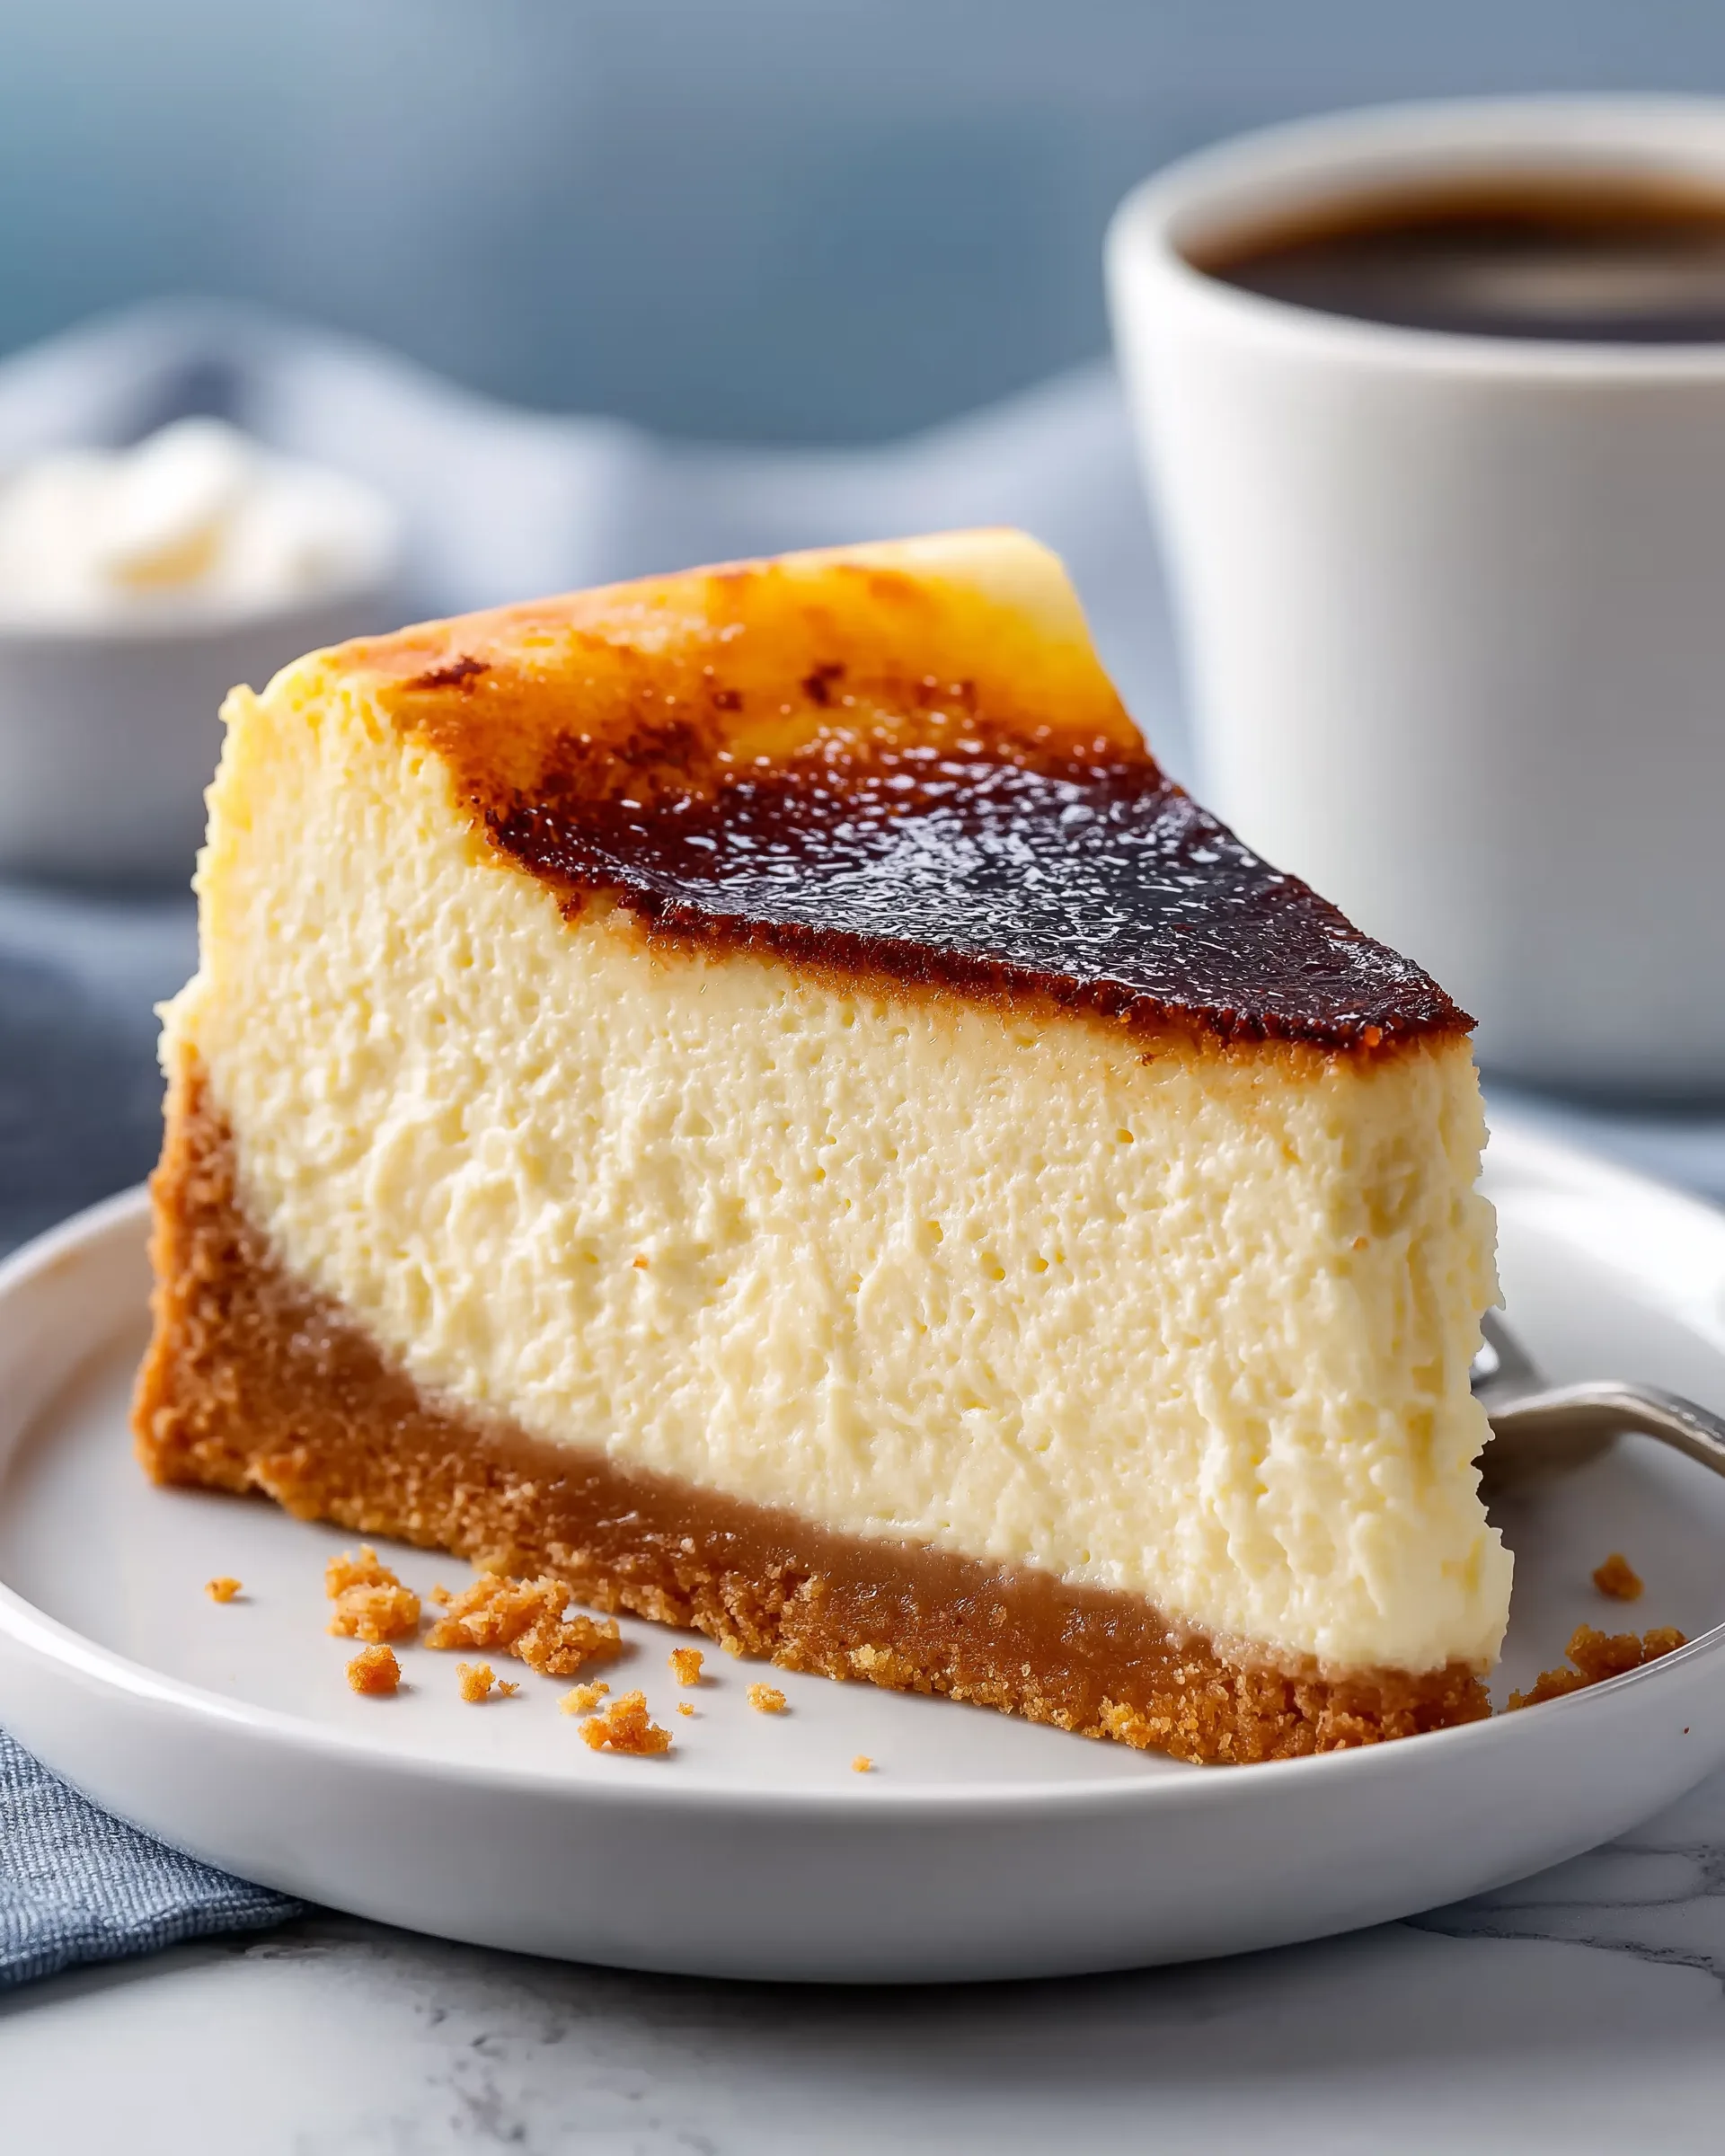
This Vanilla Bean Brown Butter Cheesecake is a rich, creamy dessert featuring nutty brown butter, real vanilla bean, and a pecan-studded crust. Topped with lightly sweetened whipped cream, it’s perfect for holidays, special events, or when you’re craving something indulgent.
Ingredients
Brown Butter:
1 cup butter
Brown Butter Crust:
2 cups graham digestive or golden oreo cookie crumbs (240g, cream removed if Oreo)
1 cup pecans, ground (115g)
½ cup plus 1 tablespoon browned butter (120g)
2 tablespoons powdered sugar
Brown Butter Cheesecake Filling:
2 packages cream cheese (452g, softened)
¼ cup brown butter (57g, mostly brown bits)
½ cup labne or sour cream
1 cup brown sugar (210g)
1 vanilla bean, scraped
¼ teaspoon fine sea salt
2 large eggs
Whipped Cream Topping:
1 cup heavy whipping cream
2 tablespoons brown sugar
Pinch of salt
1 teaspoon pure vanilla extract or vanilla bean scrapings
Instructions
1. Brown the butter: In a saucepan over medium-high heat, melt butter until foamy and browned with visible brown bits. Pour into a bowl, scraping the brown bits. Let cool slightly.
2. Make the crust: Preheat oven to 350°F. Grease and line an 8 or 9-inch cake pan with parchment paper. Combine cookie crumbs, ground pecans, powdered sugar, and browned butter (yellow liquid only). Press into the pan bottom and halfway up the sides. Bake 10 minutes, then reduce oven to 325°F.
3. Prepare the filling: Beat softened cream cheese with brown sugar, salt, and brown butter bits until smooth. Add sour cream and mix. Scrape in vanilla bean seeds. Add eggs one at a time and mix gently. Strain through a sieve if needed.
4. Bake the cheesecake: Pour filling into crust. Place cheesecake pan in a larger pan with hot water halfway up. Bake for 1 hour to 1 hour 15 minutes until the center is set and top is matte. Turn oven off, crack door, and let cool for 30 minutes. Cool another 30 minutes on the counter, then refrigerate 8+ hours.
5. Make whipped cream: In a food processor, whip cream, brown sugar, vanilla, and salt until thick but not overwhipped.
6. Serve: Spread whipped cream on chilled cheesecake and garnish if desired. Store in fridge up to 1 week.
Notes
For best texture, ensure all ingredients are at room temperature before mixing.
Use a fine mesh sieve to eliminate lumps for a smooth finish.
Freeze the cheesecake (without whipped cream) for up to 2 months.
Substitute sour cream if labne is unavailable.
- Prep Time: 45 minutes
- Cook Time: 1 hour
- Category: Dessert
- Method: Baking
- Cuisine: American
Baking the Cheesecake to Perfection
Why a Water Bath is Essential
A water bath, or bain-marie, might sound fancy, but it’s simply a method to ensure gentle, even baking. Cheesecake batter is delicate and prone to cracking if exposed to high, direct heat. By surrounding the pan with hot water, you help regulate the oven temperature around the cheesecake, allowing it to bake slowly and evenly. This helps the cheesecake stay ultra-smooth and crack-free.
It also preserves that dreamy, velvety texture you want in every bite.
Setting Up the Water Bath
To get started, you’ll need a deep roasting pan or a large 13×9-inch cake pan. Place your filled cheesecake pan in the center of the roasting pan. Then, pour warm water into the roasting pan until it comes about halfway up the sides of the cheesecake pan. Be careful not to splash any water into the batter.
If your springform or cake pan isn’t watertight, wrap the bottom and sides tightly with aluminum foil before setting it into the water to prevent leaks.
Now it’s ready for the oven.
How Long to Bake and How to Tell It’s Done
Preheat your oven to 325°F, then place the cheesecake (with its water bath) inside. Bake for at least 1 hour, possibly up to 1 hour and 15 minutes, depending on your oven. You’ll know it’s done when:
- The edges look set and slightly puffed
- The center is no longer jiggly when gently shaken
- The top has a matte, slightly dull appearance
Once the cheesecake is done, turn the oven off but leave the cheesecake inside, propping the door open with a wooden spoon. Let it cool slowly in the oven for at least 30 minutes. This step prevents sudden temperature changes, which can cause cracks.
Afterward, take the cheesecake out and allow it to cool on the counter for another 30 minutes. It should be cool enough to handle without oven mitts. Then, transfer it to the fridge for the final phase.
Proper Chilling for the Best Texture
This cheesecake needs to chill for at least 8 hours, preferably overnight. During this time, the flavors deepen, and the filling firms up into the dense yet creamy texture that makes cheesecake so irresistible.
Quick tips:
- Don’t rush the chill: Cutting into a warm or even slightly cool cheesecake will ruin its structure.
- Leave the parchment paper on until you’re ready to serve. It helps the cheesecake keep its shape during storage.
Once it’s fully chilled, you’re ready to top it off with the lightest, most flavorful whipped cream. Let’s head into the next phase to complete this dessert masterpiece.
Making the Whipped Cream Topping
Ingredients for Light, Sweet Creaminess
While the cheesecake is rich and dense, the whipped cream topping adds an airy contrast that brightens each bite. It’s lightly sweetened, with just enough flavor to complement, not overpower, the cheesecake itself.
Here’s what you’ll need:
- 1 cup heavy whipping cream: Use cold cream for best whipping results.
- 2 tablespoons brown sugar: Enhances the topping with a hint of caramel depth.
- Pinch of salt: Balances the sweetness and intensifies the cream flavor.
- 1 teaspoon pure vanilla extract or leftover vanilla bean scrapings: Rounds out the flavor with warmth and sweetness.
This simple mix results in a whipped topping that’s smooth, stable, and not overly sweet — just the way it should be.
How to Whip Cream Without Overdoing It
Place all ingredients in a food processor or stand mixer with the whisk attachment. You can also use a hand mixer or even whip by hand with a chilled metal bowl and whisk.
Blend for about 1–2 minutes in the food processor or until the cream becomes thick and holds soft peaks. Be careful not to overwhip — once the cream starts to stiffen, stop and test it. It should be scoopable, fluffy, and spreadable.
If you go too far, it can turn grainy or even into butter. Watch closely and stop at the first sign of firmness.
Topping the Cheesecake
Once your cheesecake has chilled for at least 8 hours and the topping is ready, spoon the whipped cream onto the center of the cheesecake. Use an offset spatula or the back of a spoon to spread it outwards in swirls. You can keep it rustic, or pipe it with a star tip for a fancier look.
Optional garnish ideas:
- Extra vanilla bean flecks
- Light sprinkle of toasted pecans
- Dusting of brown sugar or cookie crumbs
Whatever finish you choose, make sure to apply the whipped cream just before serving or within a couple of hours to maintain its fresh, fluffy look.
Storage After Topping
Once topped, the cheesecake can be stored in the refrigerator for up to 1 week. Just cover it with a cake dome or a large inverted bowl to protect the whipped topping. Avoid plastic wrap, as it can stick and smudge the surface.
Storing and Serving the Cheesecake
How to Store Cheesecake for Freshness
A well-made cheesecake like this Vanilla Bean Brown Butter beauty deserves proper storage to preserve its flavor and texture. After baking and chilling, it can last up to 1 week in the refrigerator if stored correctly.
Here’s how to do it right:
- Wrap the pan in plastic wrap before topping with whipped cream if you’re storing it plain.
- Once topped, use a cake dome or an inverted bowl to avoid ruining the whipped cream.
- Always store it in the coldest part of the fridge, usually toward the back and away from the door.
Avoid placing it next to strongly-scented foods. Cheesecake tends to absorb odors, and you definitely don’t want your dessert tasting like last night’s leftovers.
Freezing Cheesecake (With or Without Topping)
If you’d like to make this cheesecake ahead of time or store leftovers longer, you can freeze it easily.
To freeze:
- Chill the cheesecake completely first.
- Wrap it tightly in plastic wrap, then foil, or place it in an airtight container.
- Freeze for up to 2 months.
- Thaw overnight in the fridge before serving.
For best results, freeze without whipped cream, and add the topping fresh after thawing. If you must freeze with the topping, flash-freeze the cheesecake uncovered until solid, then wrap gently to protect the whipped cream.
How to Serve for Maximum Enjoyment
To serve, remove the cheesecake from the fridge about 20–30 minutes before slicing. This brings it just slightly below fridge temperature, where the texture becomes silky and easier to cut.
Use a sharp, thin-bladed knife, and dip it in hot water between each slice for clean cuts. Wipe off any cream or filling between cuts to keep presentation neat.
Pair your cheesecake with:
- A drizzle of brown butter for extra richness
- Fresh berries or berry compote for brightness
- A dusting of cinnamon or cocoa powder for contrast
This cheesecake stands tall on its own, no flashy extras needed. But the little touches help you elevate it for dinner parties, birthdays, or even the holidays.
Now that we’ve explored every part of this incredible dessert, let’s wrap up with a short recap and final thoughts.
Conclusion
The Vanilla Bean Brown Butter Cheesecake is more than just a dessert, it’s an experience. From the first golden swirl of browned butter to the final cloud of whipped cream, each step builds flavor, depth, and irresistible texture. This isn’t your everyday cheesecake — it’s rich, nutty, smooth, and subtly sweet with that floral kick from real vanilla bean.
Let’s recap what you’ve learned:
- How to properly brown butter to get that warm, toasted aroma and flavor.
- How to build a nutty, crisp crust that holds its shape and adds complexity.
- How to mix a perfectly smooth cheesecake filling that sets like a dream.
- How to use a water bath and cooling process to prevent cracks and keep the texture silky.
- How to whip and top your cheesecake with lightly sweetened cream for that airy, final touch.
- And how to store and serve it for both freshness and presentation.
This cheesecake makes a stunning centerpiece for special occasions but is simple enough for a skilled home baker to tackle on a weekend. Its balance of textures and flavors makes every bite memorable and it only gets better with a day or two of chilling.
So, the next time you’re ready to impress guests or treat yourself to something extra decadent, return to this Vanilla Bean Brown Butter Cheesecake recipe. It’s the kind of dessert that turns an ordinary day into something truly special.