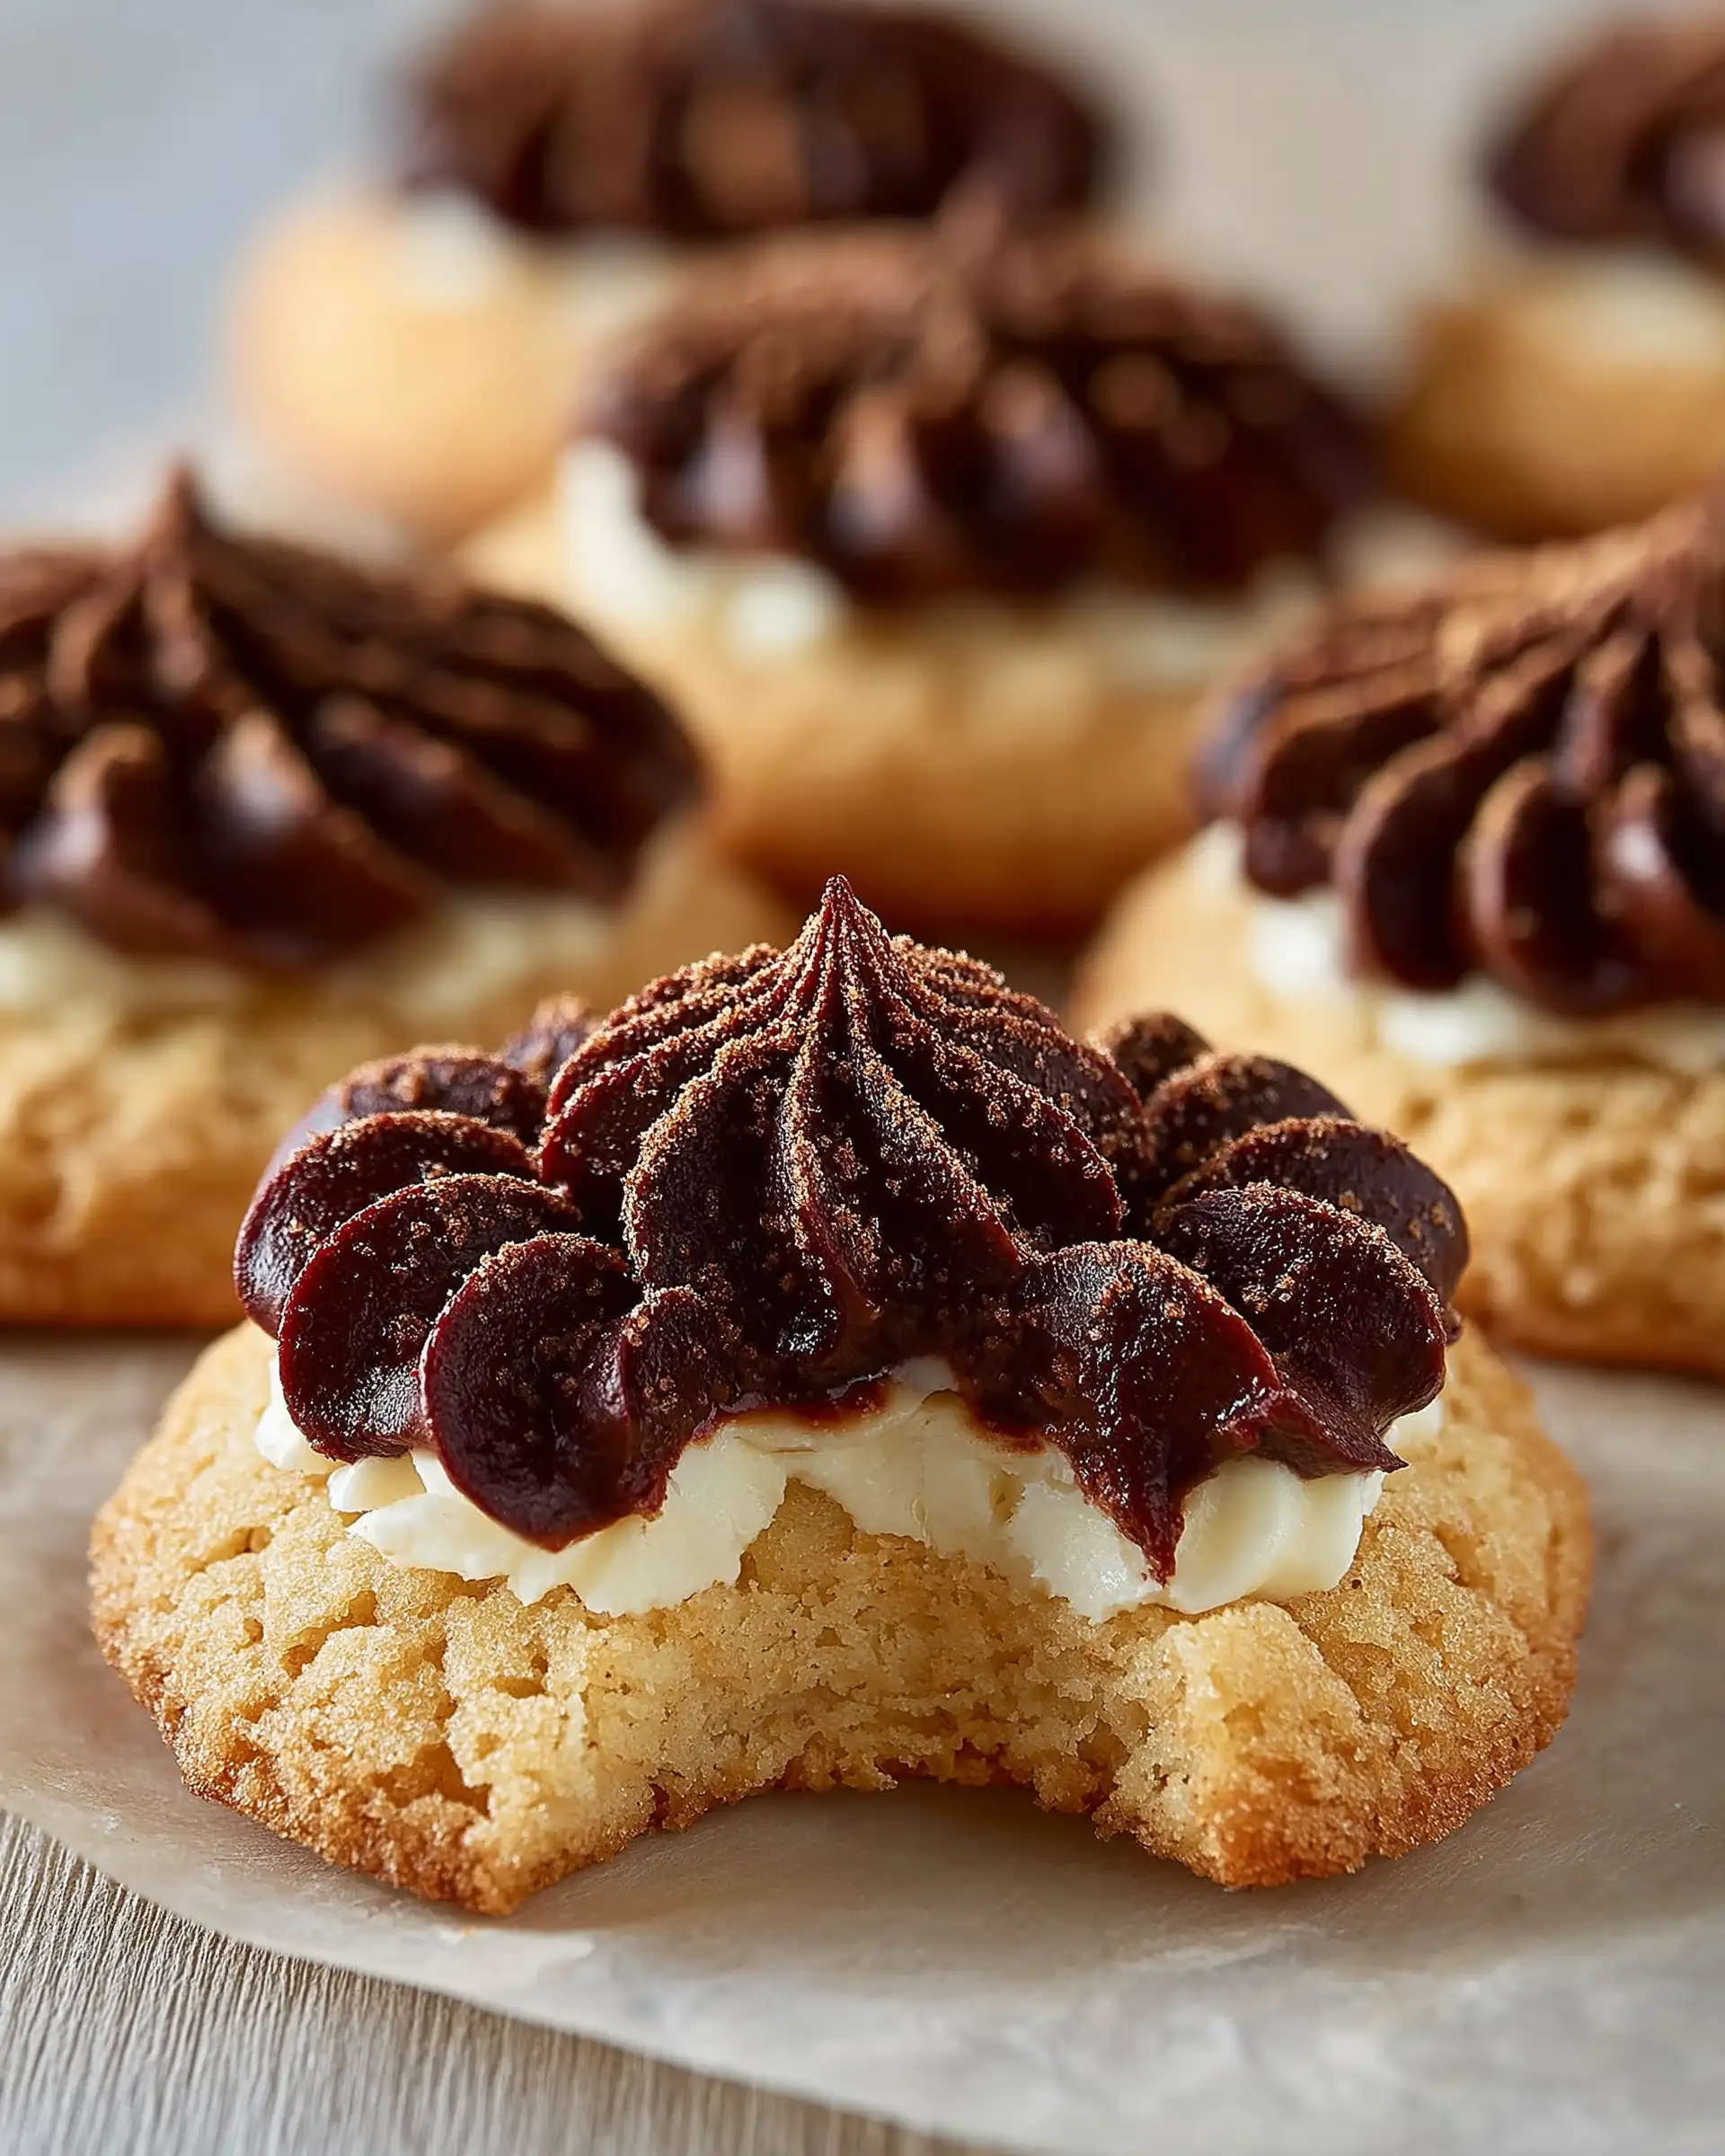
Hazelnut Thumbprint Cookies with Silky Ganache are a delightful mix of rich chocolate and nutty crunch, making them an instant favorite for any occasion. These buttery cookies are coated in toasted hazelnuts and filled with smooth, melt-in-your-mouth ganache.
Whether you’re baking for the holidays or just craving something sweet and elegant, this recipe is sure to impress. In this guide, we’ll walk through the process step-by-step so you can make bakery-quality cookies right at home.
Why Hazelnut Thumbprint Cookies Are a Must-Bake
Origins and Popularity of Thumbprint Cookies
Thumbprint cookies have been around for decades and are often found on dessert tables during the holidays. Traditionally filled with jam, the chocolate ganache version gives this classic cookie a luxurious upgrade. The thumbprint shape makes them visually appealing and perfect for customizing with different fillings.
What Makes Hazelnuts a Perfect Pairing with Chocolate
Hazelnuts and chocolate are a timeless flavor duo. The deep, roasted flavor of hazelnuts balances beautifully with the richness of dark chocolate. In this recipe, they add crunch and aroma, complementing the creamy center and soft cookie base. Using toasted hazelnuts takes the flavor up a notch, offering a bold, nutty bite in every cookie.
Key Ingredients for the Perfect Texture and Taste
Essential Dry Ingredients and Their Roles
Every great cookie begins with the right base. In this recipe, all-purpose flour is the foundation. It provides structure and keeps the cookies tender without being too soft or too firm. Granulated sugar sweetens the dough while also helping with browning, giving the cookies their golden edges. A pinch of fine sea salt enhances the flavors and balances the sweetness. Though small, this touch of salt is crucial for depth.
Another dry ingredient to consider is the turbinado sugar used for coating. Unlike regular sugar, it adds a gentle crunch to the cookie’s exterior, elevating the texture.
Importance of Using Toasted Hazelnuts
Toasted hazelnuts are the secret to the deep, aromatic nutty layer on the outside of these cookies. When hazelnuts are roasted and skinned, their natural oils emerge, releasing rich, bold flavor. Roughly grinding them ensures you get bits of crunch in every bite without overwhelming the cookie’s shape.
It’s best to toast hazelnuts in a dry pan or in the oven, then rub them with a clean kitchen towel to remove the skins. This step enhances the nutty aroma and removes bitterness.
Choosing the Right Chocolate for Silky Ganache
The filling is what makes these thumbprint cookies feel luxurious. Use finely chopped dark chocolate with a cocoa content of 60–70% for best results. This range offers a smooth, rich ganache that isn’t too bitter or too sweet.
Butter is added after melting to make the chocolate silkier and help it set beautifully. Avoid using chocolate chips, which often contain stabilizers that affect the texture. High-quality baking chocolate gives you the glossy finish and smooth pipe you want.
Step-by-Step Dough Preparation Techniques
Mixing the Dough Without Overworking It
Start by creaming the room temperature unsalted butter with fine sea salt until smooth and creamy. This step builds the base texture. Once it’s fully incorporated, gradually mix in the granulated sugar. You’ll notice the mixture getting lighter and fluffier—that’s a sign of air being whipped in, which helps the cookies stay tender.
Add the egg yolk (saving the white for later) and vanilla extract. Mix until just combined. Finally, stir in the flour. Don’t overmix once the flour is added. Overworking the dough can result in tough cookies. Stir just until the dough comes together. If needed, finish mixing gently with your hands.
Chilling the Dough: Why It’s Crucial
Once the dough is ready, form it into a ball and wrap it tightly in plastic wrap. Chill it in the refrigerator for at least one hour. This step allows the butter to firm up, which prevents the cookies from spreading too much in the oven.
Chilling also helps the flavors develop and makes the dough easier to handle, especially when rolling and shaping.
Fixing Dry or Crumbly Dough Easily
If the dough feels too dry or crumbly after chilling, don’t worry. Let it sit at room temperature for a few minutes, then knead it gently with your hands. The warmth from your hands will soften the butter slightly and help the dough come together into a smooth, pliable texture.
This step ensures your cookies hold their shape during baking and gives them that perfect thumbprint form without cracks.
Shaping and Coating the Cookies for a Signature Look
Creating Uniform Cookie Balls with the Right Size
Once the dough has chilled and is soft enough to handle, scoop out portions using a tablespoon. This ensures consistent sizing, which leads to even baking. Roll each scoop between your palms to form a smooth ball. Uniform cookie size helps prevent over- or under-baking and gives your final presentation a polished, professional touch.
Try to keep each ball compact and avoid leaving cracks or uneven areas on the surface, as this may affect how the cookies hold the ganache filling later.
Using Egg White and Hazelnut Sugar Coating for Crisp Texture
Whisk the reserved egg white until it’s foamy. This light, airy texture helps the hazelnut coating adhere smoothly. In a separate bowl, mix the roughly ground toasted hazelnuts with turbinado sugar.
Dip each dough ball into the egg white, making sure it’s evenly coated. Then roll it in the hazelnut-sugar mixture, gently pressing so the coating sticks well. The sugar adds crunch while the nuts toast even further during baking, locking in flavor and texture.
Getting the Thumbprint Indentation Just Right
Now comes the signature move-pressing the center of each dough ball. You can use your thumb, but for a more uniform and deeper cavity, the bottom of a wooden spoon works perfectly. Gently press down to make a small well without cracking the edges.
These indentations will slightly rise during baking, so be sure to press again halfway through the bake. This creates the perfect hollow to hold that smooth chocolate ganache later on.
Baking to Perfection Without Burning or Overbaking
Two-Step Baking Method for Crisp Edges and Soft Centers
Preheat your oven to 350°F and line your baking sheet with parchment paper or a silicone mat. This helps prevent sticking and promotes even browning. Once your cookie balls are shaped and indented, place them about 2 inches apart on the baking sheet. This space allows them to spread slightly without merging into each other.
Bake the cookies for 10 minutes to allow the edges to begin setting. Then, carefully remove the tray and re-indent the center of each cookie with the spoon handle or your thumb. This second press ensures there’s enough room for the ganache after they finish baking. Return the tray to the oven and continue baking for another 6 to 8 minutes until the edges are lightly golden.
This double-bake method ensures the cookies hold their shape, the center stays soft, and the edges develop that delicate crunch.
How to Avoid Cracks or Flattening in the Oven
If your cookies are cracking too much or spreading flat, a few things might be off. First, check that the dough was chilled long enough. Warm dough spreads faster and loses structure. Also, don’t skip the hazelnut coating step, it creates a natural barrier that holds in the cookie’s shape.
Make sure you’re not overworking the dough when rolling. Gentle handling and a cool surface help maintain form. Lastly, always bake on the center rack of your oven to ensure even heat distribution.
Tips to Cool Cookies Properly Without Sogginess
Once baked, let the cookies cool on the baking sheet for about 5 minutes. This gives them time to firm up slightly, making it easier to move them without breaking. Afterward, transfer them to a wire rack to cool completely.
Skipping the rack can lead to steam getting trapped underneath, softening the bottoms. Proper cooling is essential, especially before adding the ganache, which needs a cool cookie base to set properly.
Making the Silkiest Ganache Filling
Best Chocolate Types for Glossy Ganache
To create that luxurious, smooth ganache filling, start with high-quality dark chocolate. Aim for chocolate that contains between 60% and 70% cocoa solids. This range provides just the right balance of richness and sweetness without being overpowering. Avoid using chocolate chips, as they often include stabilizers that prevent smooth melting.
Finely chop the chocolate into small pieces to ensure even melting. The smaller the pieces, the quicker and smoother the process will be.
How to Melt Chocolate Without Overheating
Use a double boiler method for best results. Place the chopped chocolate in a heatproof bowl set over a pot of simmering water. Make sure the bottom of the bowl doesn’t touch the water. Stir gently and continuously as the chocolate begins to melt.
Once it’s about 90% melted, remove it from the heat. Add in the unsalted butter and stir slowly. The residual heat will melt the butter and finish the melting process. This technique ensures you don’t scorch or seize the chocolate, which could ruin the ganache’s texture.
Adding Butter for Smooth, Creamy Finish
Butter is more than just a flavor booster here—it’s essential for that silky, pipeable consistency. As it melts into the chocolate, it adds gloss and richness, making the ganache smooth and creamy.
Let the ganache cool slightly before using. You don’t want it too runny, but it should still be soft enough to pipe or spoon. For a professional touch, transfer the ganache to a pastry bag fitted with a large star tip. This makes for a clean, decorative finish inside each cookie indentation.
Assembling and Decorating Your Cookies Like a Pro
When and How to Pipe the Ganache
Before adding the ganache, make sure the cookies are completely cooled. Adding ganache to warm cookies will cause the chocolate to melt and lose shape. Once the cookies reach room temperature, the filling process can begin.
If you’re using a piping bag, fill it with the cooled ganache and use a large star tip for a beautiful swirl. Gently squeeze the ganache into each thumbprint cavity until it’s just full. For a more rustic look, you can also spoon the ganache in, smoothing the top with the back of the spoon.
Don’t rush this part—the ganache should hold its shape and stay within the center without spilling over.
Creative Garnishing Tips: Gold Dust, Flakes, and More
While the ganache-filled cookies are stunning on their own, a few finishing touches can elevate them. Lightly dust the tops with edible gold dust for a festive, elegant touch. You could also sprinkle finely chopped hazelnuts or even a pinch of sea salt flakes for a gourmet twist.
If serving for a holiday table, consider placing them in mini paper cups for easy presentation. For a personal gift box, a ribbon and label adds charm and makes your homemade cookies stand out.
Storing and Setting for the Perfect Finish
Once piped, allow the ganache to set at room temperature for at least 30 minutes. If you’re in a hurry, place the cookies in the fridge for about 10–15 minutes. This helps the chocolate firm up while preserving its glossy finish.
Store the cookies in a single layer or between sheets of parchment in an airtight container. They’ll keep fresh at room temperature for 3–4 days, or up to a week in the fridge. Let refrigerated cookies come to room temperature before serving to enjoy the full flavor and texture.
Hazelnut Thumbprint Cookie Variations to Try
Vegan and Gluten-Free Options
To make these cookies vegan, use plant-based butter and a flaxseed egg substitute. Choose dairy-free dark chocolate and coconut oil for the ganache. For a gluten-free version, swap the flour with a gluten-free baking mix that includes a binder like xanthan gum.
Flavor Twists for Any Season
Add orange zest to the dough for a citrusy lift, cinnamon for cozy fall vibes, or a touch of peppermint extract to the ganache for a wintery feel. These simple tweaks bring variety while keeping the cookie’s essence.
Simple Swaps for All Ages
Make it more kid-friendly with milk chocolate or hazelnut spread instead of ganache. For a grown-up version, add a hint of espresso powder or finish with a sprinkle of flaky sea salt.
Storing, Gifting, and Serving Suggestions
Keeping Cookies Fresh Longer
Once fully cooled and filled, store the cookies in an airtight container. They’ll stay fresh at room temperature for about 3 to 4 days. For longer storage, place them in the refrigerator for up to a week. Just let them come to room temperature before serving to enjoy their full texture and flavor.
To freeze, layer cookies between sheets of parchment paper in a freezer-safe container. They’ll keep well for up to 3 months. Thaw at room temperature before serving.
Packaging Ideas for Gifting
These cookies make a thoughtful and elegant homemade gift. Arrange them in a cookie box with tissue paper or stack them in glass jars with a ribbon and handwritten label. Mini cupcake liners can keep each cookie separate and neat.
They’re perfect for holidays, birthdays, or hostess gifts and look impressive without much effort.
Serving Suggestions for Any Occasion
Hazelnut Thumbprint Cookies shine on dessert trays and at cookie swaps. Serve them on a platter with fruit or mix them into a cookie assortment for parties. For a cozy afternoon treat, enjoy them with a cup of coffee, hot cocoa, or even a glass of cold milk. Their rich ganache center makes them feel indulgent, no matter when you serve them.
Conclusion
Hazelnut Thumbprint Cookies with Silky Ganache are more than just a sweet treat, they’re a rich, elegant dessert that brings together buttery texture, nutty crunch, and smooth chocolate in every bite.
With a few simple ingredients and careful technique, you can create bakery-worthy cookies right in your own kitchen. Whether you’re baking for a special occasion, sharing with loved ones, or simply indulging yourself, these cookies always leave a lasting impression. Once you try them, they’ll become a staple in your recipe collection.