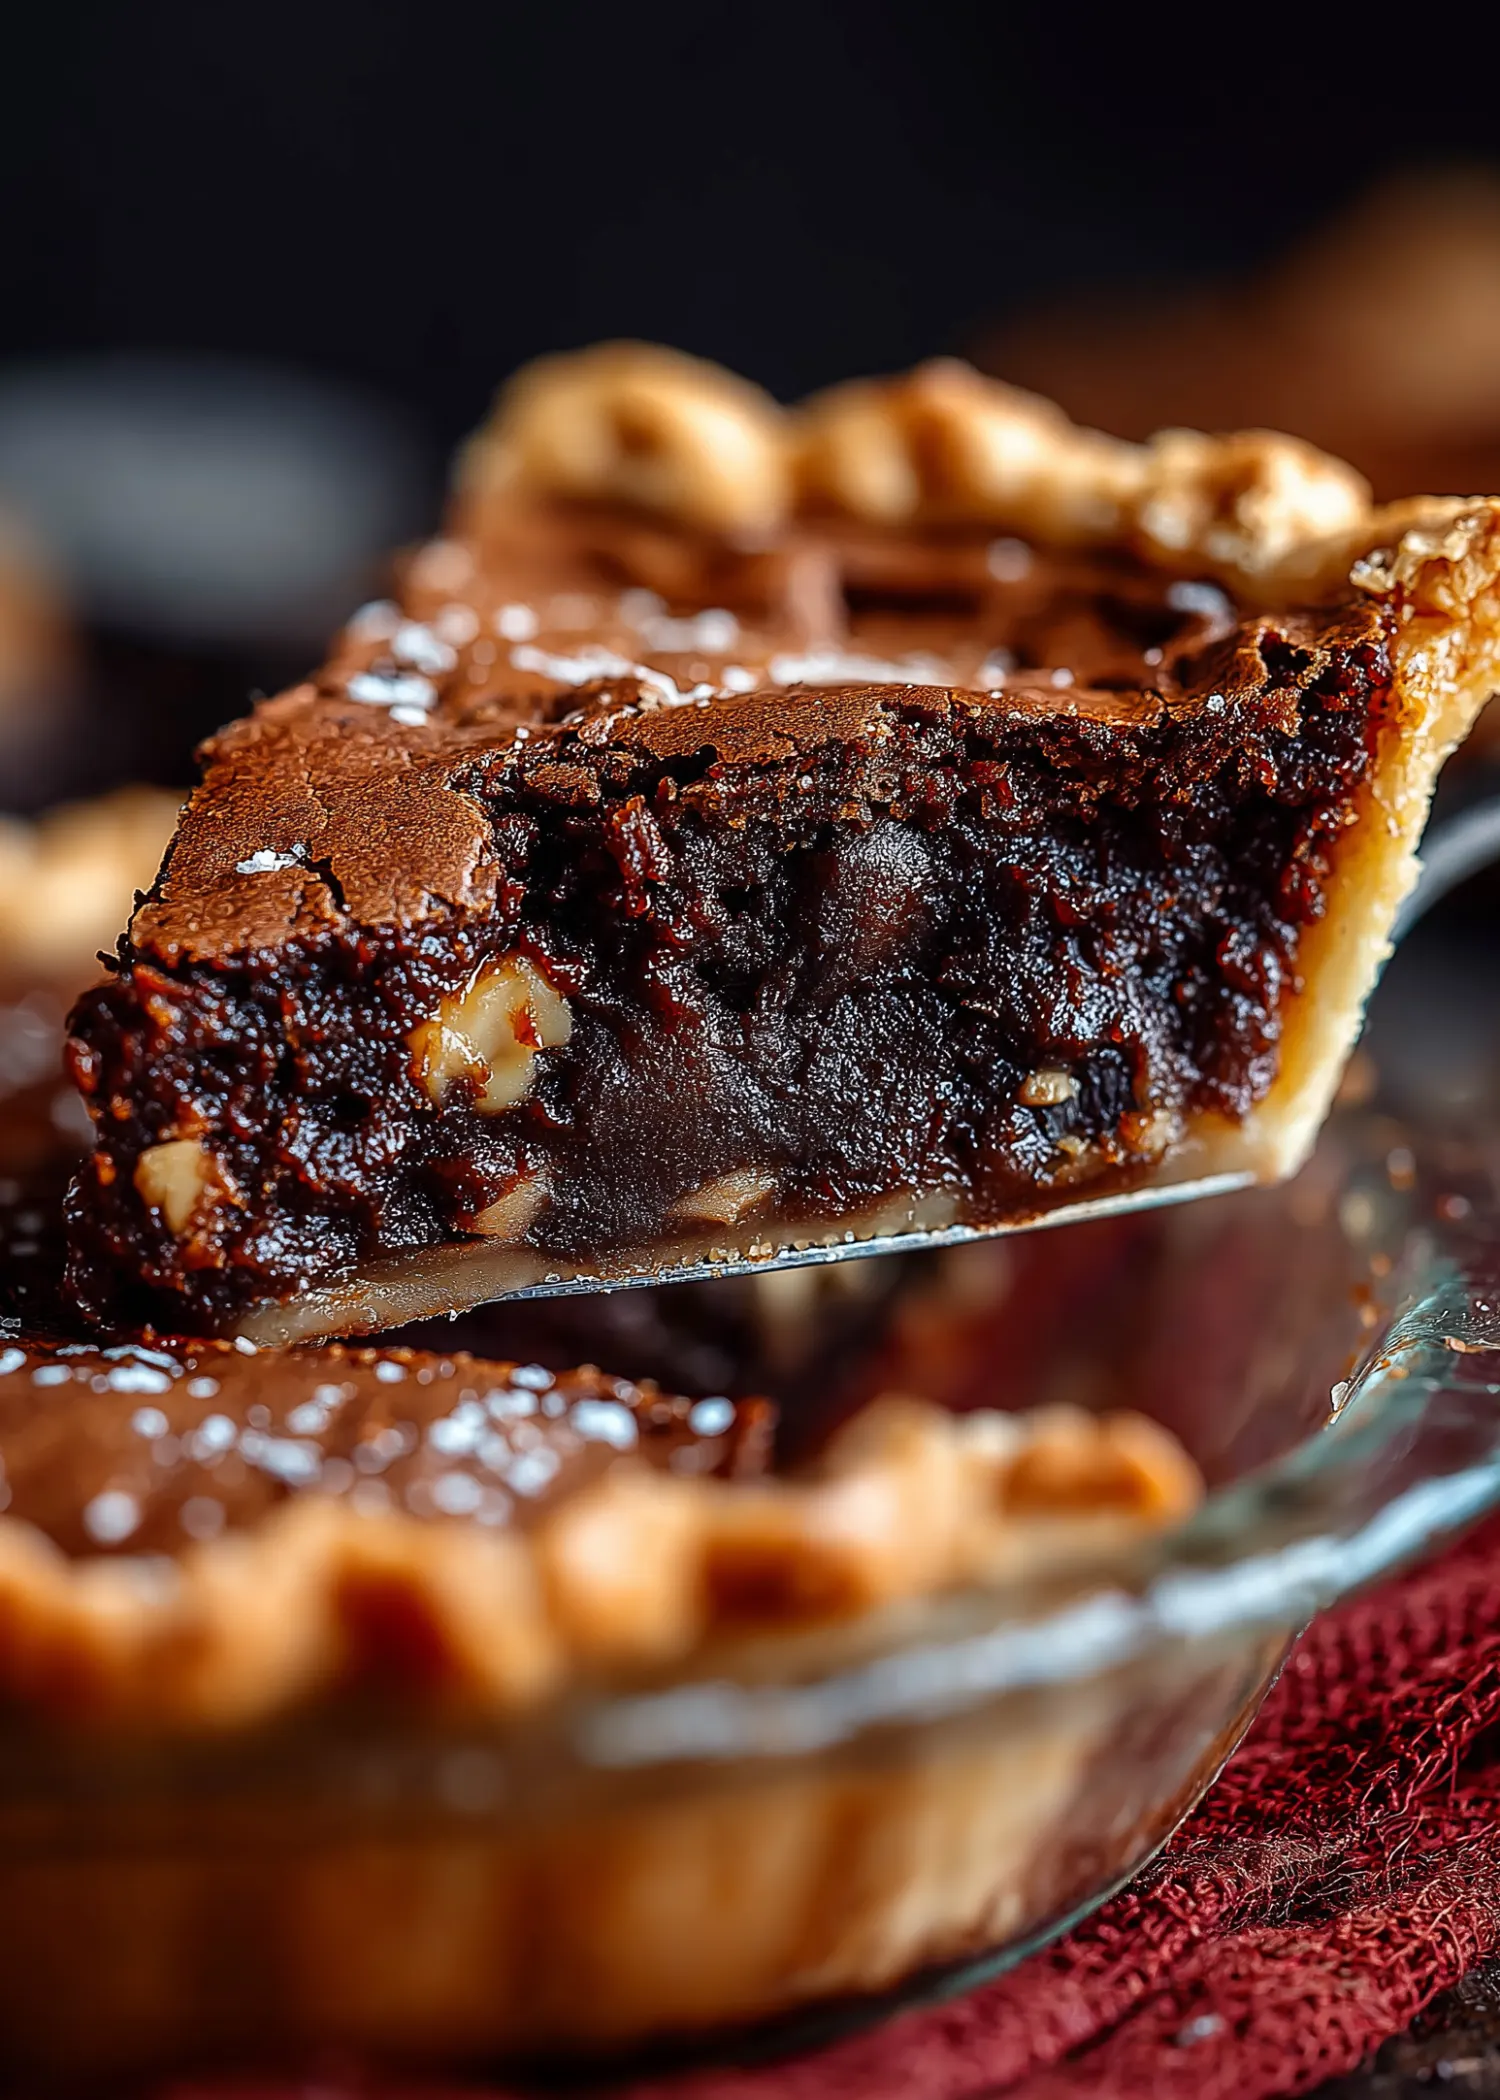
If you’ve ever debated between baking a pan of brownies or preparing a flaky homemade pie, this brownie pie recipe is your answer. It brings the best of both worlds into one delightful dessert. Imagine biting into a fudgy chocolate brownie encased in a golden, crisp crust that’s buttery and satisfying. Whether you’re celebrating a special occasion, looking for a weekend treat, or prepping for the holidays, this dessert never fails to impress.
In this detailed guide, you’ll learn how to make the perfect crust, mix a rich brownie batter, and bake everything to indulgent perfection. We’ll also explore easy ingredient swaps, creative variations, serving tips, and storage methods to make sure your pie stays fresh and delicious for days.
Contents
- 1 Choosing the Best Crust for Your Brownie Pie Recipe
- 2 Brownie Pie Recipe
- 3 The Importance of Blind Baking
- 4 Crafting the Perfect Brownie Filling
- 5 Customizing Your Brownie Pie Recipe
- 6 Baking to Gooey Perfection
- 7 Serving and Storing Brownie Pie
- 8 Make-Ahead and Freezing Instructions
- 9 Tips for First-Time Pie Bakers
- 10 Conclusion
Choosing the Best Crust for Your Brownie Pie Recipe
Flaky Pie Crust vs. All-Butter Pie Crust
When it comes to making the perfect brownie pie, the crust sets the foundation. You have two solid options: a flaky pie crust or an all-butter pie crust. Both work well, but each has a unique texture and flavor.
The flaky crust gives your brownie pie that light, layered bite with a subtle crunch. It’s ideal if you’re aiming for contrast between the crust and gooey brownie center. On the other hand, an all-butter crust delivers a rich, tender bite with buttery depth. If flavor is your top priority, go for butter.
For this brownie pie recipe, we used a flaky crust to give structure and balance to the soft filling. But if time is tight or you prefer convenience, store-bought pie dough is perfectly fine. Just don’t skip blind baking, it’s crucial for success.
| Crust Type | Texture | Flavor | Best For |
|---|---|---|---|
| Flaky Crust | Light and crisp | Mild, subtle | Textural contrast |
| All-Butter Crust | Rich and tender | Buttery, deep flavor | Bold flavor lovers |
Preparing and Chilling Your Crust Correctly
Regardless of which crust you choose, how you handle it matters. Chilling is not optional. Cold dough helps maintain structure during baking, prevents shrinking, and supports clean fluting or crimping along the edges.
Start by rolling your chilled dough on a floured surface into a 12-inch circle. Place it carefully into a 9-inch pie dish, gently pressing it in to avoid air pockets. Don’t trim the edges. Instead, fold excess dough back in to form a thick rim, then flute or crimp with your fingers or a fork.
If your dough softens too much during shaping, place it in the refrigerator for 5–10 minutes. Once shaped, chill the entire pie dish for at least 30 minutes before blind baking. This simple step ensures a crust that bakes evenly and holds its shape.
Print
Brownie Pie Recipe
- Total Time: 4 hours 25 minutes
- Yield: One 9-inch pie
- Diet: Vegetarian
Description
This rich and gooey brownie pie recipe combines a fudgy chocolate filling with a crisp, buttery pie crust. Perfect for holidays, birthdays, or any chocolate craving. Serve warm with ice cream or whipped cream for an unforgettable dessert.
Ingredients
1 unbaked flaky pie crust (or all-butter crust)
1 large egg white (for egg wash)
1/2 cup (113g) unsalted butter
2 tbsp (30ml) vegetable oil or melted coconut oil
1 cup (200g) granulated sugar
2 large eggs + 1 egg yolk (room temperature)
2 tsp pure vanilla extract
3/4 cup (62g) unsweetened natural or dutch-process cocoa powder
1/2 cup (63g) all-purpose flour
1/4 tsp salt
3/4 cup (100g) chopped walnuts (optional)
3/4 cup (135g) semi-sweet chocolate chips
Optional toppings: ice cream, whipped cream, hot fudge, chocolate syrup
Instructions
1. Prepare and chill pie dough for at least 2 hours.
2. Roll out dough to a 12-inch circle and place in a 9-inch pie dish. Crimp edges.
3. Chill the shaped crust for 30 minutes.
4. Preheat oven to 375°F (190°C).
5. Line crust with parchment paper and fill with pie weights. Bake for 15–16 minutes.
6. Remove weights and parchment, prick crust with fork, and bake for 8 more minutes.
7. Brush warm crust with egg white to seal. Reduce oven temp to 350°F (177°C).
8. Melt butter and mix with oil and sugar. Let cool for 3–5 minutes.
9. Whisk in eggs, yolk, and vanilla.
10. Add cocoa powder, flour, and salt. Whisk until combined.
11. Fold in walnuts and chocolate chips.
12. Spread batter into the prepared crust.
13. Bake for 40–45 minutes until set with moist crumbs on a toothpick.
14. Cool for 20 minutes before slicing. Serve warm with toppings.
Notes
To make ahead: Prepare dough up to 5 days in advance or freeze up to 3 months. You can also blind bake the crust 3 days early or bake the whole pie 1–2 days ahead.
To reheat: Cover and warm in a 300°F (149°C) oven for 15–20 minutes.
For nut-free version: Omit walnuts and use 1 cup (180g) chocolate chips instead.
- Prep Time: 3 hours
- Cook Time: 1 hour 5 minutes
- Category: Pie Recipes
- Method: Baking
- Cuisine: American
The Importance of Blind Baking
Step-by-Step: How to Blind Bake Your brownie pie Crust
Blind baking is a crucial step in this brownie pie recipe, especially when your filling is as thick and moist as a brownie batter. It prevents the dreaded soggy bottom and ensures your crust holds up to the rich chocolate center.
Here’s how to do it right:
- Chill the crust: After placing and shaping your dough into a 9-inch pie dish, refrigerate it for at least 30 minutes. Cold dough holds its form in the oven better.
- Preheat the oven to 375°F (190°C) while the crust chills.
- Line the crust: Place a sheet of parchment paper over the dough, then fill it with pie weights or dried beans. These keep the dough from puffing up during baking.
- Bake with weights: Bake for about 15–16 minutes until the edges just begin to brown.
- Remove weights and prick the base: Take the crust out, lift the parchment paper with weights, and prick holes across the bottom using a fork. This step prevents bubbling.
- Bake again: Place the crust back in the oven (uncovered) and bake for another 8 minutes to firm up the bottom.
- Apply egg wash: While the crust is still warm, brush the bottom and sides with a lightly beaten egg white. This seals the crust and adds a slight sheen.
You can blind bake your crust up to three days in advance. Just store it tightly covered in the fridge until ready to use.
Why Blind Baking Prevents a Soggy Crust
You might be wondering, why go through the trouble? Because brownie batter is heavy and moist. If you pour it directly into raw dough, it won’t give the crust time to firm up. You’ll end up with a chewy or even raw bottom—not ideal.
Blind baking gives the crust a head start. It sets the structure and allows it to crisp up, especially when paired with an egg white wash. This protective barrier keeps the wet filling from soaking through the dough during the final bake.
Crafting the Perfect Brownie Filling
Choosing Quality Cocoa Powder and Chocolate
The heart of any brownie pie is the chocolate, so choosing the right ingredients here makes all the difference. For this brownie pie recipe, the chocolate flavor comes entirely from unsweetened cocoa powder and semi-sweet chocolate chips.
You can use natural cocoa powder for a more traditional brownie flavor or opt for Dutch-process cocoa for a deeper, smoother chocolate profile. Both work well, but Dutch-process tends to deliver a slightly richer result.
Then come the chocolate chips. Semi-sweet chips melt beautifully into the batter, creating gooey pockets in every bite. They also help create that signature shiny crackly brownie top. If you’re feeling adventurous, you can swap them with chunks of dark chocolate or a mix of milk and dark chips for a more dynamic taste.
| Ingredient | Role in Recipe |
|---|---|
| Cocoa Powder | Base chocolate flavor |
| Semi-sweet Chocolate | Melty texture and shiny brownie top |
| Walnuts (optional) | Crunch and nutty contrast to the filling |
Mixing the Batter: The Order Matters
This isn’t a dump-and-stir kind of recipe. To achieve a thick, gooey brownie layer, you need to build your batter step-by-step.
Here’s the correct mixing sequence:
- Melt the butter in a heatproof bowl. Slice it first for even melting. Add oil and granulated sugar to the warm butter, then whisk until smooth. Let it sit for 3–5 minutes to slightly cool.
- Add eggs and vanilla. Use 2 large eggs plus 1 egg yolk. Whisk until the mixture looks thick and creamy. The extra yolk adds richness and helps bind the batter.
- Whisk in cocoa, flour, and salt. The batter will be thick at this stage, and that’s exactly what you want. It shouldn’t be runny or loose.
- Fold in the walnuts and chocolate chips. The batter will continue to thicken as it sits, so be sure to spoon it into your crust immediately.
Once mixed, the batter should be spooned and spread evenly into the still-warm, blind-baked crust. Don’t wait too long or the batter will set and become hard to spread.
Want to skip the nuts? That’s fine. Replace the walnuts with extra chocolate chips—just don’t exceed 1.5 cups total, or your brownie pie may become too rich and dense.
Customizing Your Brownie Pie Recipe
Adding Walnuts or Going Nut-Free
One of the great things about this brownie pie recipe is its flexibility. If you love texture and a little crunch in your dessert, walnuts are a classic choice. They complement the deep chocolate flavor and add that satisfying nutty bite. You’ll need about ¾ cup of chopped walnuts, which you can toast beforehand for even more depth.
Not into nuts? No problem. Simply leave them out and replace them with extra chocolate chips—about 1 cup total. Just a heads-up, using 1½ cups of chips can make the pie ultra-rich, maybe even too much for some. But if you’re all in on chocolate, go for it.
Prefer other nuts? Try chopped pecans or hazelnuts. They bring a slightly sweeter or more roasted flavor that works well with this filling.
| Option | Amount | Notes |
|---|---|---|
| Walnuts | ¾ cup | Toast for extra flavor |
| Extra choc chips | 1 to 1½ cups | For nut-free version, adds gooey richness |
| Pecans/Hazelnuts | ¾ cup | Substitutes for classic walnut crunch |
Alternative Add-Ins and Flavors
This brownie pie is delicious as-is, but if you’re feeling creative, there are dozens of ways to take it up a notch. Here are some tasty variations:
- Peppermint chips: Add ½ cup for a holiday-ready brownie pie.
- Caramel swirls: Drop in spoonfuls of caramel before baking and swirl with a knife for pockets of buttery sweetness.
- Espresso powder: Just ½ teaspoon enhances the chocolate without tasting like coffee.
- Peanut butter: Swirl ¼ cup into the top of the batter right before baking for a chocolate-peanut butter twist.
Even better? These variations don’t require any adjustments to baking time or temperature. Just mix them in or swirl them on and bake as usual.
Baking to Gooey Perfection
How Long to Bake Brownie Pie for the Ideal Texture
Getting the bake time right is critical if you want that signature fudgy brownie texture in your brownie pie. Unlike a regular brownie in a pan, this one is encased in a crust, so it needs a slightly different approach.
After you’ve spooned the batter into the still-warm, blind-baked crust, bake the pie at 350°F (177°C) for 40 to 45 minutes. The goal is to bake it just long enough for the top to set and the center to remain soft and moist.
If you prefer your brownies on the gooey side, pull the brownie pie at the 40-minute mark. If you like them a bit more set, let it go closer to 45 minutes. But remember: it’s better to underbake than overbake, because the filling continues to firm up as it cools.
Here’s a quick texture guide:
| Bake Time | Result |
|---|---|
| 40 minutes | Extra gooey, fudgy center |
| 43 minutes | Balanced gooey + set texture |
| 45 minutes | More firm, chewy brownie texture |
Signs Your Brownie Pie Is Done
Not sure if your brownie pie is fully baked? Use these signs to check for doneness:
- Crackly top: The surface should look set and slightly shiny with that classic brownie crust.
- Toothpick test: Insert a toothpick into the center. It should come out with a few moist crumbs, not wet batter.
- Slight jiggle: The pie should not slosh in the middle. A slight jiggle is fine—it will continue to set as it cools.
If the edges of your crust start browning too quickly before the center is done, use a pie crust shield or a ring of foil to prevent burning.
Once baked, let the pie cool for at least 20 minutes before slicing. It will still be warm and gooey—perfect for serving with ice cream.
Serving and Storing Brownie Pie
Best Ways to Serve: Ice Cream, Whipped Cream, and Syrups
Fresh from the oven, your brownie pie is a masterpiece of warm, melty chocolate tucked inside a crisp, buttery crust. But the real fun starts when you dress it up for serving.
Here are the best ways to turn each slice into a dessert moment:
- Vanilla ice cream: The classic combo. A cold scoop on warm pie creates an irresistible contrast.
- Whipped cream: Light and fluffy, it balances the richness of the brownie center.
- Hot fudge drizzle: Want even more chocolate? A warm drizzle of hot fudge takes it over the top.
- Chocolate syrup: Great if you’re in a rush. Just pour and go.
- Salted caramel: Add a little sweet-salty edge with a swirl of caramel sauce.
Pro tip: Warm your slice in the microwave for 10 to 15 seconds before topping it. The chocolate will melt slightly, creating a gooey bite every time.
You can even serve the brownie pie chilled or at room temperature, but warming enhances flavor and texture. It’s also a showstopper when served family-style in the center of the table.
Looking for inspiration? Try serving brownie pie as part of a dessert board with berries, nuts, and sauces.
Storing Leftovers and Reheating Tips
Brownie pie stores beautifully, making it ideal for making ahead or enjoying leftovers over a few days.
Here’s how to store it right:
- Room temperature: Cover and store for up to 2 days.
- Refrigerator: Keeps fresh for up to 4–5 days. Just let slices come to room temp or reheat before serving.
To reheat:
- Single slice: Microwave for 10–15 seconds.
- Whole pie: Cover with foil and warm in a 300°F (149°C) oven for 15–20 minutes.
Freezing instructions:
- Wrap the cooled pie tightly in plastic and foil.
- Store for up to 3 months.
- To serve, thaw in the fridge overnight and reheat before slicing.
Make-Ahead and Freezing Instructions
Preparing the Pie or Dough in Advance
Life gets busy, and sometimes you need a dessert that works with your schedule. Luckily, this brownie pie recipe is extremely make-ahead friendly. You can prep the crust, blind bake it, or even fully bake the pie days before your event without sacrificing texture or flavor.
Here are your best options:
- Pie dough: Make and chill the dough up to 5 days in advance. Keep it tightly wrapped in the refrigerator.
- Blind-baked crust: Once you’ve blind-baked the crust and brushed on the egg wash, you can store it covered in the fridge for up to 3 days.
- Fully baked pie: Yes, you can make the entire pie 1–2 days ahead. Let it cool completely, cover tightly, and store at room temperature.
When it’s time to serve, reheat in the oven to bring back that gooey center and crisp crust. You’ll never guess it wasn’t made the same day.
| Prep Stage | How Long It Lasts | Storage Method |
|---|---|---|
| Raw pie dough | 5 days (fridge), 3 months (freezer) | Wrap tightly in plastic wrap |
| Blind-baked crust | 3 days (fridge) | Covered in pie dish with wrap |
| Fully baked pie | 2 days (room temp) | Covered tightly |
How to Reheat Without Drying Out
Reheating brownie pie the right way is key to preserving that gooey texture and crisp crust. Whether you’re warming up a full pie or a single slice, here’s how to do it right:
- Whole pie: Cover loosely with foil and warm in a 300°F (149°C) oven for 15–20 minutes.
- Individual slices: Place a slice on a microwave-safe plate and heat for 10–15 seconds. This keeps the chocolate soft and the crust intact.
Avoid microwaving the entire pie—it can make the crust soggy and unevenly heat the filling. The oven method is best for freshness and presentation.
Want to freeze your brownie pie? No problem. After baking and cooling, wrap it in plastic and foil and freeze for up to 3 months. To serve, thaw in the refrigerator overnight and warm up as needed.
Tips for First-Time Pie Bakers
Tools You Need for Success
If you’re new to baking pies, having the right tools can make the process smoother and more enjoyable. Here are a few essentials that help you master this brownie pie recipe:
- Rolling Pin: For an even crust thickness
- 9-Inch Pie Dish: Glass or metal bakes more evenly than ceramic
- Parchment Paper & Pie Weights: For blind baking the crust
- Pastry Brush: Helps apply egg wash neatly
- Whisk & Silicone Spatula: Ensures smooth batter mixing and clean scraping
Each of these tools supports a specific step, from crust prep to filling and baking.
Troubleshooting Common Pie Baking Issues
Even experienced bakers run into hiccups. Here are quick fixes for common problems:
- Soggy crust? Make sure to blind bake and brush with egg white.
- Dry brownie filling? You may have overbaked. Check doneness around the 40-minute mark.
- Cracked top? That’s normal with brownies and adds texture.
- Hard crust edges? Cover them with foil during the last 15 minutes.
Conclusion
This brownie pie recipe blends everything you love about gooey, chocolate-rich brownies with the classic comfort of a flaky pie crust. Whether you’re baking for a family celebration, holiday feast, or just to satisfy a serious chocolate craving, this dessert delivers both flavor and wow factor. With easy-to-follow steps, make-ahead options, and flexible variations, it’s a foolproof way to impress guests or treat yourself to something decadent.
Remember, the key to success lies in blind baking your crust, using quality cocoa and chocolate, and not overbaking the filling. From there, it’s all about the toppings—ice cream, whipped cream, or even a drizzle of salted caramel can turn each slice into a showstopper.
If you’re looking to upgrade your dessert game, this brownie pie belongs in your recipe rotation. It’s rich, versatile, and guaranteed to disappear quickly.
For More Delicious And Easy Recipes Follow Me In Facebook And Pinterest.
