


If you’ve been hunting for a citrus-infused dessert that’s light, fluffy, and packed with flavor, this orange cupcake recipe is the treat you need. In this comprehensive guide, we’ll show you how to create bakery-quality orange cupcakes filled with homemade orange curd and topped with silky orange cream cheese frosting.
Whether you’re a seasoned baker or a beginner, we’ll walk you through every step. You’ll learn about ingredient tips, perfect mixing techniques, baking times, and much more. Plus, we’ve got expert advice on how to store, decorate, and even adapt the cupcakes for different occasions.
Why This Orange Cupcake Recipe Works
– Orange flavor in every layer
What makes this orange cupcake recipe stand out is its bold, natural citrus flavor. By using freshly zested and juiced oranges in the batter, curd, and frosting, you get a triple dose of real orange goodness. Rubbing orange zest into sugar helps release aromatic oils that carry through every bite.
– Light, moist, and perfectly balanced
These Orange Cupcakes are soft but not fragile, thanks to the combo of cake flour, butter, and oil. The mix of egg and egg white adds structure and lift, while sour cream and milk lock in moisture. The result is a bakery-style texture that’s tender but holds its shape—ideal for filling and frosting.
Print
Orange Cupcake Recipe
- Total Time: 3 hours 56 minutes
- Yield: 22 cupcakes
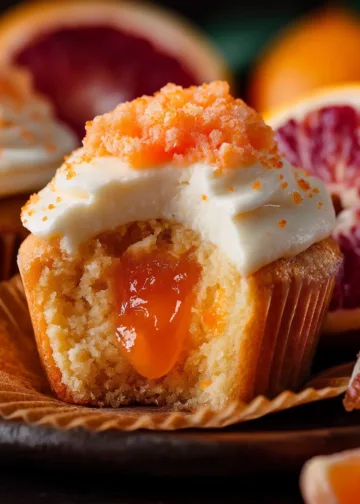
Description
Soft, citrus-packed orange cupcakes filled with homemade orange curd and topped with rich orange cream cheese frosting. The perfect dessert for bright, refreshing flavor in every bite.
Ingredients
For the Orange Curd:
2 and 1/2 large oranges, zested
3/4 cup + 1 tbsp orange juice (freshly squeezed)
2 tbsp lemon juice (freshly squeezed)
2/3 cup granulated sugar
2 large egg yolks
2 large whole eggs
Pinch of salt
1/2 tsp vanilla extract
6 tbsp salted butter (cubed)
For the Cupcakes:
1 and 3/4 cups cake flour
1 and 1/2 tsp baking powder
1/4 + 1/8 tsp baking soda
1/4 tsp salt
1/4 cup + 1 tbsp salted butter
1/4 cup vegetable oil
1 and 1/3 cups granulated sugar
2 large oranges, zested
1 large egg
1 large egg white
1/3 cup + 1 tbsp sour cream
1/4 cup orange juice
1/2 cup milk (2%)
For the Orange Cream Cheese Frosting:
1 and 1/2 cups salted butter
5 and 3/4 cups powdered sugar
2 tbsp orange juice
2 tsp orange zest
1 tbsp vanilla extract
8 oz cream cheese (cold, cubed)
For Decorating:
Extra orange zest
Instructions
1. Make the Orange Curd: Whisk orange juice, lemon juice, sugar, eggs, and zest in a saucepan. Cook on medium-low while whisking until thickened. Strain and stir in vanilla. Chill.
2. Preheat oven to 350°F. Line cupcake pans.
3. Infuse sugar with orange zest by rubbing together with hands.
4. Whisk flour, baking powder, baking soda, and salt.
5. Beat butter, then mix in oil. Add orange sugar and beat until fluffy.
6. Add egg and egg white. Beat well.
7. Add sour cream and vanilla. Mix.
8. Add dry ingredients alternating with milk and orange juice. Mix gently.
9. Scoop into liners 3/4 full. Bake for 14–16 minutes. Cool completely.
10. Make frosting: Beat butter, add powdered sugar gradually. Mix in juice, zest, vanilla. Add cream cheese last.
11. Core cupcakes and add 1–2 tsp orange curd. Replace tops.
12. Pipe frosting onto cooled cupcakes.
13. Top with orange zest. Chill briefly before serving if needed.
Notes
Store cupcakes in the fridge for up to 4 days in an airtight container. Orange curd can be made a day ahead and stored chilled. For best flavor, serve cupcakes at room temperature after chilling. You can also freeze unfrosted cupcakes for up to 3 months.
- Prep Time: 3 hours 40 minutes
- Cook Time: 16 minutes
- Category: Dessert
- Method: Baking
- Cuisine: American
Ingredients You’ll Need for Orange Cupcakes
– Core ingredients and why they matter
Understanding why each ingredient is used helps guarantee the perfect cupcake every time. Here’s a breakdown:
- Cake flour: Creates a soft, delicate crumb that keeps the cupcakes light and airy.
- Baking powder & baking soda: Both are used to help the batter rise properly and give a balanced lift.
- Salted butter: Adds richness and flavor. Using salted butter in both the batter and frosting deepens the overall taste.
- Vegetable oil: Prevents the Orange Cupcakes from drying out and keeps them soft for days.
- Granulated sugar: Besides sweetness, sugar helps tenderize and lock in moisture.
- Orange zest: Adds a concentrated citrus aroma. It’s infused into the sugar to enhance flavor.
- Egg & egg white: The combination keeps the crumb light and helps the cupcakes hold their shape.
- Sour cream: Adds moisture and a subtle tang that balances the sweetness.
- Orange juice: Freshly squeezed juice brightens the flavor and adds natural sweetness.
- Milk: Full-fat milk adds richness and helps dissolve the dry ingredients evenly.
These ingredients are easy to find but when used correctly, they transform into something bakery-worthy. Always use room-temperature dairy and eggs for a smoother batter and better texture.
– Best oranges for baking
Not all oranges are equal when it comes to baking. For this recipe, we recommend:
| Orange Type | Flavor Profile | Best Use |
|---|---|---|
| Navel | Sweet, low acidity | Zest and juice |
| Valencia | Juicy, slightly tangy | Orange curd and juice |
| Cara Cara | Mild, berry-like sweetness | Balanced batter flavor |
| Blood Orange | Deep color, tart-sweet | Decorative finish or frosting twist |
How to Make Homemade Orange Curd
– Step-by-step guide for orange curd
Orange curd adds a rich, tangy center that perfectly complements the sweet orange cupcakes. Making it from scratch ensures vibrant flavor and smooth texture. Here’s how to do it:
- Combine citrus and eggs: In a medium saucepan, whisk together freshly squeezed orange juice, lemon juice, orange zest, granulated sugar, whole eggs, and egg yolks until smooth.
- Heat gently: Cook the mixture over medium-low heat, whisking constantly. Once the sugar dissolves and the mixture starts to warm up, add cubed salted butter and continue whisking.
- Thicken the curd: Cook until the mixture thickens enough to coat the back of a spoon. This usually takes about 5–7 minutes.
- Strain and chill: Remove from heat and strain through a fine mesh sieve to remove any cooked egg bits. Stir in vanilla extract. Let the curd cool, then refrigerate in an airtight container.
Pro Tip: Make the orange curd a day ahead. It thickens more as it chills, making it easier to spoon or pipe into the Orange Cupcakes.
– Storage and prep tips for curd
Orange curd can be refrigerated for up to one week in a sealed jar or container. You can also freeze it for up to two months. Just thaw in the fridge overnight before using.
Uses beyond cupcakes: Use leftover orange curd on pancakes, toast, yogurt bowls, or even swirled into whipped cream for a quick citrus mousse.
Preparing and Mixing the Orange Cupcake Batter
– Mixing techniques for a tender crumb
A great orange cupcake starts with how you mix the batter. Here’s a step-by-step approach to keep the texture light, airy, and moist:
- Zest and infuse: Combine orange zest and granulated sugar in a small bowl. Use clean hands to rub them together until the mixture feels like wet sand. This step releases natural citrus oils for maximum flavor.
- Combine dry ingredients: In a medium bowl, whisk together cake flour, baking powder, baking soda, and salt. Set aside.
- Cream butter and oil: In a large mixing bowl, beat room-temperature salted butter for 30 seconds. Add vegetable oil and beat for another minute until smooth.
- Add orange-sugar mixture: Beat on high speed for 2 full minutes. The mixture should be fluffy and aromatic.
- Incorporate eggs: Add one whole egg and one egg white. Beat on medium-high speed for about 45 seconds until the batter is light and airy.
- Add sour cream and vanilla: Mix just until combined. Avoid overbeating.
- Alternate dry and wet additions: With your mixer on low speed, add half of the dry ingredients. Then slowly add in the milk and orange juice, followed by the remaining dry mixture. Stop mixing when only a few flour streaks remain.
- Finish by hand: Use a rubber spatula to gently fold the batter. This step ensures a soft crumb and avoids overmixing.
Key Tip: Overmixing is the number one cause of dense cupcakes. Mix only until ingredients are just combined.
– Smart substitutions and tweaks
Want to adapt this recipe for different needs? Try these variations:
| Adjustment | Substitute With | Notes |
|---|---|---|
| Dairy-free | Vegan butter, plant milk, coconut yogurt | Keeps moisture and flavor intact |
| Gluten-free | 1:1 gluten-free baking flour | Choose a blend with xanthan gum included |
| Less sweet | Cut sugar by 15% | Won’t drastically affect structure |
| Egg-free | Use 1/4 cup applesauce per egg | Results in slightly denser cupcakes |
Baking and Cooling Your Cupcakes the Right Way
– Proper portioning and oven tips
Getting your Orange Cupcakes to bake evenly comes down to proper portioning and oven management. Here’s how to do it right:
- Preheat the oven: Set your oven to 350℉ (180℃) and let it fully heat before baking.
- Line your pans: Use cupcake liners in two standard cupcake trays. This makes for easy cleanup and gives cupcakes a polished look.
- Portion the batter: Use an ice cream scoop or spoon to fill each liner about ¾ full. This allows enough room for the Orange Cupcakes to rise without spilling over.
- Bake evenly: Bake for 14–16 minutes. Start checking at 13 minutes. A toothpick inserted in the center should come out with moist crumbs—not wet batter.
- Avoid overbaking: If you leave them in too long, the Orange Cupcakes will dry out quickly. They don’t dome much, so don’t wait for a big rise.
Note: Oven temperatures vary, so if you notice uneven baking, rotate the pan at the halfway point.
– Cooling and handling techniques
Cupcakes need time to set properly after baking, especially if you’re planning to fill or frost them. Here’s the right way to cool:
- Cool in pan: Let Orange Cupcakes rest in the pan for 5–10 minutes after baking. This helps them firm up without over-drying.
- Transfer to a wire rack: Use a butter knife to gently lift them out, then transfer to a cooling rack to cool completely. This prevents soggy bottoms from steam buildup.
- Don’t frost while warm: Wait until cupcakes are fully cool before adding filling or frosting. Warm cupcakes will melt the frosting and create a mess.
Creating the Orange Cream Cheese Frosting
– Balancing creaminess and citrus tang
This orange cream cheese frosting brings everything together with its creamy texture and citrusy brightness. The key is in the order and method:
- Start with the butter: Beat 1½ cups of room-temperature salted butter until completely smooth and creamy. This forms the base of your frosting.
- Gradually add powdered sugar: Add 5¾ cups of powdered sugar in batches. Mix slowly at first to avoid a sugar cloud, then increase the speed until the mixture is fluffy.
- Add orange juice and zest: Mix in 2 tablespoons of freshly squeezed orange juice and 2 teaspoons of orange zest. This gives your frosting that signature citrus zing without thinning it out too much.
- Flavor with vanilla: Add 1 tablespoon of vanilla extract for warmth and depth.
- Fold in cream cheese: Finally, add the chilled, cubed cream cheese (8 oz) and beat just until combined. Doing this last prevents the frosting from becoming too loose or weepy.
Tip: If the frosting feels too soft after mixing, chill it for 15–20 minutes before piping.
This frosting is sturdy enough to pipe tall swirls yet soft enough to melt in your mouth.
– Piping tips for a perfect finish
A beautiful Orange Cupcake deserves a bakery-style finish. Here’s how to achieve it:
- Use the right tools: A large piping bag fitted with a Wilton 1A tip will give you that smooth, tall swirl.
- Fill the bag properly: Don’t overfill. Twist the top to prevent frosting from spilling out.
- Pipe with confidence: Hold the tip over the center of the Orange Cupcake and squeeze gently while slightly wiggling in a circular upward motion. This gives that full, dome-like shape.
| Piping Style | Best For | Look |
|---|---|---|
| Straight swirl | Clean, professional finish | Smooth, tall crown |
| Rosette swirl | Special occasions, added flair | Flower-like finish |
| Classic mound | Quick and easy application | Dome-like shape |
Filling and Decorating the Orange Cupcakes
– Best method to fill with orange curd
Filling cupcakes might sound fancy, but it’s actually simple and quick when done right. Here’s how to add that luscious orange curd center:
- Core the cupcake: Once completely cooled, use a small spoon, cupcake corer, or even a knife to remove a small piece from the center of each cupcake. Keep the removed piece—it’ll go back in.
- Add orange curd: Spoon in about 1 to 2 teaspoons of your chilled orange curd. You want enough to be noticed in every bite, but not so much that it overflows.
- Seal the top: Place the removed cupcake piece back over the filling to “seal” it in before frosting.
This curd-filled center adds a zesty, tangy surprise that balances beautifully with the sweet cake and rich frosting.
– Garnishing with flair
You’ve filled the Orange Cupcakes, piped the frosting—now it’s time to add the final touches that make them irresistible.
Top garnish options:
- Orange zest: A pinch on top gives visual contrast and an extra hit of aroma.
- Candied orange slices: Thinly sliced and sugar-coated, these are a fun decorative option.
- Mini wedges or curls: A small orange slice tucked into the frosting makes for an elegant touch.
| Garnish Type | Purpose | Visual Effect |
|---|---|---|
| Orange zest | Brightens flavor & color | Color pop |
| Candied peel | Adds sweetness & shine | Glossy, refined look |
| Fresh orange segment | Natural, juicy texture | Fresh appeal |
If your frosting is soft after piping, chill the cupcakes in the fridge for 10–30 minutes to firm it up before serving.
Storing, Serving, and Freezing Instructions
– Keep Orange Cupcakes fresh longer
Proper storage is key to preserving the flavor, texture, and appearance of your orange cupcakes. Here’s how to do it:
- Short-term storage (1–3 days):
Store frosted cupcakes in an airtight container in the refrigerator. This keeps the cream cheese frosting firm and the curd from spoiling. Before serving, let them sit at room temperature for 15–20 minutes for best texture and flavor. - Avoid sogginess:
Always cool the cupcakes completely before storing to prevent condensation, which can make the liners peel and the cake go soggy. - Serving tip:
For the freshest taste, serve cupcakes within 24 hours of assembly. If storing longer, keep frosting and filling separate and assemble right before serving.
– Freezing for later enjoyment
These orange cupcakes freeze beautifully with or without frosting. Here’s how to do both:
Freezing unfrosted cupcakes:
- Cool completely and place on a baking sheet to freeze solid.
- Wrap each cupcake in plastic wrap and store in a freezer-safe container or bag.
- Freeze for up to 3 months. Thaw at room temperature before decorating.
Freezing frosted Orange Cupcakes:
- Place fully assembled cupcakes on a tray and freeze until the frosting is firm (about 1–2 hours).
- Wrap each individually in plastic and store in a container to prevent damage.
- To serve, unwrap and let thaw at room temperature for 1–2 hours.
Make-ahead tip:
Bake and freeze the cupcakes ahead of time, then prepare the frosting and curd fresh when you’re ready to serve. This saves time without sacrificing quality.
| Storage Type | Shelf Life | Notes |
|---|---|---|
| Fridge (assembled) | 3–4 days | Store in airtight container |
| Freezer (unfrosted) | Up to 3 months | Best to thaw before decorating |
| Freezer (frosted) | Up to 3 months | Flash freeze first, then wrap |
Flavor Variations and Customization Ideas
– Chocolate, spice, and fruity twists
Once you’ve got the base recipe down, try these simple changes:
- Chocolate Orange: Add cocoa powder and chocolate chips for a rich flavor combo.
- Spiced Orange: Mix in cinnamon or nutmeg for a warm, cozy twist.
- Orange Cranberry: Fold in fresh or dried cranberries for tart contrast.
- Blood Orange: Swap regular oranges with blood oranges for deeper flavor and color.
– Easy dietary swaps
Need to make your Orange Cupcakes fit specific diets? No problem:
- Gluten-Free: Use a 1:1 gluten-free flour blend.
- Dairy-Free: Sub plant-based butter, yogurt, and milk.
- Egg-Free: Replace eggs with applesauce or flaxseed eggs.
These small changes let you personalize your orange cupcake recipe without losing that citrusy goodness.
These orange cupcakes are more than just a pretty dessert—they’re a celebration of fresh citrus flavor, a soft and fluffy crumb, and smooth, creamy frosting. Whether you’re baking them for a party, holiday, or simply because you’re craving something bright and sweet, this recipe delivers bakery-quality results right from your kitchen.
With the richness of real orange juice and zest layered into every bite, plus that surprising pop of orange curd in the center, these Orange Cupcakes offer a refreshing twist on classic flavors. You’ve got flexibility too—whether you want to go gluten-free, dairy-free, or try fun variations like chocolate-orange or cranberry-orange.
Take your baking to the next level by following each part of this guide carefully. And remember, the little details—like rubbing zest into sugar or mixing frosting in the right order are what make these Orange Cupcakes unforgettable.
For More Delicious And Easy Recipes Follow Me In Facebook And Pinterest.