
At Wish-Cake.com, every dessert tells a story and this rainbow cake recipe is one close to my heart. My love for baking began in my grandmother’s kitchen, where flour-dusted afternoons and warm vanilla scents taught me that food isn’t just about flavor, it’s about feeling. Those early lessons inspired a lifelong passion, from baking through college to sharing sweet moments with my own children today.
This rainbow cake is more than just layers of color. It’s joy, celebration, and nostalgia all in one. Whether you’re making it for a birthday, a baby shower, or just to add a little magic to your week, this recipe brings vibrant fun and bakery-level results straight to your kitchen.
Print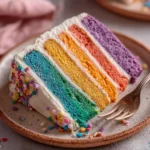
Contents
- 1 Rainbow Cake Recipe
- 2 Rainbow Cake Ingredients and Tools Breakdown
- 3 Preparing the Perfect Rainbow Cake Batter
- 4 Baking and Cooling the Layers Correctly
- 5 Mastering the Buttercream Frosting
- 6 Assembling Your Rainbow Cake Like a Pro
- 7 Creating the Stunning Gold Drip Effect
- 8 Decoration Ideas and Creative Finishing Touches
- 9 Tips, Troubleshooting, and Storing Your Cake
- 10 Conclusion: A Rainbow Cake Worth Celebrating
- 11 FAQs: Rainbow Cake Recipe
Rainbow Cake Recipe
- Total Time: 40 minutes
- Yield: 14 servings
- Diet: Vegetarian
Description
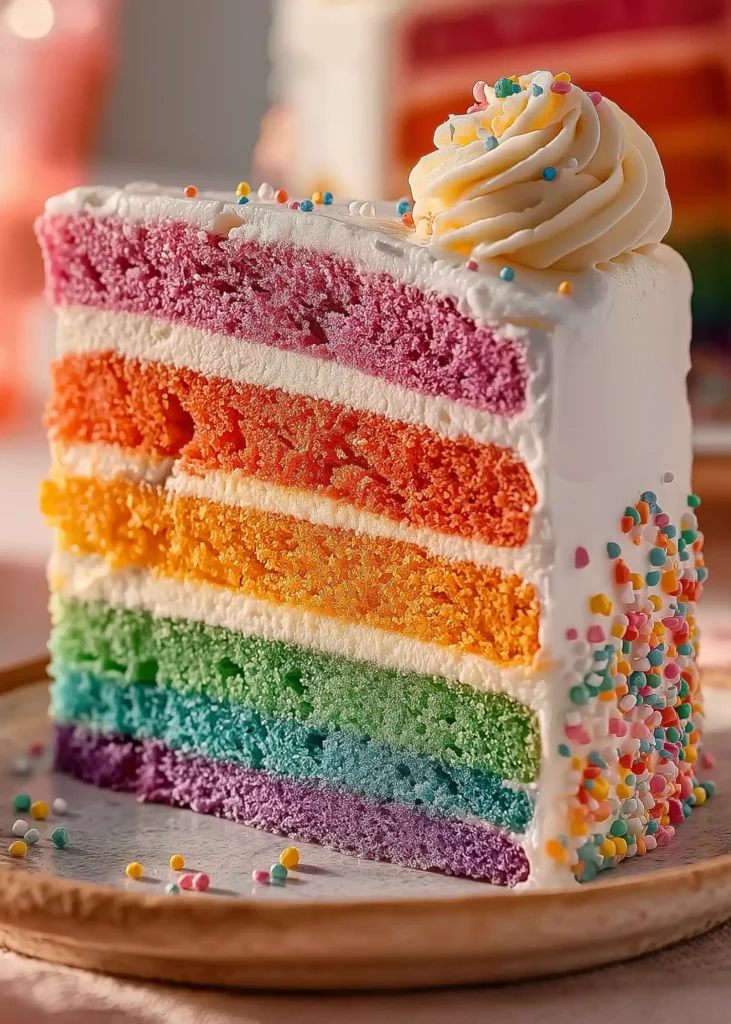
A vibrant and fluffy rainbow cake with six colorful layers, smooth buttercream, and a stunning gold drip. Perfect for birthdays, pride celebrations, or any joyful gathering.
Ingredients
24 oz cake flour
24 oz granulated sugar
1 tsp salt
2 tbsp baking powder
1 tsp baking soda
10 oz egg whites (room temperature)
6 oz vegetable oil
18 oz buttermilk (room temperature or slightly warm)
12 oz unsalted butter (softened)
1 tbsp vanilla extract
Buttercream Frosting:
8 oz pasteurized egg whites (for buttercream)
32 oz powdered sugar
32 oz unsalted butter (softened)
2 tsp vanilla extract
½ tsp salt
1 dot purple food coloring (optional)
Gold Drip:
5 oz white candy melts
1 oz chocolate candy melts
1 oz hot water
1 tsp gold dust (Truly Mad Plastics)
¼ tsp vodka or lemon extract
Instructions
1. Preheat oven to 335ºF (168ºC). Prepare six 8″x2″ pans with cake goop or parchment.
2. Mix 8 oz buttermilk with vegetable oil. Set aside.
3. Mix remaining buttermilk, egg whites, and vanilla. Whisk and set aside.
4. Combine flour, sugar, salt, baking powder, and baking soda in a stand mixer. Mix for 10 seconds.
5. Add softened butter and mix on low until it resembles coarse sand.
6. Add buttermilk/oil mix. Mix on medium speed for 2 minutes.
7. Gradually add the egg white mixture in 3 parts, mixing for 15 seconds between each.
8. Divide batter into 6 bowls (15 oz each). Color each bowl with electric food gel.
9. Pour into pans and bake 20–24 minutes. Tap pans after baking to release steam.
10. Cool cakes for 10 minutes, then turn out and freeze for 30–60 minutes before trimming.
11. Make buttercream by whipping egg whites and powdered sugar. Add softened butter in chunks.
12. Add vanilla, salt, and a dot of purple food coloring to whiten. Mix with paddle attachment to remove bubbles.
13. Stack cake layers with ¼ inch buttercream between each. Apply crumb coat and chill for 15 minutes.
14. Add final buttercream coat and chill again for 15 minutes.
15. Melt candy melts, add hot water and yellow coloring to make drip. Apply to chilled cake.
16. Paint drip gold using dust and vodka. Finish with buttercream rosettes and sprinkles.
Notes
Be sure all ingredients are room temperature for best mixing.
Use electric gel coloring for bright, even layers.
Chill cake layers before trimming and stacking.
You can freeze cake layers in advance for easier prep.
- Prep Time: 20 minutes
- Cook Time: 20 minutes
- Category: Cakes Recipes
- Method: Baking
- Cuisine: American
Rainbow Cake Ingredients and Tools Breakdown
Key Ingredients That Make This rainbow cake Taste Heavenly
A rainbow cake isn’t just about the look—it needs to taste as good as it looks. This recipe uses a white velvet base, which delivers a soft, moist crumb with a subtle, buttery flavor that absorbs color beautifully without dulling the vibrancy.
Here’s what you’ll need to create the perfect batter:
- Cake flour (24 oz) – Essential for a tender, fine crumb. Cake flour has a lower protein content than all-purpose, which keeps the layers light and airy.
- Granulated sugar (24 oz) – Sweetens the cake and aids in structure and browning.
- Salt (1 tsp), Baking powder (2 tbsp), Baking soda (1 tsp) – These leavening agents help create even, fluffy layers.
- Egg whites (10 oz) – Using only whites keeps the batter pale and ready to take on food coloring vibrantly.
- Vegetable oil (6 oz) – Adds moisture and keeps the cake soft, even after refrigeration.
- Buttermilk (18 oz, divided) – Gives the cake a slight tang and contributes to tenderness.
- Unsalted butter (12 oz) – Softened, not melted. Helps in emulsifying and flavor depth.
- Vanilla extract (1 tbsp) – Adds aroma and warmth.
Buttercream Frosting Ingredients:
- Pasteurized egg whites (8 oz) – Helps create a stable, smooth frosting.
- Powdered sugar (32 oz) – Sweet and light, perfect for a silky texture.
- Unsalted butter (32 oz) – Softened for easy blending; don’t substitute margarine.
- Vanilla extract (2 tsp), Salt (½ tsp)
- Purple food coloring (1 dot) – Used to counteract yellow tint from butter for a whiter finish.
Gold Drip Elements:
- White candy melts (5 oz), Chocolate candy melts (1 oz) – The base for your ganache.
- Hot water (1 oz) – Mixes into the chocolate to form a pourable ganache.
- Gold dust (1 tsp) and vodka/lemon extract (¼ tsp) – For painting the drip once it sets.
Must-Have Tools for Assembling and Decorating
The right tools make this rainbow cake easier to handle, especially since it’s tall, delicate, and visually detailed. Here’s what you’ll need:
- Stand mixer with paddle and whisk attachments – For smooth batters and fluffy buttercream.
- 6 (8″x2″) cake pans – Or fewer, baked in batches. The rainbow cake has 6 layers, so equal sizing is key.
- Kitchen scale – For dividing batter equally. Each layer should be about 15 oz.
- Turntable – Makes smoothing buttercream and layering much easier.
- Offset spatula and bench scraper – For spreading and smoothing frosting evenly.
- Piping bag and 1M piping tip – To add final rosettes and decorative swirls.
- Cake goop or parchment paper – Ensures easy cake removal from pans.
Preparing the Perfect Rainbow Cake Batter
How to Mix the Batter for Optimal Texture
Getting the texture right is essential for a rainbow cake. You want the layers to be soft and sturdy enough to stack without crumbling. This method follows a reverse creaming technique to ensure the cake stays tender and moist:
- Bring all ingredients to room temperature. This step is crucial. Cold ingredients don’t mix evenly, which can lead to a broken batter or uneven baking.
- Preheat your oven to 335°F (168°C). It’s a slightly lower temperature than usual, which helps the thin layers bake evenly without doming.
- Combine the dry ingredients. In your stand mixer bowl, add:
- 24 oz cake flour
- 24 oz granulated sugar
- 2 tbsp baking powder
- 1 tsp baking soda
- 1 tsp salt
Mix on low speed for 10 seconds using the paddle attachment.
- Cut in the butter. Add 12 oz of softened unsalted butter into the dry ingredients and mix until the texture resembles coarse sand. This step coats the flour in fat, which helps reduce gluten formation.
- Add your oil and buttermilk mix. Combine 6 oz vegetable oil and 8 oz of buttermilk, then pour it into the mixer. Let the mixture blend on low until just moistened, then increase to medium (setting 4 on a KitchenAid) and mix for 2 full minutes. This activates the leaveners and builds the cake’s structure.
Skipping this two-minute mix can cause your rainbow cake to collapse after baking.
- Create the liquid blend. In a separate bowl, whisk together:
- 10 oz egg whites
- 1 tbsp vanilla extract
- Remaining 10 oz buttermilk
Slowly pour this into the batter in 3 batches, mixing for 15 seconds between each. Scrape down the bowl to ensure everything is well incorporated.
Dividing and Coloring Each Layer for Vibrancy
Now comes the fun part: making your cake look like a rainbow.
- Divide the batter evenly. Measure out 15 oz of batter into each of 6 bowls. Using a scale ensures even layers that bake at the same rate.
- Color each layer. Use electric gel food coloring for bold results with minimal dye. Here’s a proven color combo:
| Layer | Color Mix |
|---|---|
| Pink | ½ tsp electric pink |
| Orange | ¼ tsp yellow + ¼ tsp orange |
| Yellow | ½ tsp electric yellow |
| Green | ¼ tsp yellow + ½ tsp electric green |
| Blue | ½ tsp electric blue |
| Purple | ¼ tsp pink + ½ tsp electric purple |
Mix each color thoroughly with a spoon or spatula until the shade is even. Don’t overmix, just fold the color in gently.
- Prepare the pans. Grease each 8″ cake pan with cake goop or line with parchment circles. Pour one color into each pan, smoothing the top.
- Bake at 335°F for 20–24 minutes. The layers are done when the edges begin to pull away from the sides of the pan.
Pro Tip: Immediately tap each pan firmly on the counter once it comes out of the oven. This releases steam and prevents the rainbow cake from shrinking in the middle.
- Cool and freeze. Let layers cool for 10 minutes in the pans before removing. Place them in the freezer for 30–60 minutes before trimming. This makes stacking and decorating easier.
Baking and Cooling the Layers Correctly
Timing and Temperature Tips for Baking Rainbow Cake
Baking six thin, colorful layers might seem intimidating, but with a few precise steps, you’ll get even, fluffy results every time.
- Use consistent oven heat: Preheat your oven to 335°F (168°C). This slightly lower temperature helps the layers cook through without doming or browning too much. Even baking is key for a stacked cake like this.
- Avoid overcrowding: If you don’t have six identical cake pans, bake in batches. Keep unused batter refrigerated to maintain its consistency while other layers bake.
- Layer size matters: Each layer should contain 15 oz of batter. Use a digital kitchen scale for accuracy—guesswork will lead to uneven thickness and baking times.
- Check for doneness: Bake each layer for 20 to 24 minutes. You’ll know it’s ready when:
- The edges slightly pull away from the pan.
- A toothpick inserted in the center comes out clean.
- The top springs back when gently pressed.
Do not underbake. If the center is underdone, the layer may sink or become gummy after cooling.
How to Prevent Cake Shrinkage and Collapse
This recipe is carefully structured, but like any tall cake, it can shrink or deflate if not handled properly. Here’s how to avoid it:
- Release steam right away: As soon as a cake layer comes out of the oven, tap the pan firmly on the counter once. This allows steam to escape and stabilizes the crumb.
- Cool the right way: Let cakes sit in the pans for 10 minutes. Then turn them out onto a wire rack. If you flip them too soon, they may break apart. If you wait too long, condensation can make them soggy.
- Freeze before trimming: Once cool, place the layers in the freezer for 30–60 minutes. This firms them up, making it easier to trim domes and browned edges for picture-perfect slices.
This cake is about 7 inches tall once assembled, so expect tall, impressive slices. You could cut them in half, but that would disrupt the rainbow effect.
- Avoid stacking warm cake: Never frost or stack layers while they’re warm or soft. Doing so will cause sliding, bulging, or a total collapse.
Mastering the Buttercream Frosting
Step-by-Step Easy Buttercream Recipe
To complement the bold colors of your rainbow cake layers, you need a smooth, stable, and delicious frosting. This easy buttercream is perfect—light, creamy, and easy to pipe or spread. Plus, it holds up well under the weight of six stacked layers.
Follow these steps:
- Gather your ingredients (all at room temperature):
- 8 oz pasteurized egg whites
- 32 oz powdered sugar
- 32 oz unsalted butter, softened but not melted
- 2 tsp vanilla extract
- ½ tsp salt
- 1 small dot purple food coloring (optional)
- Mix egg whites and sugar: In the bowl of a stand mixer fitted with the whisk attachment, combine powdered sugar and pasteurized egg whites. Mix on low to combine, then increase to high speed. Whip until glossy and stiff peaks begin to form.
- Add butter gradually: With the mixer on medium-high, add the softened butter a few tablespoons at a time. Let each portion blend in before adding more.
- Flavor and whiten: Once the frosting is fully combined, add vanilla extract and salt. For an extra white finish, add a dot of purple food coloring. This neutralizes the yellow tint from the butter.
- Smooth out the texture: Switch to the paddle attachment and mix on low for 10 minutes. This step removes air bubbles and creates a smooth, easy-to-spread frosting.
If your buttercream looks curdled at any point, don’t panic. Keep mixing—it will come together as the butter emulsifies.
This buttercream is stable enough for layering, crumb coats, and decorative piping. It can also be colored for accents or used as-is for a clean, white canvas that makes your rainbow layers pop.
Getting That Perfect White Finish With Purple Tint
Butter naturally has a yellowish hue, which can make your buttercream look off-white or ivory. If you want a crisp, white exterior that shows off the bright rainbow interior, this trick is essential:
- Add a tiny dot of purple gel food coloring to the finished buttercream. The purple neutralizes the yellow, making your frosting appear brighter and whiter.
- Don’t overdo it. Start small, mix well, and adjust if needed.
This is the same trick pro decorators use to get pristine white wedding cakes.
Once your buttercream is fluffy, smooth, and ready to go, you can move on to stacking and frosting the rainbow cake. Make sure the layers are chilled before beginning, or the buttercream may melt or shift.
Assembling Your Rainbow Cake Like a Pro
Stacking and Frosting Each Layer Smoothly
With chilled layers and smooth buttercream ready, it’s time to build your rainbow cake:
- Start with a base: Place a dab of buttercream on a cake board to anchor the bottom layer (usually purple).
- Stack in color order: Add layers from purple up to pink, spreading ¼ inch of buttercream between each. Press gently to keep layers even.
- Keep it aligned: Check the cake from eye level as you build to make sure it stays straight.
Tricks for a Clean Finish and Even Shape
- Crumb coat: Spread a thin layer of frosting all over the cake to lock in crumbs. Chill for 15 minutes.
- Final coat: Apply a thicker layer of buttercream and smooth with an offset spatula and bench scraper.
- Chill again: Refrigerate the frosted cake another 15 minutes before applying your drip.
Tip: If needed, use a center dowel to stabilize tall layers.
Your rainbow cake is now stacked, smooth, and ready for gold drip magic.
Creating the Stunning Gold Drip Effect
Mixing and Applying the Drip
- Make the drip:
- Melt 5 oz white candy melts and 1 oz chocolate melts in 15-second microwave bursts.
- Stir in 1 oz hot water and a few drops of yellow food coloring until smooth.
- Apply to chilled cake:
- Use a piping bag to drip the ganache around the top edge of your cold cake.
- Let it drip naturally—chilling helps control the flow.
Painting the Gold
- Mix gold paint:
- Combine 1 tsp gold dust with ¼ tsp vodka or lemon extract until thick and paint-like.
- Paint the drip:
- Use a small brush to carefully paint over the drip. Let dry before decorating further.
Tip: Keep the mixture thick to avoid streaks.
Now your rainbow cake has a brilliant, elegant finish.
Decoration Ideas and Creative Finishing Touches
Simple and Stunning Finishes
- Buttercream swirls:
Use a piping bag with a 1M tip to add rosettes or swirls around the top. - Sprinkles:
Add rainbow or metallic sprinkles to the top or base for texture and fun. - Optional toppers:
A simple “Happy Birthday” pick or edible glitter adds extra flair.
Make It Match the Occasion
- Birthday: Add candles or a name topper
- Baby shower: Use pastel sprinkles
- Pride: Accent with rainbow shapes
- Graduation: Add school colors
Keep it playful—the rainbow cake’s inside is already the star.
Tips, Troubleshooting, and Storing Your Cake
Quick Fixes for Common Issues
- Cake sinking?
Make sure it’s fully baked and mixed for 2 minutes at medium speed. - Uneven layers?
Weigh batter—15 oz per layer—for consistent height. - Dull colors?
Use electric gel food coloring for bold results. - Buttercream curdled?
Keep mixing. It usually comes together once fully emulsified. - Runny drip?
Chill cake well before adding the ganache.
Storage Tips
- Refrigerate:
Keep covered up to 2 days. Let sit out before serving. - Freeze layers:
Wrap tightly and freeze up to 1 month before decorating. - Leftovers:
Wrap slices and store in the fridge for 3–5 days.
Keep chilled if transporting, especially in warm conditions.
Conclusion: A Rainbow Cake Worth Celebrating
This rainbow cake recipe is more than a dessert—it’s a centerpiece, a mood-lifter, and a memory-maker. With soft, vibrant layers and a silky buttercream finish, every slice is a surprise of color and flavor. Whether you’re baking for a special occasion or just adding some fun to your week, this cake is a guaranteed crowd-pleaser.
From my grandmother’s kitchen to my own, and now to yours through Wish-Cake.com, I hope this recipe brings as much joy to your home as it has to mine. Remember, you don’t need to be a professional to bake something beautiful—just a little patience, color, and love.
For More Delicious And Easy Recipes Follow Me In Facebook And Pinterest.
FAQs: Rainbow Cake Recipe
What is the flavor of rainbow cake?
Rainbow cake typically uses a vanilla-based white velvet cake, which has a light, buttery flavor. It’s neutral enough to carry vibrant colors without clashing and pairs beautifully with sweet, fluffy buttercream.
Does Costco have a rainbow cake?
Costco occasionally offers layered rainbow cakes in select locations or online, often as seasonal or special-event desserts. However, they may not always be available, and they differ in ingredients and texture from a homemade version.
What does a rainbow cake symbolize?
Rainbow cakes often represent joy, celebration, and hope. They’re popular for birthdays, baby showers (especially for rainbow babies), and pride events, symbolizing love, diversity, and new beginnings.
What ingredients to make a rainbow cake?
You’ll need basic cake staples:
– Cake flour, sugar, egg whites, buttermilk, butter, baking powder, baking soda, vanilla, and food coloring for the layers.
– Egg whites, powdered sugar, butter, vanilla, and salt for the buttercream.
– Candy melts, water, and edible gold dust for the gold drip.
