Let’s be honest—some gluten-free desserts can be a bit… underwhelming. Dry, crumbly, or weirdly dense, they often feel like a disappointing compromise. But these Gluten-Free Red Velvet Cupcakes? They’re a whole different story.
Imagine sinking your teeth into a soft, fluffy, and downright dreamy cupcake that delivers all the classic red velvet richness—without a trace of gluten. Oh, and the cream cheese frosting? Pure magic.
Perfect for busy moms juggling a million things, professionals who need a quick baking fix, or anyone looking to indulge without the gluten, this recipe is a game-changer. Plus, it’s so easy, you won’t need to be a baking expert to pull it off. Let’s get baking!
Contents
- 1 Why You’ll Love These Gluten-Free Red Velvet Cupcakes
- 2 Ingredients for the Best Gluten-Free Red Velvet Cupcakes
- 3 Equipment You’ll Need
- 4 Step-by-Step Guide to Baking the Best Gluten-Free Red Velvet Cupcakes
- 5 Making The Cream Cheese Frosting
- 6 Pro Tips for Perfect Gluten-Free Red Velvet Cupcakes
- 7 A Personal Note: My Red Velvet Journey
- 8 Nutritional Information: Gluten-Free Red Velvet Cupcakes
- 9 Cooking Time & Yield for Gluten-Free Red Velvet Cupcakes
- 10 FAQs: Gluten-Free Red Velvet Cupcakes Recipe
Why You’ll Love These Gluten-Free Red Velvet Cupcakes
- Ridiculously Moist & Fluffy: No one wants a dry cupcake. These stay soft and tender, thanks to a perfect balance of ingredients.
- Easy & Fail-Proof: You don’t need a pastry chef’s skill set—just a bowl, a whisk, and a craving for something delicious.
- Classic Red Velvet Flavor: A hint of cocoa, a touch of tang, and that gorgeous red color—it’s all here, If you love gluten-free baking, you might also enjoy our easy and irresistible vanilla cupcakes!
- Dairy-Free Option: Simple swaps make this recipe adaptable for those avoiding dairy, too.
Ingredients for the Best Gluten-Free Red Velvet Cupcakes
For the Gluten-Free Red Velvet Cupcakes:
- ¾ cup granulated sugar
- ½ cup vegetable oil
- 1 egg
- 1 teaspoon gluten-free vanilla extract
- 2 teaspoons red food coloring (or up to 2 tablespoons for a deeper shade)
- ½ cup buttermilk (or ½ cup flax milk + 1 teaspoon white vinegar; let sit 2–3 minutes)
- ¼ cup hot coffee (or hot water)
- 1 teaspoon white vinegar (omit if using dairy-free buttermilk substitute)
- 1 cup gluten-free flour blend (Bob’s Red Mill 1-to-1 works great!)
- 2 tablespoons unsweetened cocoa powder
- ½ teaspoon gluten-free baking powder
- ½ teaspoon baking soda
- ½ teaspoon salt
For the Cream Cheese Frosting:
- 4 oz. cream cheese, room temperature (or dairy-free cream cheese)
- Use 2 tablespoons of softened butter or a plant-based alternative
- 1 teaspoon gluten-free vanilla extract
- 2 cups powdered sugar
Equipment You’ll Need
Before you start making these red velvet cupcakes without gluten, double-check that you’ve got all your baking tools read. Nothing’s worse than realizing mid-mix that you’re missing a crucial utensil! Here’s what you’ll need:
- Mixing Bowls – One large for the wet ingredients and one medium for the dry.
- You’ll need a whisk to beat everything together and a spatula to gently blend the ingredients without overmixing
- Measuring Cups & Spoons – Precision matters, so have both dry and liquid measuring tools ready.
- Electric Mixer (Optional) – Helps achieve a fluffier batter and smooth frosting.
- Muffin tray with paper cups – These help the cupcakes hold their shape and make washing up a breeze.
- Wire rack – Perfect for letting the cupcakes cool down properly without trapping steam.
- Piping Bag & Tip (Optional) – If you want that bakery-style frosting swirl.
Step-by-Step Guide to Baking the Best Gluten-Free Red Velvet Cupcakes
Step 1: Preheat and Prep
Begin by setting your oven to a temperature of 350°F (175°C) and allow it to fully preheat while you prepare the baking equipment. Take a standard 12-cup muffin tin and carefully place individual Gluten-Free Red Velvet Cupcakes liners into each section.
This step not only ensures an easy release of the cupcakes after baking but also helps maintain the shape and texture of the treats while significantly reducing the need for scrubbing the pan afterward..
Step 2: Mix the Dry Ingredients
In a moderately sized mixing vessel, thoroughly combine the specially crafted gluten-free flour mixture with rich cocoa essence, a touch of leavening agents including both baking soda and baking powder, along with a hint of salt.
Ensuring an even distribution of all dry components for a well-balanced texture in your final creation. This ensures the leavening agents are evenly distributed, leading to a perfect rise. Set aside.
Step 3: Beat the Wet Ingredients
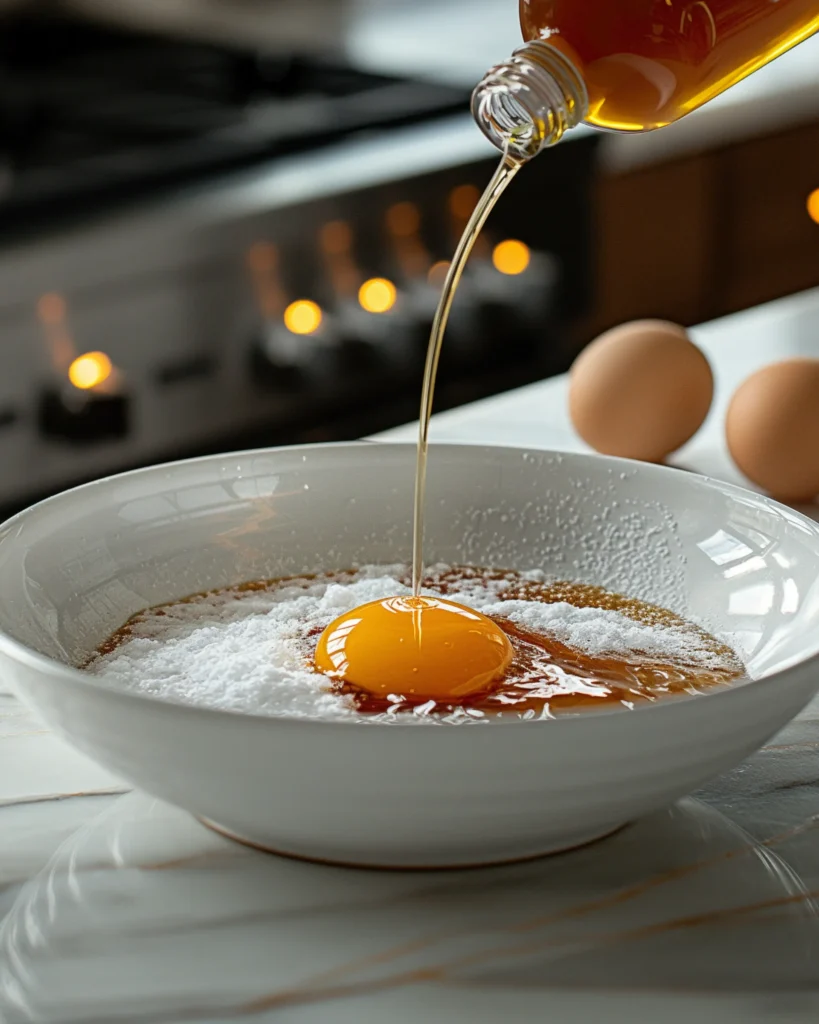
Combine the sugar and oil in a large bowl, mixing until the texture turns smooth and even. Crack in the egg and mix it in, then add a bit of vanilla to bring out the flavor.
To achieve a vibrant and visually appealing hue, carefully blend in a few drops of deep crimson food dye, ensuring the color is evenly distributed throughout the batter. Mix until well combined. The batter should now have that signature red velvet hue—if it’s not vibrant enough, feel free to add a little more coloring.
Step 4: Alternate Mixing Dry and Wet
Pour in half of the dry mixture, then add half of the buttermilk (or dairy-free substitute). Stir gently, then repeat with the remaining dry ingredients and buttermilk. Mix until just combined—overmixing can make Gluten-Free Red Velvet Cupcakes dense instead of fluffy.
Step 5: The Secret Ingredient—Coffee!
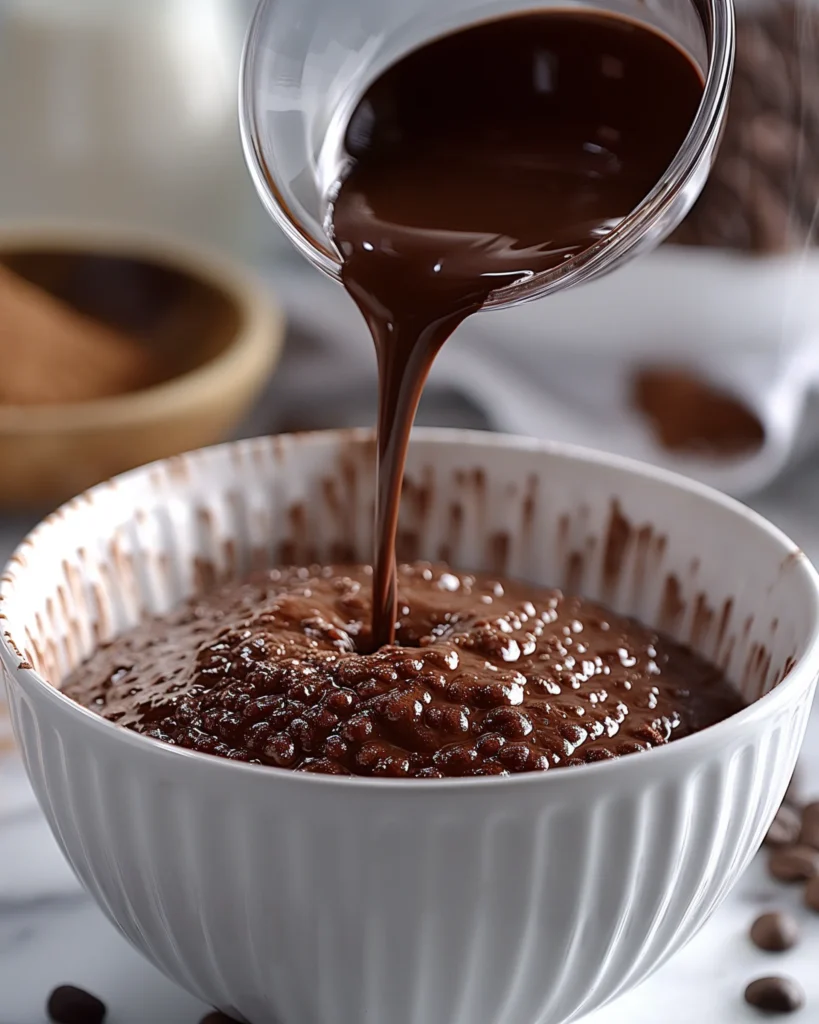
Slowly pour in the hot coffee (or water) and stir gently. The heat helps “bloom” the cocoa powder, making the flavor richer. Your batter will look thinner than usual—don’t panic! This is normal and will lead to super moist Gluten-Free Red Velvet Cupcakes.
Step 6: Fill the Cupcake Liners
Using a spoon or cookie scoop, divide the batter evenly among the liners, filling each about ⅔ full. This prevents overflow while giving them room to rise.
Step 7: Bake to Perfection
Carefully place the prepared baking tray into the preheated oven, allowing the mixture to cook for approximately 18 to 22 minutes. Keep a close eye on the texture, and to determine if it has reached the perfect level of doneness, insert a toothpick into the middle—if it emerges free of any wet batter, your baked treat is ready to be removed and cooled. If your kitchen smells like a dream, you’re on the right track.
Step 8: Cool Before Frosting
Let the Gluten-Free Red Velvet Cupcakes rest in the pan for 5 minutes, then transfer them to a wire rack. Patience is key—frosting too soon can lead to a melted mess!
Making The Cream Cheese Frosting
Step 9: Beat the Butter & Cream Cheese
In a mixing bowl, beat cream cheese and butter together until light and fluffy (about 2 minutes). If using a hand mixer, start on low and gradually increase speed.
Step 10: Add the Vanilla & Sugar
Mix in the gluten-free vanilla extract, then gradually add powdered sugar, beating until smooth. If the frosting feels too heavy or stiff, mix in a little milk to loosen it up. Too thin? More powdered sugar does the trick.
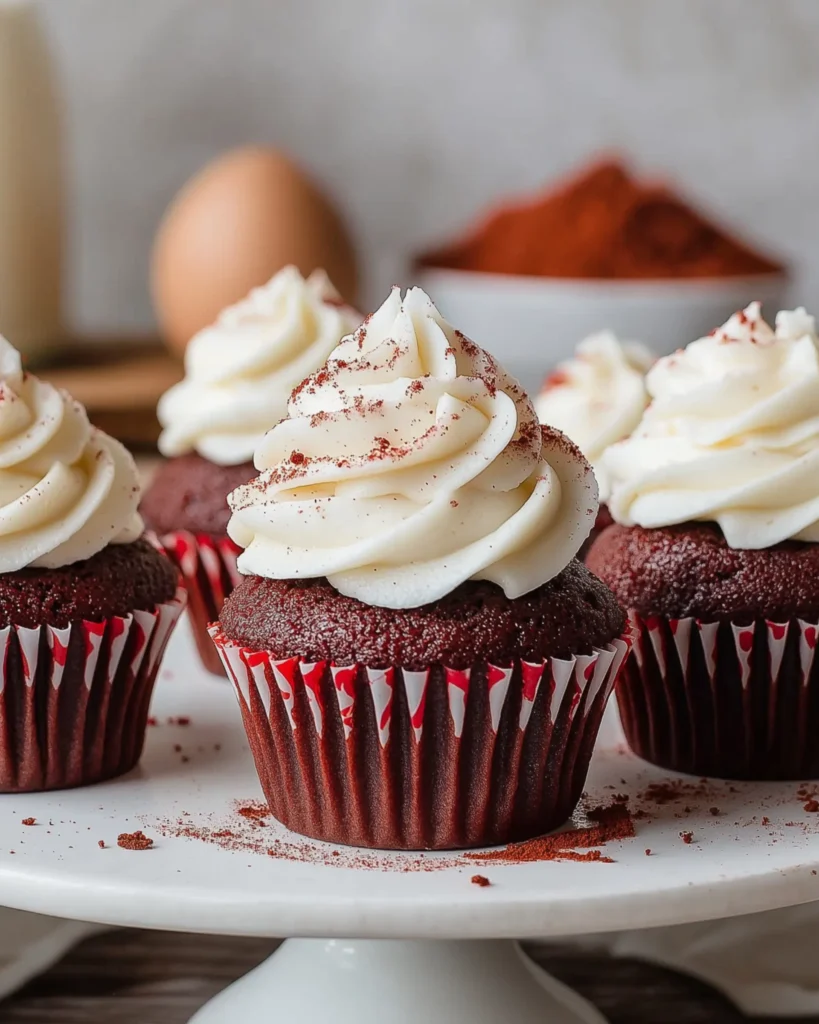
Step 11: Frost & Decorate!
Once the Gluten-Free Red Velvet Cupcakes are completely cool, spread or pipe the frosting onto each one. Sprinkle with cocoa powder or red velvet crumbs for extra flair.
Pro Tips for Perfect Gluten-Free Red Velvet Cupcakes
- Don’t Skip the Vinegar! It reacts with the baking soda to create a light, airy texture—exactly what you want in red velvet.
- Room Temperature Ingredients Work Best. Cold eggs or buttermilk can make the batter lumpy.
- No Overmixing! This keeps the Gluten-Free Red Velvet Cupcakes soft instead of dense.
- Coffee Is the Secret Hero. Even if you’re not a coffee drinker, adding it deepens the chocolate flavor without making the Gluten-Free Red Velvet Cupcakes taste like coffee. Want to explore more gluten-free chocolate delights? Check out our ultimate gluten-free chocolate cupcakes recipe!
- For Dairy-Free Frosting: Swap out the butter and cream cheese for dairy-free versions like Earth Balance and Kite Hill.
A Personal Note: My Red Velvet Journey
I’ll never forget the first time I tried making gluten-free red velvet cupcakes. Since my sister started eating gluten-free, I thought it’d be a sweet idea to make her a version of the dessert she loves most. The first batch? A disaster—dry, sad, and totally unappetizing.
But after a few tweaks (hello, coffee and the perfect flour blend!), I finally nailed it. Now, these Gluten-Free Red Velvet Cupcakes are a family staple, and no one ever guesses they’re gluten-free!
So whether you’re making these for yourself, a loved one, or just because you deserve a sweet treat (which you absolutely do), I hope this recipe becomes a favorite in your home, too.
Nutritional Information: Gluten-Free Red Velvet Cupcakes
When indulging in a Gluten-Free Red Velvet Cupcake, it’s good to know what you’re getting in terms of nutrition. These Gluten-Free Red Velvet Cupcakes are a delightful treat, offering a balance of carbohydrates, fats, and proteins, making them a satisfying dessert or snack.
Since they are gluten-free, they are suitable for those with celiac disease or gluten sensitivities. Plus, with the option for dairy-free substitutions, they can be adjusted to fit various dietary needs.
While these Gluten-Free Red Velvet Cupcakes are not exactly a “health food,” they do contain ingredients that provide some nutritional benefits. The cocoa powder adds a touch of antioxidants, while the buttermilk (or dairy-free alternative) provides a small dose of calcium.
Additionally, the cream cheese frosting contributes to the overall protein and fat content, making these cupcakes a bit more filling than your average treat.
For those watching their sugar intake, keep in mind that these Gluten-Free Red Velvet Cupcakes contain natural and added sugars, primarily from the granulated sugar and powdered sugar in the frosting.
But thanks to the mix of healthy fats and proteins, you’re less likely to feel that post-sugar slump. Feel free to try out options like coconut sugar or a sugar replacement for a gentler impact on your blood sugar.
For a lighter version of these cupcakes, you can cut back a bit on the sugar or use unsweetened applesauce in place of some of the oil. This simple swap cuts down on fat while still keeping the cupcakes soft and tender.
Now, let’s break down the full nutritional profile per serving:
| Nutrient | Amount per Serving |
|---|---|
| Serving Size | 1 cupcake |
| Calories | ~280 kcal |
| Total Fat | 14g |
| Saturated Fat | 4.5g |
| Unsaturated Fat | 8g |
| Trans Fat | 0g |
| Cholesterol | 25mg |
| Sodium | 180mg |
| Total Carbohydrates | 36g |
| Dietary Fiber | 1g |
| Sugars | 25g |
| Protein | 3g |
| Calcium | 40mg |
| Iron | 1.2mg |
| Potassium | 85mg |
Note: Please be aware that the nutritional values and measurements provided are approximate estimates, as they can fluctuate depending on the specific brands of ingredients used, as well as the exact portion sizes incorporated into the recipe.
Cooking Time & Yield for Gluten-Free Red Velvet Cupcakes
When baking these Gluten-Free Red Velvet Cupcakes, timing is key to achieving that perfect, moist texture with a rich cocoa flavor. Below are the detailed time estimates for each step of the process:
| Cooking Stage | Time Required |
|---|---|
| Prep Time | 15 minutes |
| Cook Time | 18-22 minutes |
| Cooling Time | 30 minutes |
| Total Time | ~1 hour |
Yield
- Makes: 12 standard cupcakes
- Can be doubled for larger batches
Cuisine
- American – A classic Southern-inspired treat, red velvet cupcakes have deep roots in American baking culture, with origins tracing back to the early 20th century.
Baking should never feel like a chore—it should be a little act of joy, a way to fill your home with warmth and the irresistible scent of something sweet in the oven.
These Gluten-Free Red Velvet Cupcakes are proof that you don’t have to compromise on texture, flavor, or indulgence just because you’re avoiding gluten. For another rich and nostalgic treat, try our homemade Hostess-style cupcakes—pure indulgence in every bite.
They’re soft, moist, and topped with a luscious cream cheese frosting that makes every bite feel like a special occasion.
What makes these Gluten-Free Red Velvet Cupcakes even better is their versatility. Whether you’re making them for a birthday, a get-together, or simply a well-deserved treat for yourself, they always bring a little extra happiness to the table.
And let’s not forget the ease of preparation—you don’t need to be a professional baker to whip up a batch, Craving a cookies-and-cream twist? Don’t miss our moist and fluffy Oreo cupcakes, a must-try for dessert lovers. With just a few simple steps and the right gluten-free ingredients, you can enjoy a classic dessert that everyone will love, whether they eat gluten or not.
So go ahead, give this Gluten-Free Red Velvet Cupcakes Recipe a try! Share them with friends, save a few for yourself (you deserve it), and don’t be surprised when people start asking for the recipe. After all, great cupcakes have a way of bringing people together—one delicious bite at a time.
FAQs: Gluten-Free Red Velvet Cupcakes Recipe
Can I substitute the buttermilk?
Yes! If you’re dairy-free, mix ½ cup of flax milk (or any plant-based milk) with 1 teaspoon of white vinegar and let it sit for 2–3 minutes. This creates a similar tangy effect.
What’s the best gluten-free flour to use?
A high-quality 1-to-1 gluten-free flour blend (like Bob’s Red Mill) works best. Avoid single gluten-free flours like almond or coconut, as they can alter the texture.
Can I make these cupcakes ahead of time?
Absolutely! For optimal convenience, consider preparing the cupcakes one day ahead of time. Once they have cooled completely, transfer them into a well-sealed, airtight container to maintain their freshness and soft texture. Keep them stored at room temperature in a dry area, ensuring they remain moist and flavorful until ready to serve. Frost just before serving for the freshest taste.
How do I store leftovers?
Keep frosted cupcakes in the fridge for up to 3 days. If unfrosted, store them at room temperature for 1-2 days in an airtight container.
Can I freeze these cupcakes?
Yes! Store plain cupcakes without frosting in an airtight box in the freezer, and they’ll keep well for around two months. Thaw at room temperature, then frost before serving.
Why add coffee to the batter?
Adding a bit of coffee brings out the richness of the chocolate, but you won’t actually taste the coffee in the cupcakes. It’s a simple trick for richer red velvet cupcakes!