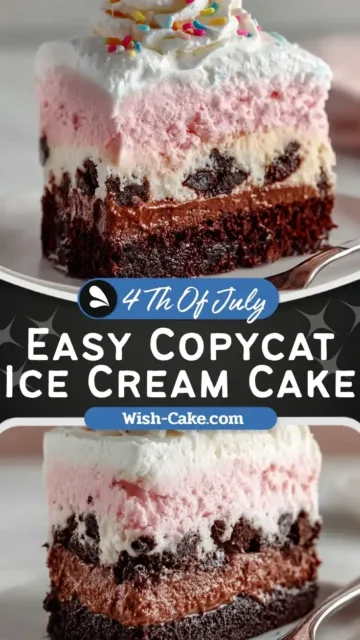


Copycat Dairy Queen Ice Cream Cake is the ultimate frozen dessert for anyone who loves creamy layers, crunchy textures, and rich chocolate flavor. This homemade version recreates that iconic combination of chocolate and strawberry ice cream, a fudgy center, and a cookie crunch layer. It is surprisingly simple to prepare with basic ingredients and a little patience while freezing. Whether you want a crowd-pleasing dessert or a fun baking project, this Copycat Dairy Queen Ice Cream Cake delivers bakery-style results right at home with customizable flavors and textures.
Benefits
Making a Copycat Dairy Queen Ice Cream Cake at home gives you full control over ingredients, flavors, and sweetness levels. You can choose high-quality ice cream, adjust sugar content, and even experiment with different cookie bases. This dessert provides a satisfying mix of carbohydrates and fats, offering quick energy and a rich, indulgent taste.
For some people, this cake can be a fun way to include calcium from dairy-based ice cream and cream. It also offers a creative kitchen activity, especially when assembling layers and decorating. However, for individuals watching sugar intake or managing lactose sensitivity, moderation is key. You can adapt the recipe using lactose-free ice cream or reduced-sugar options without compromising too much on flavor.
Another advantage is versatility. You can easily switch flavors like vanilla, cookies and cream, or even fruit-based ice creams. This makes the Copycat Dairy Queen Ice Cream Cake suitable for different preferences while still keeping its signature layered structure.
Ingredients List
Cake Layers
- 10 Oreo cookies, about 110 grams, crushed into crumbs
- 2 tablespoons unsalted butter, melted, about 28 grams
- 1.5 quarts chocolate ice cream, softened, about 1.42 liters
- 1 cup hot fudge sauce, about 227 grams, divided
- 1.5 quarts strawberry ice cream, softened, about 1.42 liters
Topping
- 2 cups heavy cream, cold, about 480 ml
- 1/3 cup confectioners sugar, about 40 grams
- 1.5 teaspoons Watkins Clear Vanilla Flavor or Simply Organic Vanilla Flavor
Optional Garnish
- 2 to 4 tablespoons colorful sprinkles
Equipment
Essential Tools
- Food processor or blender
- 9×3 inch or 10×3 inch springform pan
- Plastic wrap or foil
- Mixing bowls
- Electric mixer, handheld or stand
Optional Tools
- Piping bag with decorative tip
- Offset spatula for smoothing
- Cake stand or cutting board
Step by Step
Preparing the Cookie Crunch Layer
Start by placing Oreo cookies into a food processor. Pulse until you get a coarse crumb texture with some small chunks for added crunch. Transfer the crumbs to a bowl and mix with melted butter until evenly coated. This creates a rich and slightly crunchy base layer that mimics the classic cake center. Set this mixture aside while preparing the ice cream layers.
Building the First Ice Cream Layer
Line your springform pan with plastic wrap, making sure there is enough overhang to lift the cake later. Take the chocolate ice cream out of the freezer and let it soften for about 10 minutes. Once spreadable, scoop it into the pan and press it down evenly using the back of a spoon. Smooth the surface as much as possible to create a stable base. Place the pan in the freezer for 30 minutes to firm up.
Adding Fudge and Crunch
Warm the hot fudge sauce slightly until it becomes easy to spread. Remove the pan from the freezer and pour half of the fudge over the chocolate layer. Spread it evenly, then sprinkle the Oreo butter mixture on top. Press it gently so it sticks to the fudge layer. Return the pan to the freezer for another 30 minutes to set the structure.
Final Ice Cream Layer and Freezing
While the cake chills, let the strawberry ice cream soften for about 10 minutes. Remove the pan again and drizzle the remaining hot fudge over the cookie layer. Add the strawberry ice cream on top and spread it evenly. Cover the pan with plastic wrap or foil and freeze for at least 12 hours to ensure all layers are firm and stable.
Preparing the Whipped Topping
In a mixing bowl, combine cold heavy cream, confectioners sugar, and vanilla flavor. Beat on medium-high speed until stiff peaks form. This usually takes about 4 minutes. The whipped cream should hold its shape and be smooth and fluffy.
Assembling and Decorating
Remove the cake from the freezer and carefully lift it out using the plastic wrap. Peel off the wrap and place the cake on a chilled plate or board. Spread whipped cream evenly over the top and sides. Use a piping bag if you want decorative edges. Add sprinkles for a colorful finish. Slice with a sharp knife dipped in warm water for clean cuts.
Storage
Proper storage is essential to maintain the texture and flavor of your Copycat Dairy Queen Ice Cream Cake. Always keep the cake tightly covered with plastic wrap or in an airtight container to prevent freezer burn. This helps preserve the creamy consistency and prevents ice crystals from forming on the surface.
You can store the cake in the freezer for up to 3 days for best quality. Beyond that, the texture may become harder and slightly icy. If you need to prepare it ahead, assembling the cake up to 48 hours in advance works well. Keep the whipped topping separate if you want a fresher finish before serving.
When ready to serve, allow the cake to sit at room temperature for 5 to 10 minutes. This softens the layers slightly, making slicing easier and improving the overall mouthfeel. Avoid leaving it out too long, as it can melt quickly and lose its shape.
Variations and Substitutions
You can customize this Copycat Dairy Queen Ice Cream Cake in many ways. Swap chocolate and strawberry ice cream with flavors like vanilla, cookies and cream, or mint chocolate chip. Each variation creates a new flavor profile while keeping the same layered structure.
For the cookie layer, try graham crackers, chocolate chip cookies, or Biscoff biscuits instead of Oreos. Each option adds a unique texture and taste. You can also use caramel sauce instead of hot fudge for a sweeter twist.
If you prefer a lighter version, choose reduced-fat ice cream and whipped topping alternatives. Dairy-free ice cream can also be used for those avoiding lactose, making this dessert more inclusive without sacrificing enjoyment.
Tips and Tricks
To achieve the perfect Copycat Dairy Queen Ice Cream Cake, timing and temperature are crucial. Always allow ice cream to soften slightly before spreading. This ensures smooth layers without tearing or uneven surfaces.
Use a springform pan for easy removal. The removable sides help maintain the cake’s structure when unmolding. Lining the pan with plastic wrap is essential for lifting the cake without sticking.
When layering, work quickly to prevent melting. Return the cake to the freezer between each step to keep layers firm. This creates clean, defined sections that look professional when sliced.
For the whipped topping, ensure the cream is very cold before whipping. This helps achieve stiff peaks faster and gives a stable frosting. If decorating, chill the cake again after applying whipped cream to set everything in place.
Notes
This Copycat Dairy Queen Ice Cream Cake works best when prepared with patience. Freezing times are essential for maintaining structure, so avoid rushing the process. Each layer needs enough time to firm up before adding the next.
If you do not have a springform pan, a lined baking dish works as an alternative. Just ensure there is enough plastic wrap overhang to lift the cake easily. Adjust ice cream quantities depending on the pan size to maintain balanced layers.
The hot fudge layer is key to achieving the signature texture. Make sure it is spreadable but not too hot, as excessive heat can melt the ice cream layers. A slightly warm consistency works best.
Serving Suggestions
Serve this Copycat Dairy Queen Ice Cream Cake slightly softened for the best texture. Pair it with fresh berries or a drizzle of extra fudge sauce for added flavor. It also works well with a cup of coffee or milk to balance the sweetness.
Conclusion
Copycat Dairy Queen Ice Cream Cake is a fun and rewarding dessert that brings together creamy ice cream, rich fudge, and a crunchy cookie layer. With simple ingredients and step-by-step preparation, you can recreate a bakery-style frozen treat at home. This recipe allows for endless customization, making it perfect for different tastes and preferences. Once you try it, this homemade version may become your go-to dessert for any special moment.
FAQs
Can I make Copycat Dairy Queen Ice Cream Cake ahead of time
Yes, you can prepare it up to 48 hours in advance and keep it frozen until ready to serve.
What is the best way to cut the cake
Use a sharp knife dipped in warm water and wipe it clean between slices for neat cuts.
Can I use different ice cream flavors
Absolutely, you can mix and match flavors like vanilla, caramel, or cookies and cream.
How do I prevent the cake from melting too quickly
Keep it in the freezer until just before serving and work quickly when slicing.
Can I make it without a springform pan
Yes, use a lined baking dish and lift the cake out using plastic wrap for easy removal.
PrintCopycat Dairy Queen Ice Cream Cake Irresistible Treat
- Total Time: 14 hours
- Yield: 10 to 12 servings
- Diet: Vegetarian
Description
This Copycat Dairy Queen Ice Cream Cake is a creamy layered dessert made with rich chocolate ice cream, strawberry ice cream, a crunchy cookie center, and smooth hot fudge. Finished with a light whipped topping, this homemade version delivers the same indulgent flavor and texture as the classic favorite.
Ingredients
10 Oreo cookies, about 1 cup crumbs (110 g)
2 tablespoons unsalted butter, melted (28 g)
1.5 quarts chocolate ice cream, softened (about 6 cups or 1.42 L)
1 cup hot fudge sauce, divided (8 oz or 227 g)
1.5 quarts strawberry ice cream, softened (about 6 cups or 1.42 L)
2 cups heavy cream, cold (480 ml)
1/3 cup confectioners sugar (40 g)
1.5 teaspoons Watkins Clear Vanilla Flavor or Simply Organic Vanilla Flavor
2 to 4 tablespoons sprinkles, optional
Instructions
• Crush Oreo cookies into coarse crumbs using a food processor, then mix with melted butter until evenly coated
• Line a 9×3 inch or 10×3 inch springform pan with plastic wrap, leaving extra overhang for easy removal
• Spread softened chocolate ice cream evenly into the pan and freeze for about 30 minutes until firm
• Warm the hot fudge sauce slightly and spread half of it over the chocolate ice cream layer
• Sprinkle the Oreo crumb mixture evenly over the fudge layer and press gently, then freeze again for 30 minutes
• Drizzle the remaining hot fudge over the cookie layer
• Spread softened strawberry ice cream evenly on top, cover, and freeze for at least 12 hours
• Whip heavy cream, confectioners sugar, and vanilla flavor until stiff peaks form
• Remove cake from pan, place on a chilled plate, and frost with whipped cream on top and sides
• Decorate with sprinkles if desired, slice using a warm knife, and serve immediately
Notes
Freeze each layer properly before adding the next to maintain clean layers
Use very cold heavy cream to achieve stable whipped topping
Allow cake to sit at room temperature for 5 to 10 minutes before slicing for easier cuts
Store leftovers tightly covered in the freezer for up to 3 days
You can substitute different ice cream flavors or cookies for variety
- Prep Time: 2 hours
- Cook Time: 0 minutes
- Category: Dessert
- Method: No Bake
- Cuisine: American