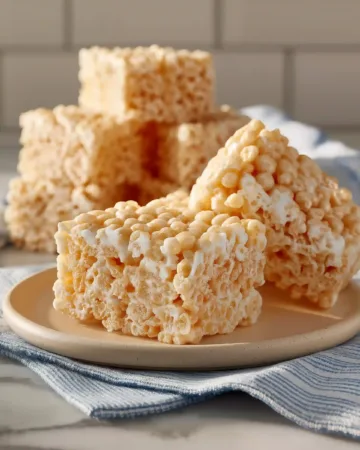


Marshmallow Rice Krispie Treats are one of the most iconic no bake desserts in American kitchens. They are quick, budget friendly, and loved by both kids and adults. Whether you are looking for an easy dessert, a lunchbox snack, or a crowd pleasing sweet, Marshmallow Rice Krispie Treats always deliver.
With just a few pantry staples and minimal prep time, you can create soft, chewy squares with the perfect balance of buttery richness and gooey marshmallow flavor. This article walks you through everything you need to know, from step by step preparation to tips, notes, and storage, so your Marshmallow Rice Krispie Treats turn out perfect every single time.
Step by step method for perfect Marshmallow Rice Krispie Treats
Ingredients you will need
To make classic Marshmallow Rice Krispie Treats, gather the following simple ingredients. Use gelatin free marshmallows made with agar agar or plant based alternatives to keep the recipe suitable for a wide audience in the USA.
¼ cup butter
4 cups miniature gelatin free marshmallows made with agar agar
5 cups crispy rice cereal
These ingredients create the classic flavor and texture everyone expects from Marshmallow Rice Krispie Treats, with no unnecessary additives.
Preparing the base mixture
Start by choosing a large saucepan with a heavy bottom. Place it over low heat and add the butter. Allow the butter to melt slowly, stirring occasionally so it does not brown. Low heat is essential here, as overheating can cause the marshmallows to become stiff later.
Once the butter is fully melted and smooth, add the miniature gelatin free marshmallows to the pan. Stir gently but continuously until the marshmallows begin to soften and melt. This process should be slow and controlled. Rushing it can lead to grainy texture.
After the marshmallows are completely melted and combined with the butter, continue cooking for about two additional minutes while stirring constantly. This extra time helps the mixture become glossy and evenly blended, which is key for smooth Marshmallow Rice Krispie Treats.
Remove the saucepan from the heat as soon as the mixture is fully melted. Overcooking at this stage can cause the treats to harden once cooled.
Mixing in the cereal
With the saucepan off the heat, immediately add the crispy rice cereal. Use a sturdy spatula or wooden spoon to gently fold the cereal into the marshmallow mixture. Make sure every piece of cereal is coated evenly.
Work efficiently but gently. Crushing the cereal too much will affect the final texture. The goal is to maintain the light crispness while ensuring even distribution throughout the marshmallow base.
Once mixed, the combination should look sticky, glossy, and well balanced, with no dry cereal spots remaining.
Shaping and setting the treats
Prepare a 9 by 13 inch pan by lightly buttering the bottom and sides. This prevents sticking and makes cutting easier later.
Transfer the mixture into the prepared pan. Using a buttered spatula or a piece of waxed paper, press the mixture evenly into the pan. Apply gentle pressure rather than force. Pressing too hard can make Marshmallow Rice Krispie Treats dense instead of soft and chewy.
Make sure the surface is even, reaching all corners of the pan. Allow the treats to cool at room temperature until fully set. This usually takes about 30 minutes.
Once cooled, cut into 2 inch squares using a sharp knife. Clean the knife between cuts for neat edges.
Tips and tricks for better Marshmallow Rice Krispie Treats
Achieving the perfect texture
One of the most important tips for Marshmallow Rice Krispie Treats is heat control. Always melt butter and marshmallows over low heat. High heat causes the sugars to overcook, resulting in hard treats.
Using fresh marshmallows also makes a noticeable difference. Older marshmallows tend to dry out, which affects how smoothly they melt and how soft the final treats feel.
Enhancing flavor naturally
For richer flavor, consider browning the butter slightly before adding the marshmallows. Do this carefully and remove from heat as soon as the butter turns golden and smells nutty. This adds depth without changing the classic profile.
You can also mix in a small pinch of salt to balance the sweetness. This enhances the overall taste without making the treats savory.
Easy variations for creativity
Marshmallow Rice Krispie Treats are incredibly versatile. You can fold in chocolate chips after the mixture cools slightly, or swirl in peanut butter for a creamy twist.
Another option is to top the pressed mixture with melted chocolate and let it set before cutting. This creates a simple layered dessert that still feels familiar.
Keep additions minimal so the classic texture remains the star of the recipe.
Notes for consistent results every time
Ingredient quality matters
Choosing high quality crispy rice cereal ensures consistent crunch and flavor. Store brand cereals work well as long as they are fresh and crisp.
Butter should be real butter rather than margarine for best flavor and structure. Unsalted butter allows better control over seasoning.
Timing and handling
Work quickly once the marshmallows are melted. The mixture begins to set fast as it cools, so have your pan prepared in advance.
Avoid refrigerating the mixture before shaping. Cooling too early makes it difficult to spread evenly.
Nutrition awareness
Marshmallow Rice Krispie Treats are meant to be enjoyed in moderation. Each square is relatively low in calories, making them a lighter dessert option compared to baked goods.
They provide quick energy from carbohydrates and small amounts of fat from butter. While not a health food, they fit well into balanced eating when enjoyed occasionally.
Storage and freshness tips
Short term storage
Store Marshmallow Rice Krispie Treats in an airtight container at room temperature for up to two days. Keep them away from direct sunlight and heat, which can cause melting or drying.
Layer the treats with parchment or waxed paper to prevent sticking.
Refrigeration guidelines
If you need longer storage, place the airtight container in the refrigerator. They will stay fresh for up to five days. Allow them to come to room temperature before serving for the best texture.
Cold treats can feel firmer, so resting them briefly helps restore their chewiness.
Freezing considerations
While freezing is possible, it is not ideal. Freezing can alter the texture of Marshmallow Rice Krispie Treats, making them slightly crumbly once thawed.
If freezing is necessary, wrap individual squares tightly in plastic wrap and store in a freezer safe container. Thaw at room temperature before serving.
Conclusion
Marshmallow Rice Krispie Treats remain a timeless favorite because they are simple, fast, and endlessly satisfying. With just butter, gelatin free marshmallows, and crispy rice cereal, you can create a dessert that feels nostalgic yet always welcome. By following the step by step method, using gentle heat, and applying the tips shared above, your Marshmallow Rice Krispie Treats will turn out soft, chewy, and perfectly balanced every time. Whether you keep them classic or add your own twist, this recipe is one you will come back to again and again.
Print
Marshmallow Rice Krispie Treats
- Total Time: 15 minutes
- Yield: 24 squares
- Diet: Vegetarian
Description
These Marshmallow Rice Krispie Treats are soft, chewy, and perfectly balanced with buttery richness and gooey marshmallows. This easy no bake dessert comes together quickly with simple pantry staples and delivers classic flavor and irresistible texture that everyone loves. Ideal for everyday snacking or sharing, this recipe focuses on smooth melting, even coating, and dependable results every time.
Ingredients
Butter
Miniature gelatin free marshmallows made with agar agar
Crispy rice cereal
Instructions
Melt the butter slowly in a large saucepan over low heat until fully smooth
Add the miniature marshmallows and stir continuously until they melt completely and blend with the butter
Continue stirring gently until the mixture becomes glossy and evenly combined then remove from heat
Add the crispy rice cereal and fold gently until all pieces are evenly coated
Transfer the mixture into a lightly buttered rectangular pan
Press the mixture evenly using a buttered spatula or waxed paper without compacting too firmly
Allow the mixture to cool at room temperature until set
Slice into evenly sized squares and serve
Notes
Use low heat throughout the melting process to keep the treats soft and chewy
Fresh marshmallows melt more smoothly and improve texture
Lightly butter tools and hands to prevent sticking
Avoid pressing the mixture too firmly to maintain a light bite
Allow treats to fully cool before cutting for clean edges
- Prep Time: 10 minutes
- Cook Time: 5 minutes
- Category: Dessert
- Method: No Bake
- Cuisine: American